BitRaser Mobile Eraser & Diagnostics
- 1. About BitRaser Mobile Eraser & Diagnostics
- 2. About the Guide
 3. Getting Started
 4. Working with BitRaser Mobile Eraser & Diagnostics
- 5. Frequently Asked Questions (FAQ)
- 6. About Stellar

BitRaser Mobile Eraser & Diagnostics / 4. Working with BitRaser Mobile Eraser & Diagnostics / 4.2. Erasure Stages / 4.2.1. Erasure Process / 4.2.1.1. Erasure Process for Android Devices
4.2.1.1. Erasure Process for Android Devices
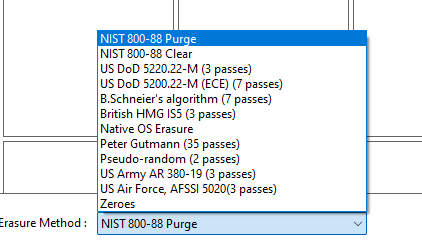
You can securely erase data from your Android device by using the erasure feature of BitRaser Mobile Eraser & Diagnostics. You can choose an erasure method from a list of 11 data erasure methods for erasing your data. The software lists all of your connected devices. It allows you to perform erasure on multiple devices at once.
Steps To erase data using BitRaser Mobile Eraser & Diagnostics:
1. Run BitRaser Mobile Eraser & Diagnostics. Plug the Android device into the computer.
2. The Devices tab (which is selected by default) lists all the attached devices. The screen which appears is displayed below:
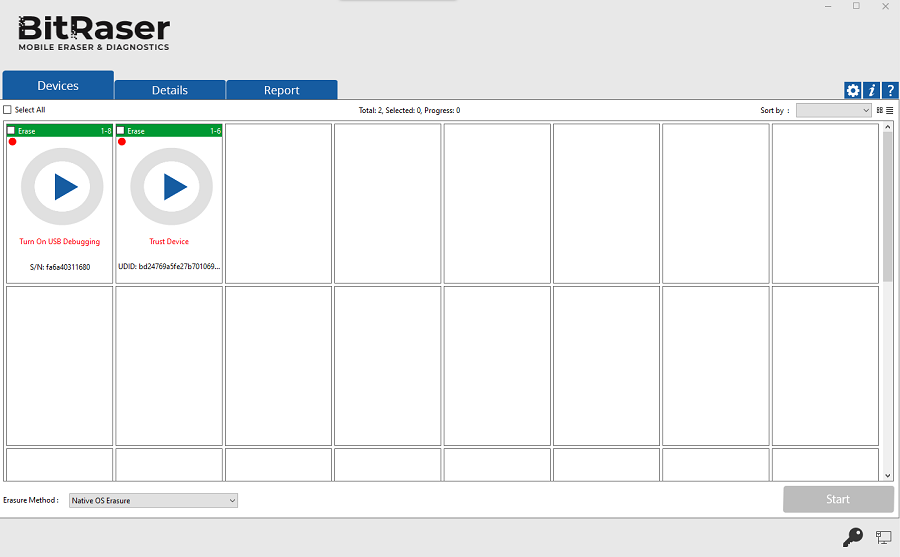
Note: You need to make sure that your connected device's driver is updated, or else it will not be listed. Please refer to the section 'Update the Driver of an Android Device' to learn more.
3. Your Android device appears with the message 'Turn On USB Debugging' once it is connected. To continue from this stage, USB Debugging must be allowed from your Android device.
Note: Please refer to the section 'Enable USB Debugging in an Android device' to know how to turn on USB Debugging.
4. All the devices along with their information like process (Erase or Diagnose), USB port name, type, progress bar, status, ECID/IMEI, and serial number are displayed. You can also see icons for connectivity status, SIM card status, and FRP (Find my device) locked/unlocked status.
Note: If you wish to change the process (Erase or Diagnose), click on the Diagnose (header area in orange color) to change the process to Erase (header area in green color) and vice versa.
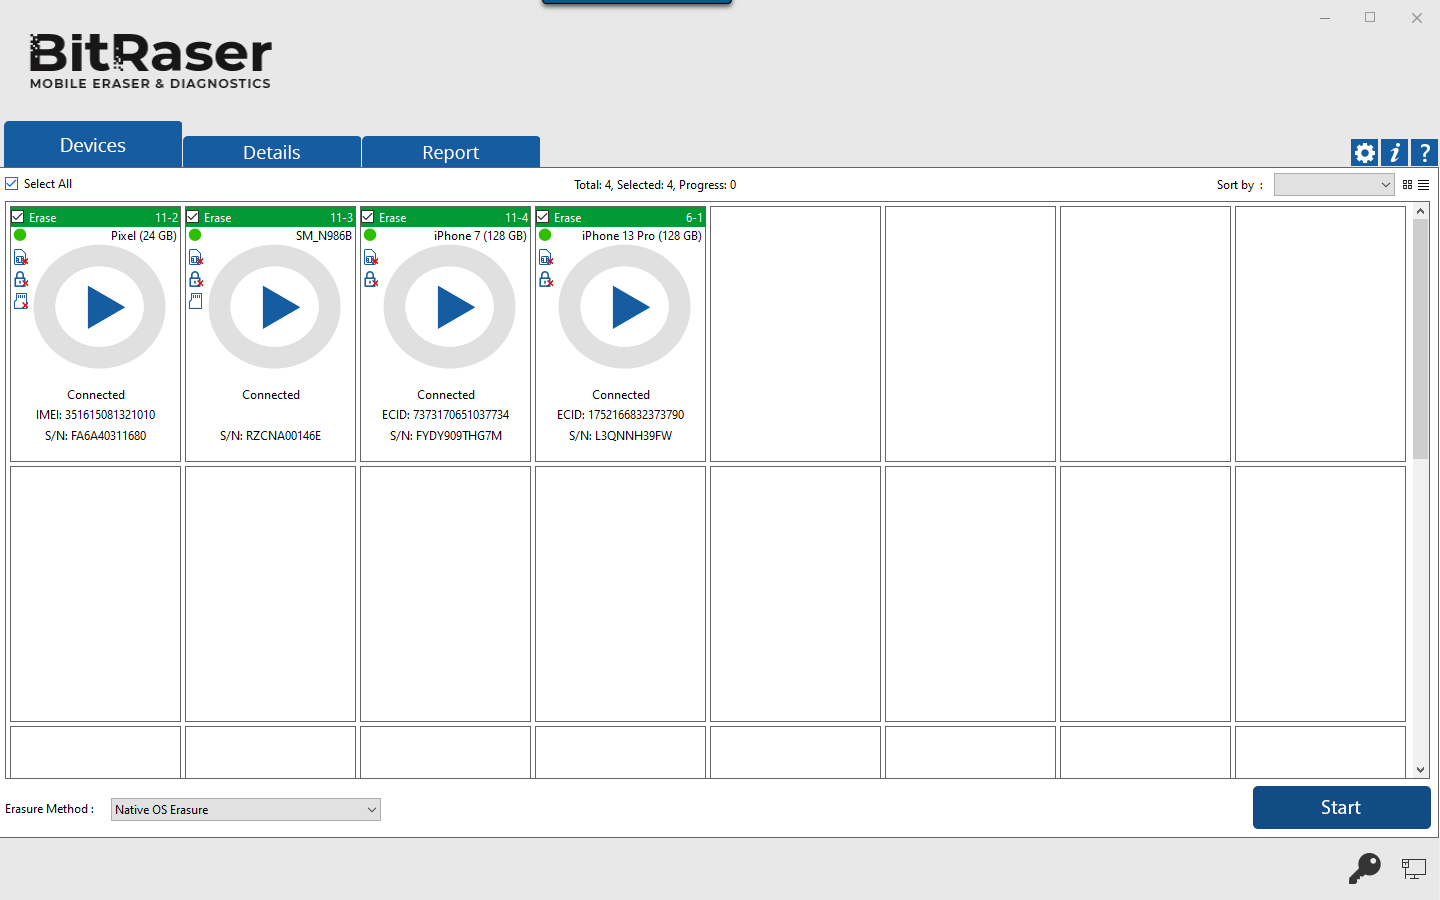
5. Select the device to erase by marking the check-box before every device. Mark Select All option to select every listed device for erasing.
Tip: When you install BitRaser Mobile Eraser & Diagnostics on a device running Android OS, you control which capabilities or information BitRaser Mobile Eraser & Diagnostics can access-known as Permissions. For example, the application might want permission to see your device's contacts or location. You can control which permissions the application can access after it installs on your device.
6. BitRaser Mobile Eraser & Diagnostics prompts the user to allow permissions on the connected Android device. Click Allow on each of the permissions from your Android device to permit access to photos, media, files, and phone calls.
 |
 |
 |
 |
 |
 |
 |
|||
Note: Keep in mind that turning off permissions may cause BitRaser Mobile Eraser & Diagnostics on your device to lose functionality.
Note: For Redmi devices, you need to install a BitRaserAndroidErasure.apk on your phone. See Procedure to install BitRaserAndroidErasure.apk on Redmi Phone.
7. You can preview the device's information either in Grid view  or List view
  .
.
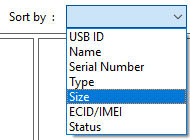
- In the Grid view, the devices get displayed in a grid-like structure, and also the devices can be sort using the Sort By option. The Sort By option allows sorting the devices based on the following information/criteria: USB ID, Name, Serial Number, Type, Size, ECID/IMEI, and Status.
-
In the List view, the devices get displayed in a list.
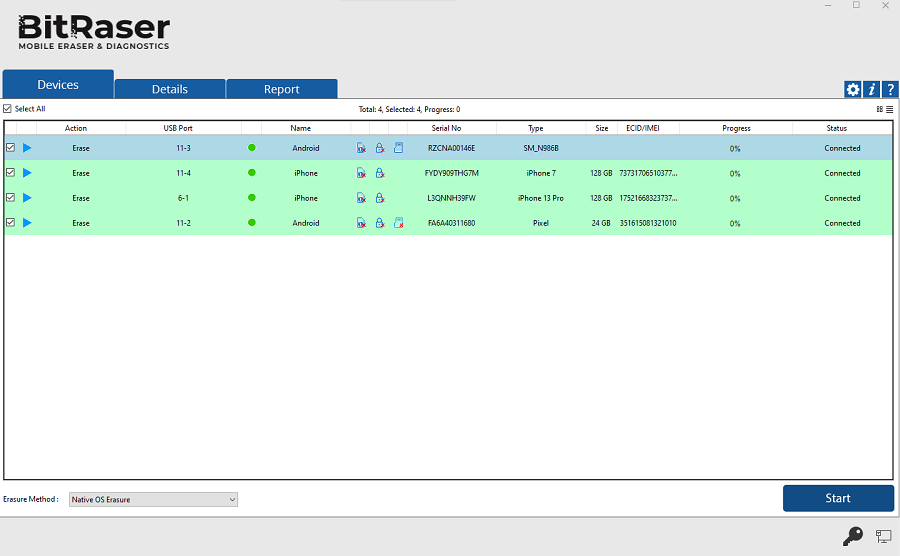
8. Double-clicking on any of the displayed devices will show the device information of the corresponding device. These details can be printed by clicking on the Print Label button.
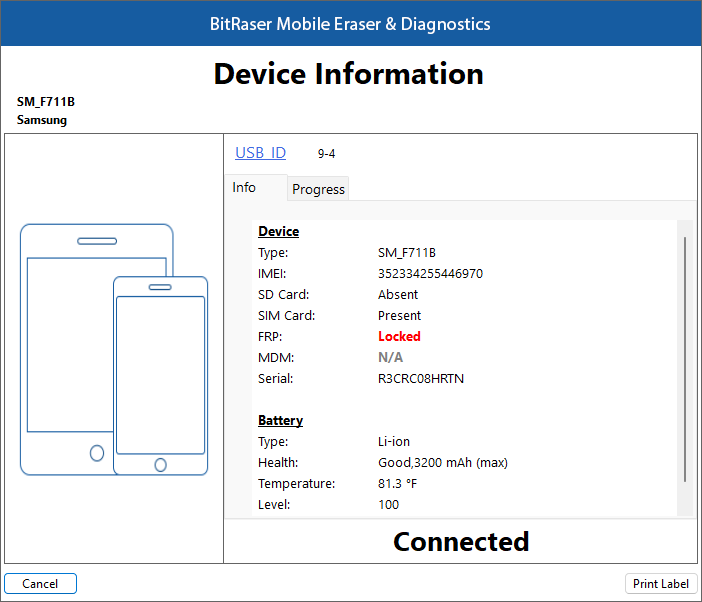
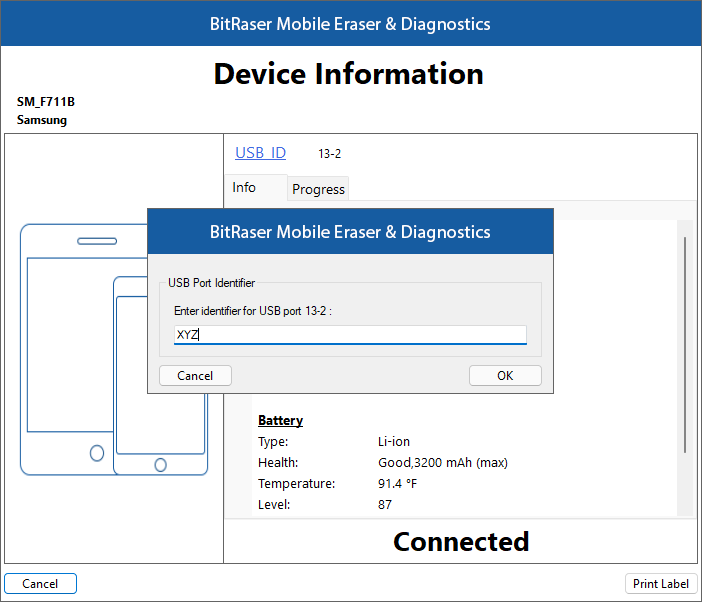
9. From the dialog that appears, click on USB ID to change the identifier for the USB port. Click OK.
10. Select any one of the 11 erasure methods from the bottom of the screen by clicking on the drop-down menu.
11. Click Start to begin the erasing process.
Note: If you wish to erase a single device, you can start the process by simply clicking the play button in the middle.
12. A warning message appears asking to proceed to the erasure process. Click Proceed.

Note: If you do not wish to see the warning message the next time you erase a device, select the Don't show again check-box.
Note: At this stage, BitRaser Mobile Eraser & Diagnostics acquires license information from BitRaser Cloud, and licenses are consumed depending upon the number of devices you have selected for erasure. Therefore, you need an active internet connection to start the erasing process.
Procedure to Install BitRaserAndroidErasure.apk on Redmi Devices:
| 1. Open File Manager on your Redmi phone | 2. Locate and open Bitraser folder | 3. Select and open BitRaserAndroidErasure.apk | |||
 |
 |
 |
 |
 |
 |
| 4. Click Install to begin the installation process | 5. Wait while the device installs the .apk file | 6. BitRaserMobileErasure is installed successfully | |||
 |
 |
|
 |
 |
