BitRaser Mobile Eraser & Diagnostics
- 1. About BitRaser Mobile Eraser & Diagnostics
- 2. About the Guide
 3. Getting Started
 4. Working with BitRaser Mobile Eraser & Diagnostics
- 5. Frequently Asked Questions (FAQ)
- 6. About Stellar

BitRaser Mobile Eraser & Diagnostics / 4. Working with BitRaser Mobile Eraser & Diagnostics / 4.2. Erasure Stages / 4.2.1. Erasure Process / 4.2.1.3. Erasure Process for Apple Watches
4.2.1.3. Erasure Process for Apple Watches
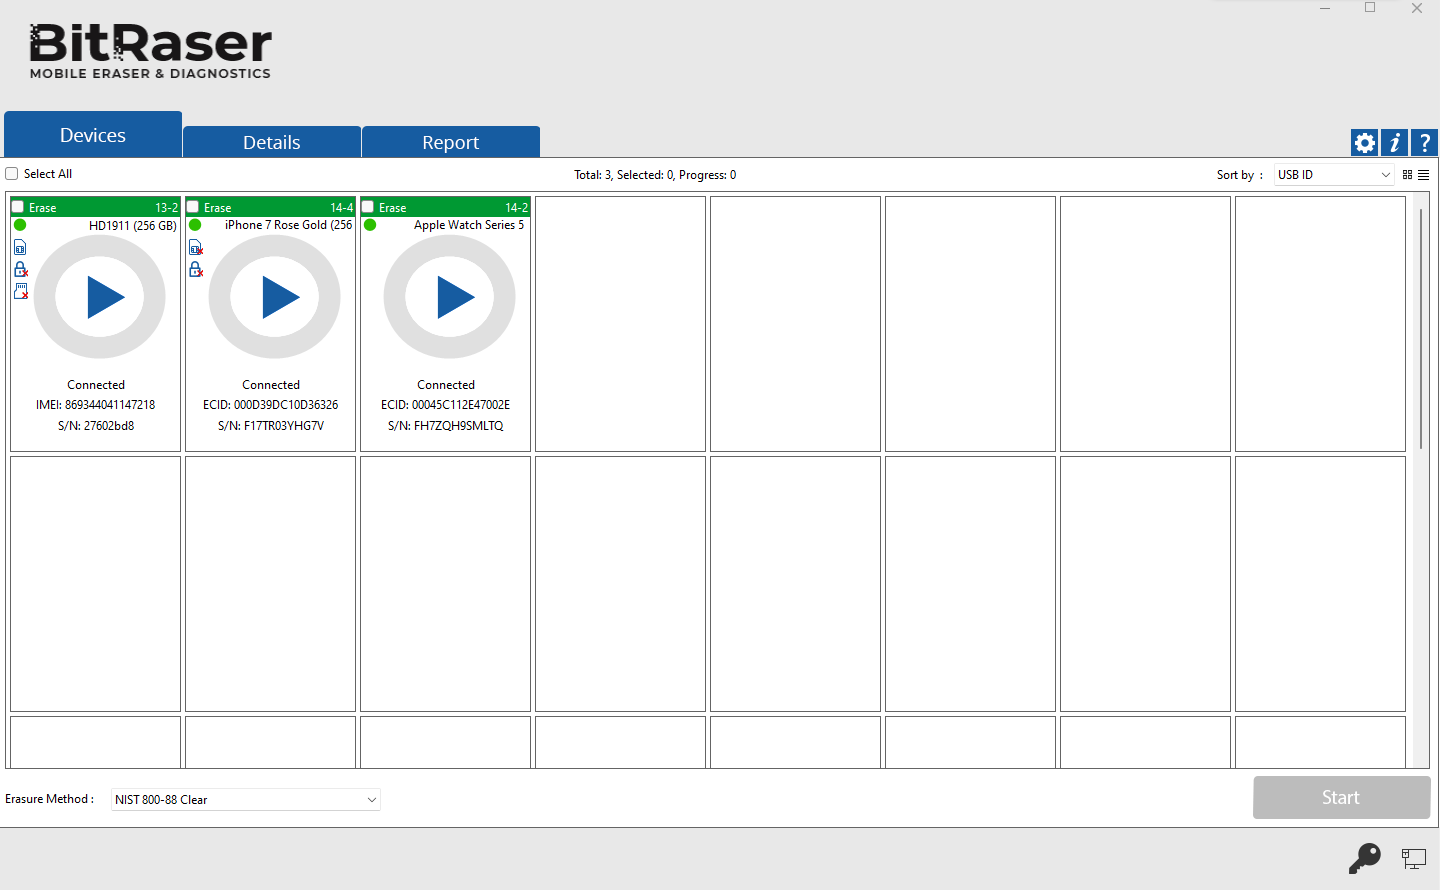
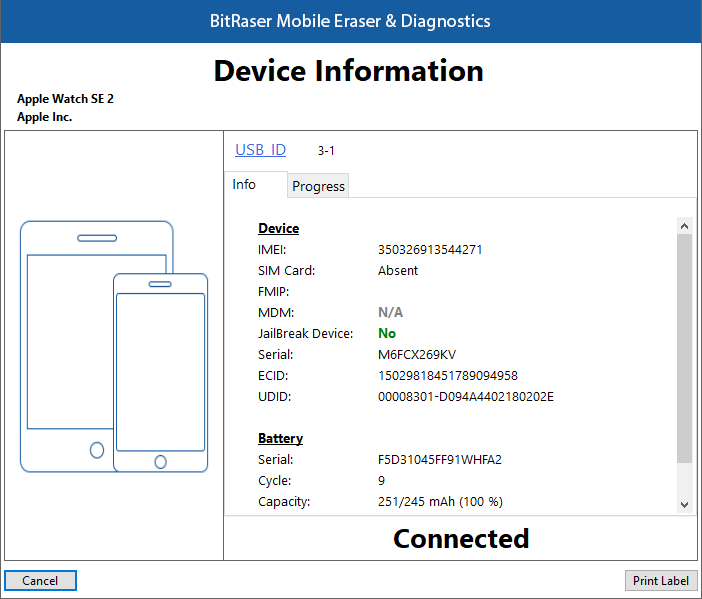
BitRaser Mobile Eraser & Diagnostics is efficiently capable of not only erasing data from iPhones, iPads, and Android devices but also from Apple Watches. It supports data erasure from Apple Watch Series 1, 2, 3, 4, 5 and Series SE. Your Apple Watch should have a minimum of 10% battery backup for successful data erasure. BitRaser Mobile Eraser & Diagnostics allows you to see your connected Apple Watch's information like process (Erase), USB port name, type, progress bar, status, ECID/IMEI, and serial number. You can also see icons for connectivity status, SIM card status, and FMIP locked or unlocked status. You can preview this information either in Grid view or List view. The software allows you to securely erase data from both activated and non-activated Apple Watches.
Steps to erase data when the Apple Watch is activated:
1. Run BitRaser Mobile Eraser & Diagnostics.
2. Detach the bands from the Apple Watch.
3. Remove the cap shielding the pin on the Apple Watch using a small pin or similar tool.
4. Connect your Apple Watch to the iBUS adapter, ensuring that the iBUS text is positioned towards the front of the Apple Watch's display, then plug the adapter into the computer using a USB cable.
Note: If the device item isn't visible in BitRaser, attempt flipping the lightning cable upside down.
Note: You need to pair Apple Watch to iPhone and then perform a manual factory reset from the Apple Watch's menu.
5. The Devices tab (which is selected by default) lists all the attached devices. The screen which appears is displayed below:
6. Your Apple Watch appears with a message 'Trust this Computer'. Click on 'Trust' button to proceed further.
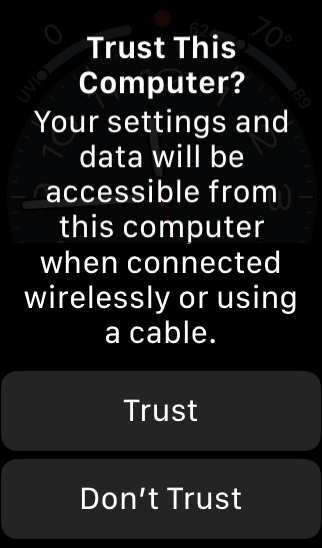
Note: You need to Trust the computer to enable sync and data transfer between your connected Apple Watch and the computer. Keep in mind that clicking on 'Don't Trust' instead of 'Trust' may cause BitRaser Mobile Eraser & Diagnostics on your device to lose functionality.
7. You can see your connected Apple Watch's information by double-clicking on its icon. These details can be printed by clicking on the Print Label button.
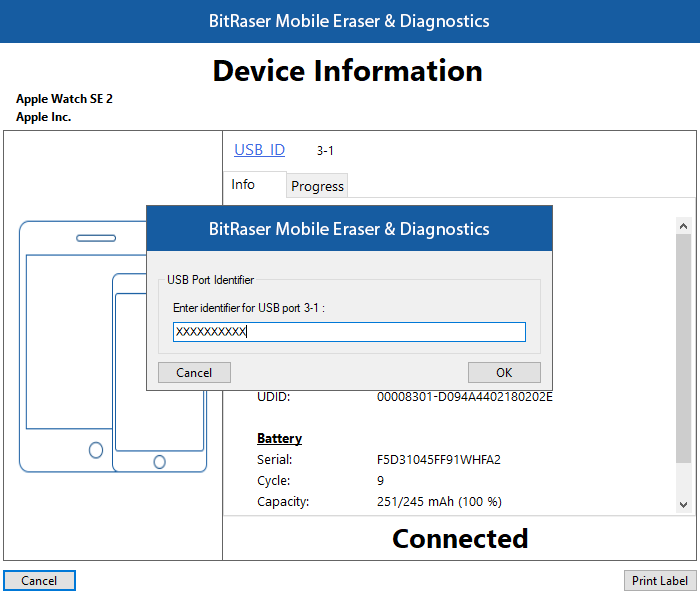
Note: From the dialog box that appears, click on USB ID if you wish to change the identifier of the USB port, and then click OK.
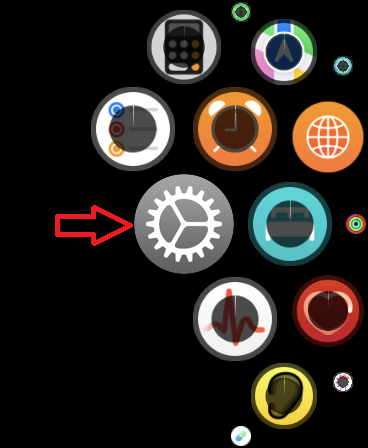
8. Press the Digital Crown of your Apple Watch for two seconds to open the Home Screen.
9. Tap on the ''Settings'' app from your Apple Watch's Home Screen and click on "General" button.
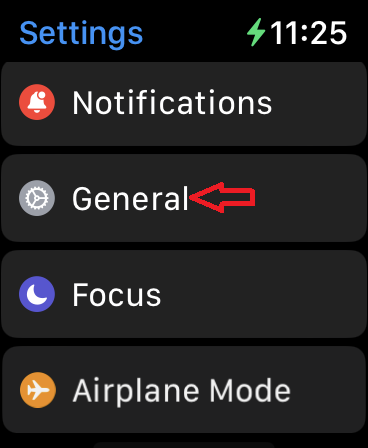
10. Scroll down and tap "Reset".
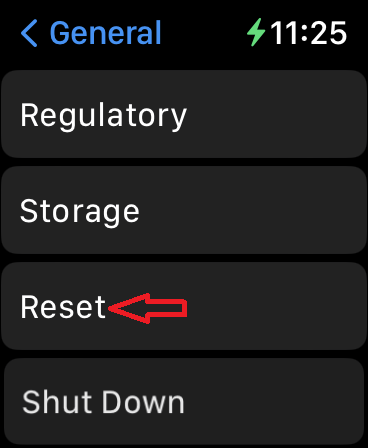
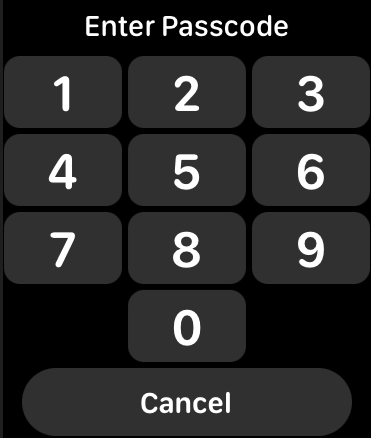
11. Select ''Erase All Content and Settings". It prompts you to enter your Apple Watch's passcode if it is passcode protected.
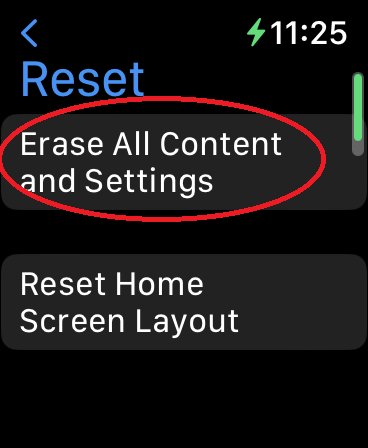
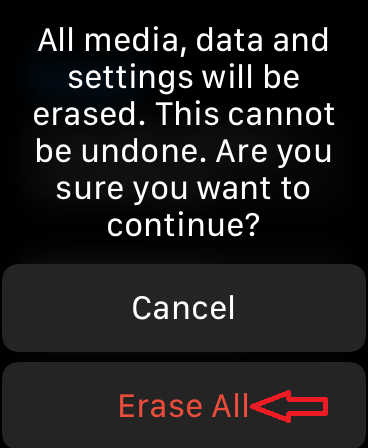
12. A dialog box appears telling you to confirm whether you want to erase your media, data, and settings or not. Tap on "Erase All" to initiate the erasure process.
Note: You will need to first unpair your Apple Watch before erasing if you wish to remove the activation lock.
Steps to erase data when the Apple Watch is not activated:
1. Run BitRaser Mobile Eraser & Diagnostics.
2. Detach the bands from the Apple Watch.
3. Remove the cap shielding the pin on the Apple Watch using a small pin or similar tool.
4. Connect your Apple Watch to the iBUS adapter, ensuring that the iBUS text is positioned towards the front of the Apple Watch's display, then plug the adapter into the computer using a USB cable.
5. The Devices tab (which is selected by default) lists all the attached devices. The screen which appears is displayed below:

6. You can see your non-activated Apple Watch's information by double-clicking on its icon, just like the activated Apple Watch. Click on the Print Label button to print these details.
Note: From the dialog box that appears, click on USB ID if you wish to change the identifier of the USB port, and then click OK.
7. Press and hold the Digital Crown your Apple Watch.
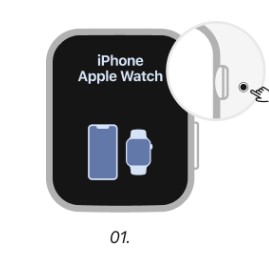
8. A dialog box appears telling you to confirm whether you want to reset your Apple Watch or not. Tap on "Reset" button to begin the erasure process.
