BitRaser Mobile Eraser & Diagnostics
- 1. About BitRaser Mobile Eraser & Diagnostics
- 2. About the Guide
 3. Getting Started
 4. Working with BitRaser Mobile Eraser & Diagnostics
- 5. Frequently Asked Questions (FAQ)
- 6. About Stellar

BitRaser Mobile Eraser & Diagnostics / 4. Working with BitRaser Mobile Eraser & Diagnostics / 4.2. Erasure Stages / 4.2.1. Erasure Process / 4.2.1.2. Erasure Process for iOS Devices
4.2.1.2. Erasure Process for iOS Devices
BitRaser Mobile Eraser & Diagnostics allows you to erase your data from all of your iOS devices like iPhones and iPads. It also supports complete data erasure from Apple Watches. The software provides you a list of 11 data erasure methods for erasing your data. BitRaser Mobile Eraser & Diagnostics lists all of your connected devices and allows you to perform erasure on multiple devices simultaneously.
Steps To erase data using BitRaser Mobile Eraser & Diagnostics:
1. Run BitRaser Mobile Eraser & Diagnostics. Plug the iOS device into the computer.
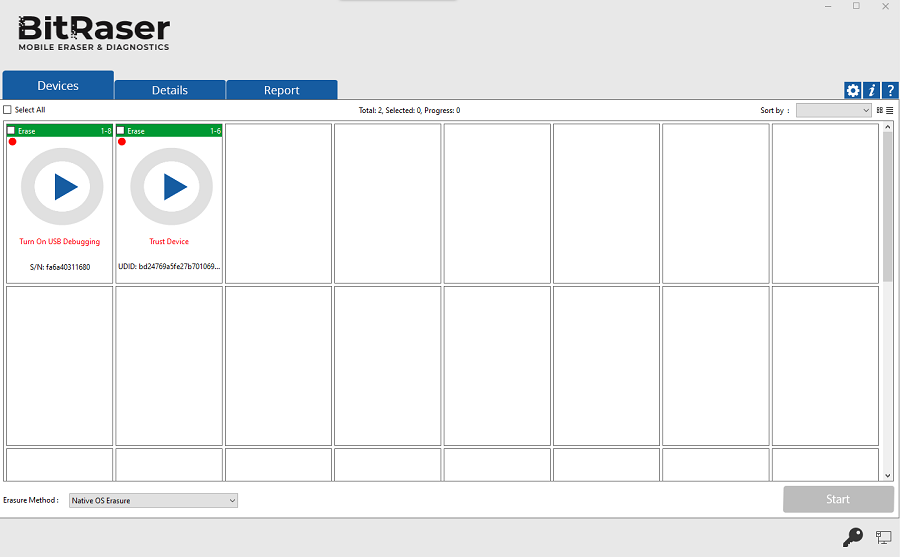
2. The Devices tab (which is selected by default) lists all the attached devices. The screen which appears is displayed below:
3. Your iOS device appears with a message 'Trust this Computer?'. Click on 'Trust' button to proceed further.
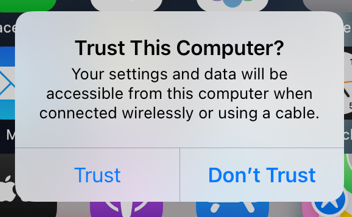
Note: You need to Trust the computer to enable sync and data transfer between your connected iOS device and the computer. Keep in mind that clicking on 'Don't Trust' instead of 'Trust' may cause BitRaser Mobile Eraser & Diagnostics on your device to lose functionality.
4. All the devices along with their information like process (Erase or Diagnose), USB port name, type, progress bar, status, ECID/IMEI, and serial number are displayed. You can also see icons for connectivity status, SIM card status, and FMIP locked/unlocked status.
Note: If you wish to change the process (Erase or Diagnose), click on the Diagnose (header area in orange color) to change the process to Erase (header area in green color) and vice versa.
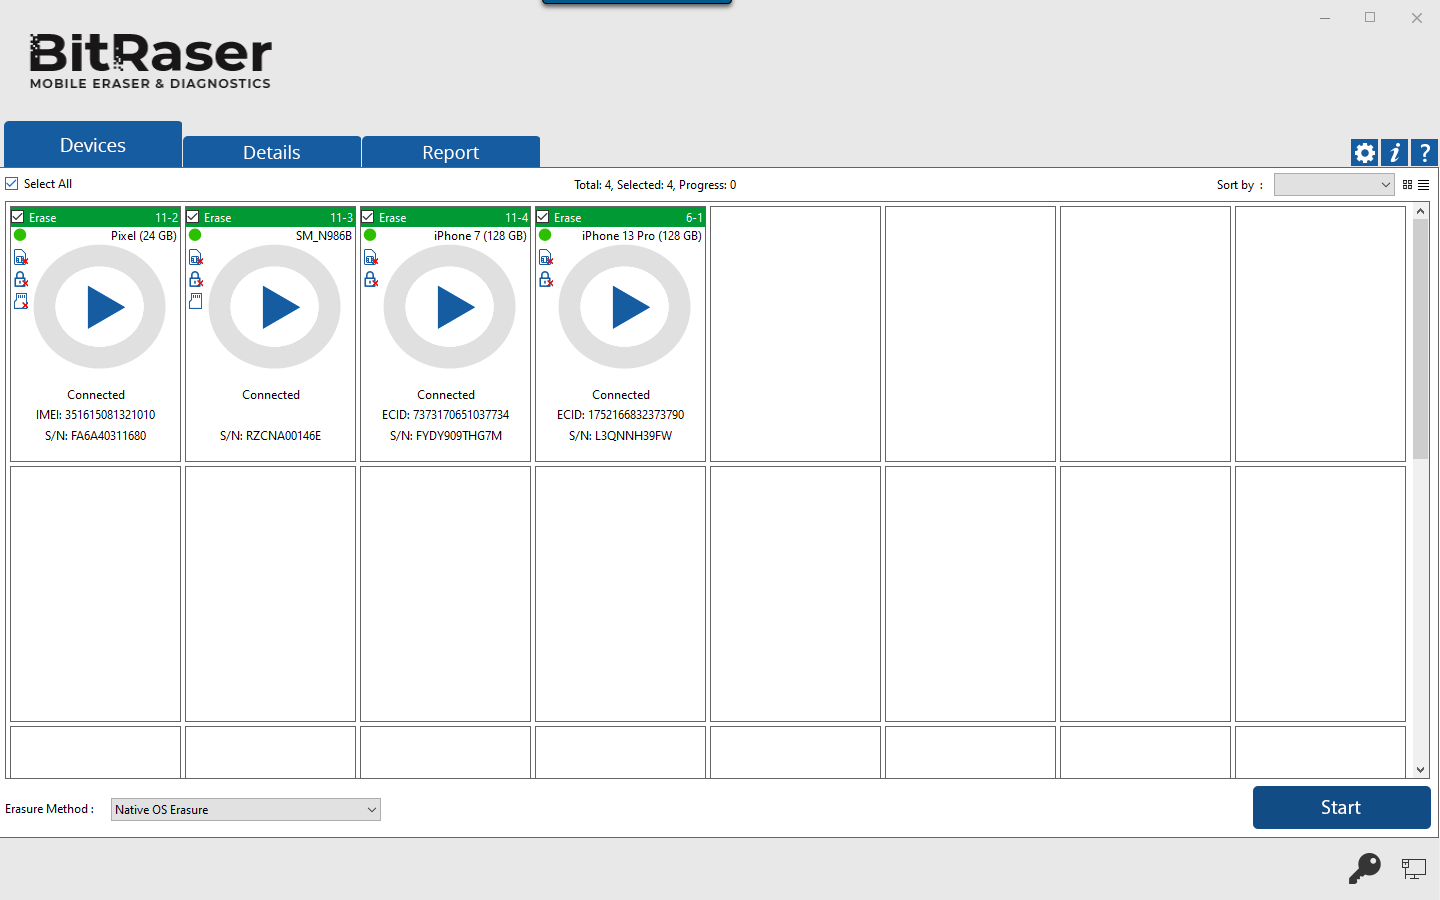
5. Select the device to erase by marking the check-box before every device. You can mark Select All option for selecting every listed device at once.
6. You can preview the device's information either in Grid view  or List view
  .
.
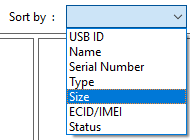
- In the Grid view, the devices get displayed in a grid-like structure, and also the devices can be sort using the Sort By option. The Sort By option allows sorting the devices based on the following information/criteria: USB ID, Name, Serial Number, Type, Size, ECID/IMEI, and Status.
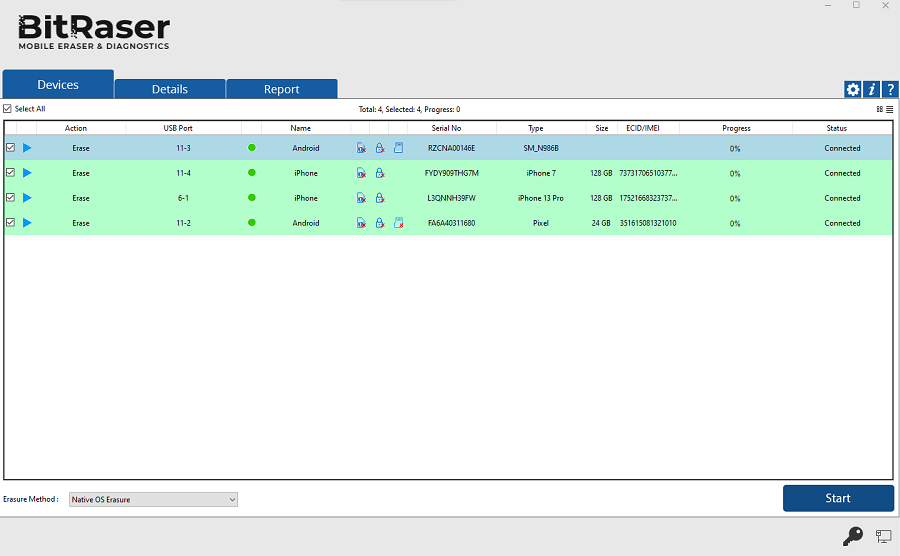
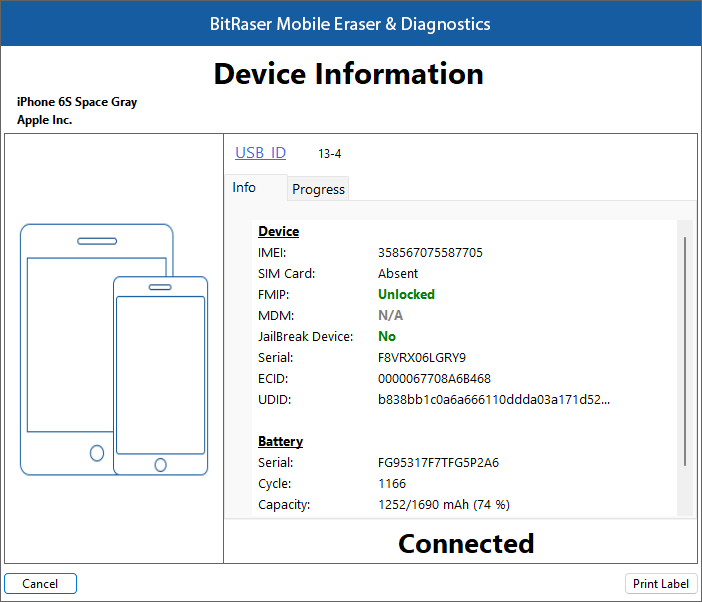
7. Double-clicking on any of the displayed devices will show the device information of the corresponding device. These details can be printed by clicking on the Print Label button.
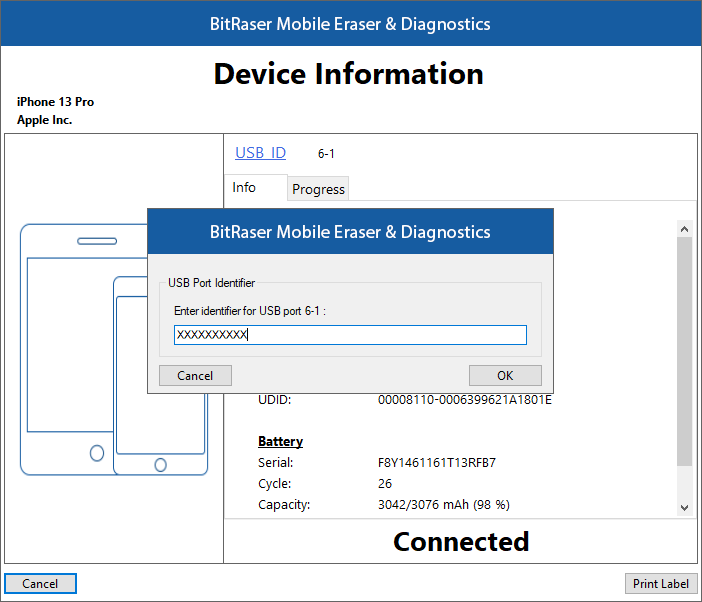
8. From the dialog that appears, click on USB ID to change the identifier for the USB port. Click OK.
9. Select any one of the 11 erasure methods from the bottom of the screen by clicking on the drop-down menu.
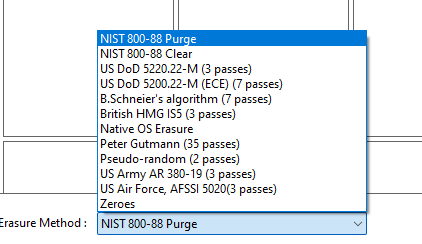
Note: The algorithms shown above are not applicable for Apple Watches. You have to manually erase data from the Apple Watch.
10. Click Start to initiate the erasing process.
Note: If you wish to erase a single device, you can start the process by simply clicking the play button in the middle.
11. A warning message appears asking to proceed to the erasure process. Click Proceed.

Note: If you do not wish to see the warning message the next time you erase a device, select the Don't show again check-box.
Note: At this stage, BitRaser Mobile Eraser & Diagnostics acquires license information from BitRaser Cloud, and licenses are consumed depending upon the number of devices you have selected for erasure. Therefore, you need an active internet connection to start the erasing process.