BitRaser® Mobile Barebone Edition – Diagnosing iOS® Devices
This guide walks you through step-by-step instructions on how to diagnose iOS devices running on iOS versions 9.0 and above like iPhone 13, iPhone 13 Pro, iPhone 13 Pro Max iPhone 13 mini, iPhone 12 Pro, iPhone 12 Pro Max, iPhone 12 mini, iPhone 12, iPhone 11 Pro Max, iPhone 11, Apple iPhone XR, Apple iPhone XS Max etc., and iPad® by using BitRaser Mobile Eraser & Diagnostics software.
STAGE 1 (one-time) 5 MINUTES 
Provides the steps to download the software ISO image file from BitRaser Cloud
STAGE 2 (one-time) 5 MINUTES 
Provides instructions to create a bootable USB for installing the software on PC.
STAGE 3
Instructs on how to install the software, connect host machine to the Internet & acquire licenses.
STAGE 4
Shares the steps to diagnose iOS devices by using BitRaser software installed on the host machine.
These instructions help you get started with diagnosing iOS devices in less than 15 minutes
STAGE 1
Download BitRaser Mobile Diagnostics Tool ISO Image from BitRaser Cloud – [5 Minutes]
- STEP 1 Login to your cloud account using the credentials delivered to your email.
- STEP 2 To download the Barebone Variant of BitRaser Mobile Eraser & Diagnostics go to 'Download BitRaser' in the left panel. Now, navigate to 'BitRaser Mobile Eraser & Diagnostics' tab on the right and click on the 'Barebone Variant: BitRaser Mobile Eraser & Diagnostics ISO' option.
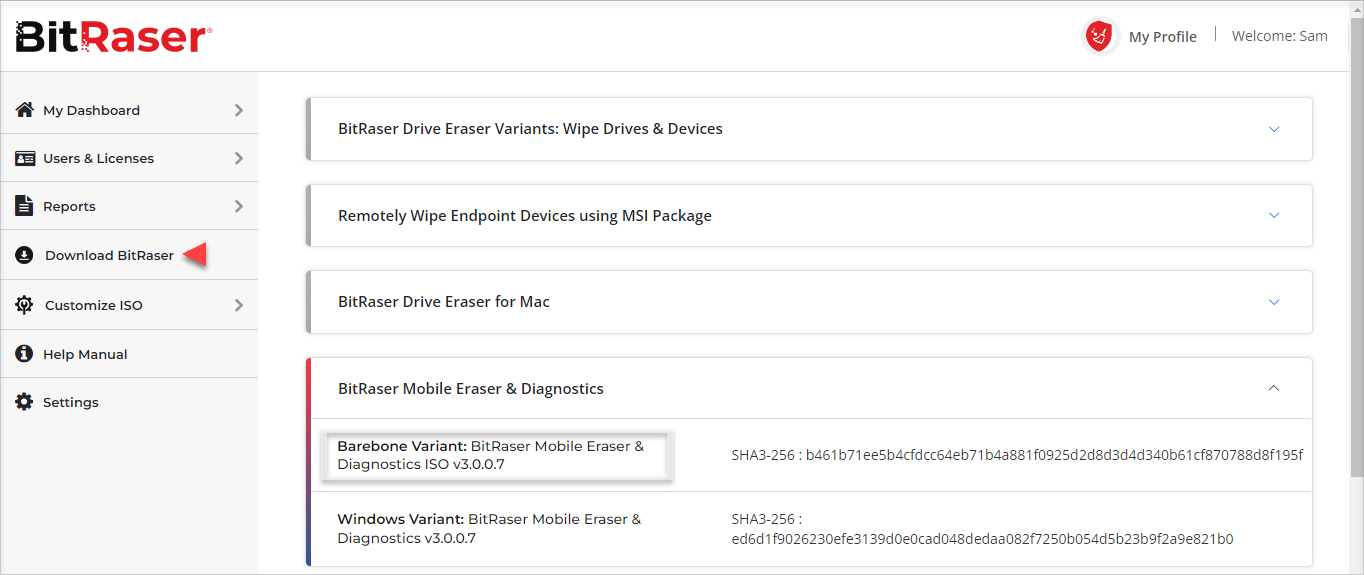
- STEP 3 Click Download BitRaser Drive ISO to download ISO image of the software
STAGE 2
Burn BitRaser Mobile Diagnostics ISO on USB Drive to Create Bootable Media
- STEP 1 Visit https://rufus.ie to download rufus – an open source application widely used for creating bootable USB flash drive.
- STEP 2 Install Rufus application on your laptop or desktop and then connect a USB drive to the system.
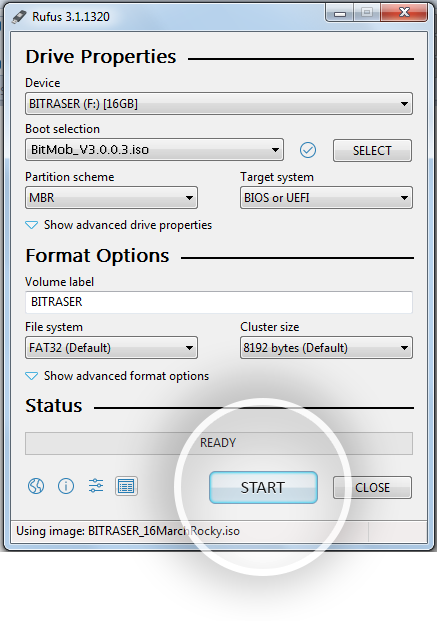
- STEP 3 Launch Rufus and follow instructions in the below annotated image. Click START to initiate the next steps for bootable USB media creation.
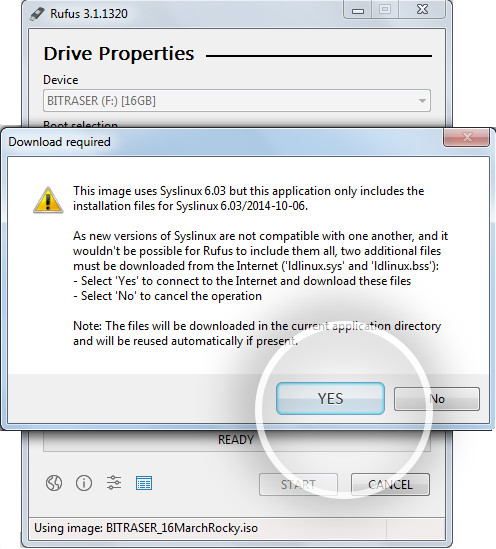
- STEP 4 Click 'Yes' on the pop-up message box to proceed further.
- STEP 5 Click OK on the final pop-up confirmation message to start burning BitRaser Mobile Eraser & Diagnostics ISO file on USB.
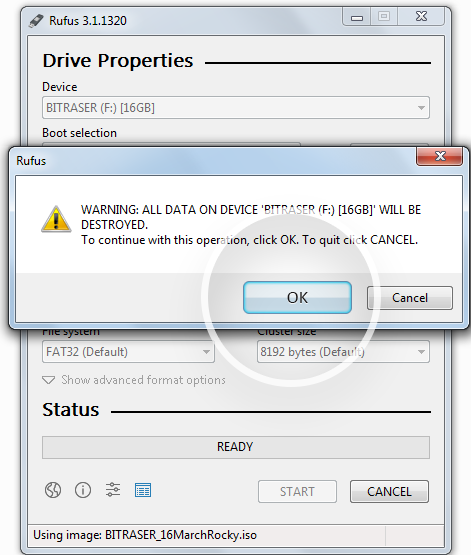
After successful completion of the process, you will have a bootable USB media for installing BitRaser Mobile Eraser & Diagnostics tool on the host machine via Boot menu.
STAGE 3
Install BitRaser Mobile Eraser & Diagnostics, Create New User Profile, & Acquire Licenses
- STEP 1 Connect the bootable USB media to your host machine (laptop or desktop).
- STEP 2 Power ON the machine and press Function keys as applicable for your device 'make' and 'model' to enter Boot Menu.
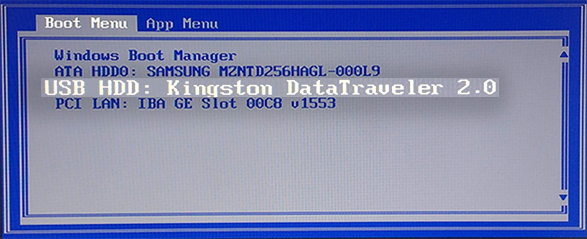
- STEP 3 Select USB Device option and press Enter.
- BitRaser Mobile Eraser & Diagnostics Installation Wizard will appear after the host PC boots successfully
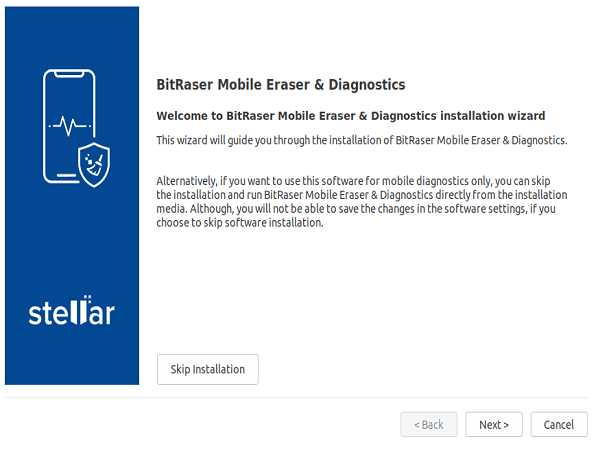
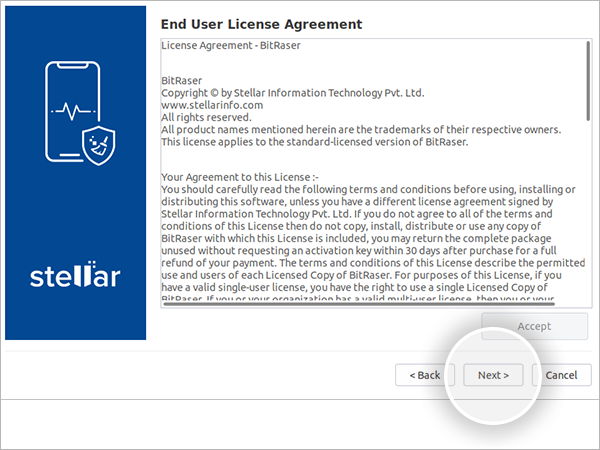
- STEP 4 Click Next to see the End User License Agreement screen. Click Accept & then click 'Next.
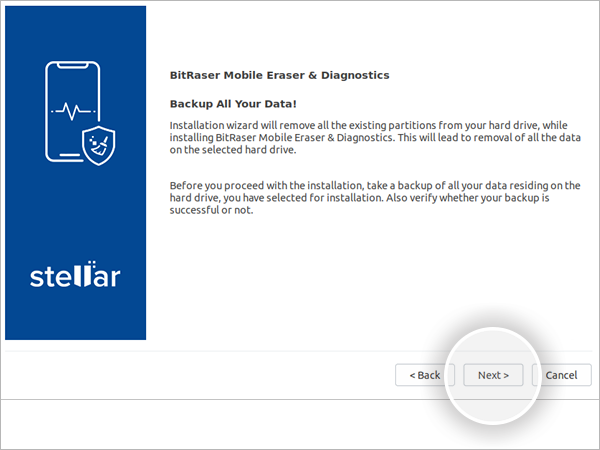
- Backup Important Data screen will appear with message prompt to back up the data and choose disk partitioning options before proceeding further on software installation process. Caution: Installing BitRaser Mobile Eraser and Diagnostics software on your PC or laptop will format the hard drive to create partitions. Backup the data stored on your PC before installing BitRaser Mobile Eraser and Diagnostics. The software overwrites the existing operating system to create a dedicated environment & setup for performing mobile Diagnostics through the allocated
- STEP 5 After backing up your data, Click Next.
- STEP 6 On the next screen, select the hard drive from dropdown list for installing the software. Next, click Start Installation
- The wizard will begin installing the software displaying "Please wait…installation is in progress" message.
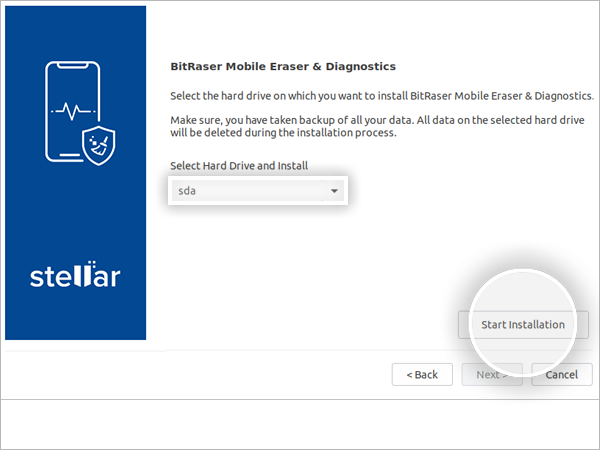
- After the installation is completed, the screen will display "Installation process completed" dialog.
- STEP 7 Remove the USB drive and click Reboot.
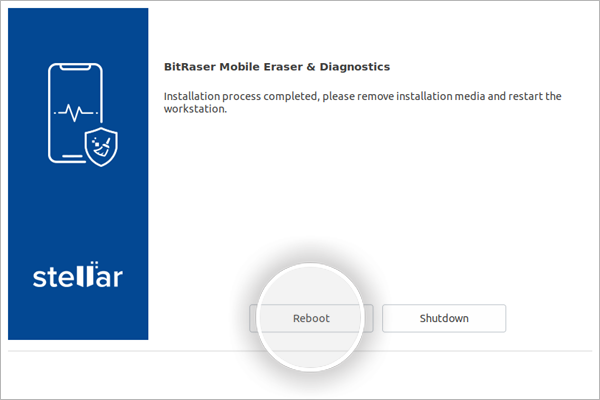
- Note: When you run BitRaser Mobile Eraser and Diagnostics for the first time after system restart, it will prompt you to create a new user profile for easy manageability of mobile diagnostics tasks from a centralized device & interface.
Follow these steps to create a new user profile:
- STEP 8 Launch the software. Click Create New User button.
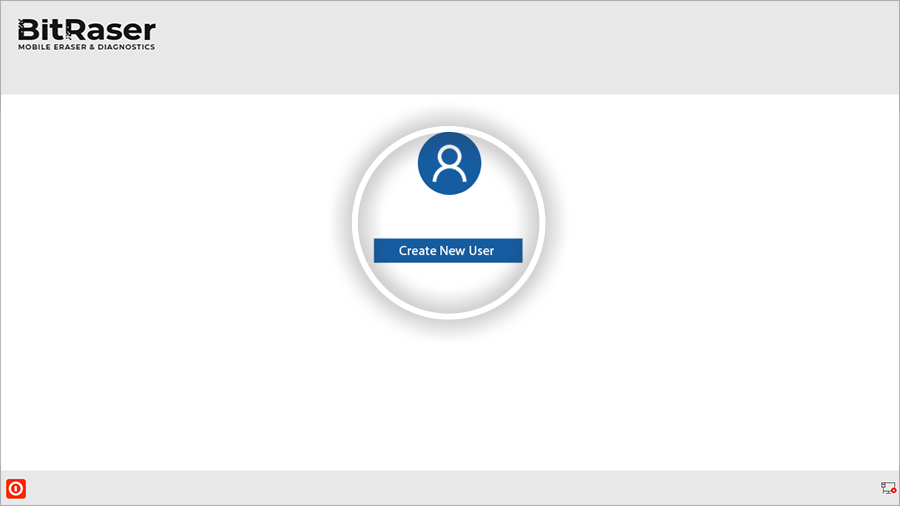
- STEP 9 Next, fill in the Username and Password to create new user profile.
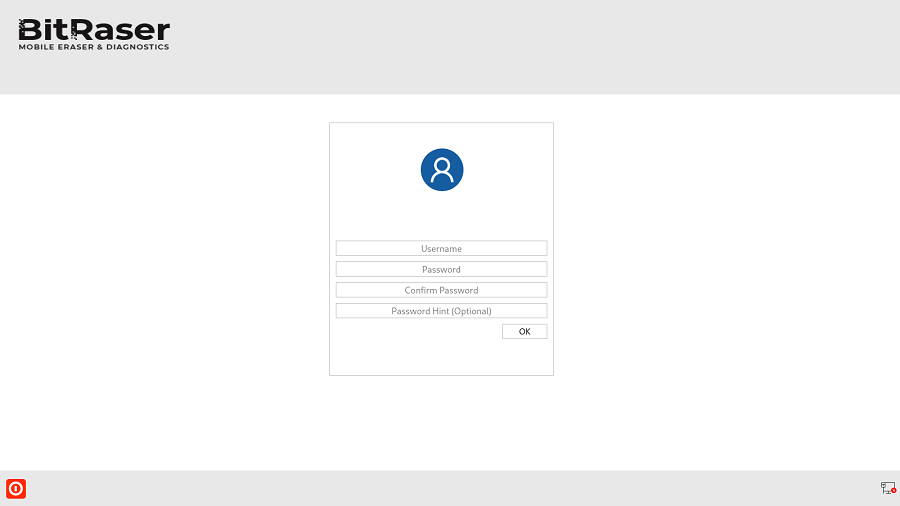
Note: The new user profile is only to login to BitRaser Mobile Eraser and Diagnostics application on the host PC. This profile has no link with BitRaser Cloud credentials. The credentials to login to BitRaser Cloud are separate.
After creating user profile, you would need to connect the application to BitRaser cloud for acquiring the license information as follows:
- STEP 10 Click Network icon on bottom right corner of the Home screen.
- STEP 11Click Network tab in Settings window.
For Ethernet, follow these steps:
Select Ethernet radio button.
Select Network Device from dropdown list.
Select Automatic (DHCP) in Configuration. All other fields will be auto-populated.
Click Connect.
For Wi-Fi, follow these steps:
Click Wireless tab.
Double click applicable wireless network in the displayed list
Enter password of the wireless network & then click Connect
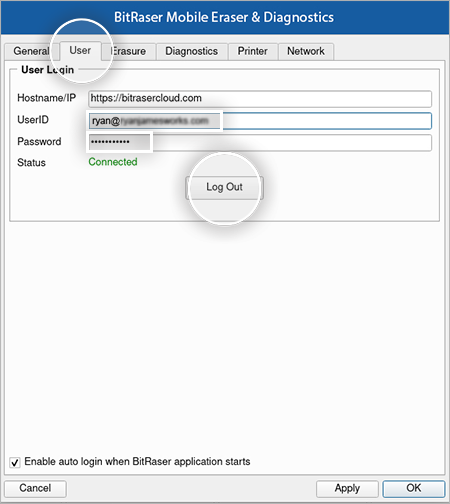
- STEP 12 Next, click User tab in Settings window
- STEP 13 Enter BitRaser cloud URL, login user name & password. Click Login.

The software will connect to BitRaser cloud and access license information to initiate mobile erasure process
STAGE 4
Diagnose iOS Device Using BitRaser Mobile Eraser Installed on Host Machine
- STEP 1 Run BitRaser Mobile Eraser and Diagnostics.
- STEP 2 Connect the iOS device(s) (iPhone and/or iPad) to the host PC.
- The main interface will display all the connected devices with 'Erase' as the default action with checkbox. Click on 'Erase' to switch the process to 'Diagnose'.
- Subsequently, the 'Trust this Computer' alert message will pop-up on your iOS device. Click on Trust .
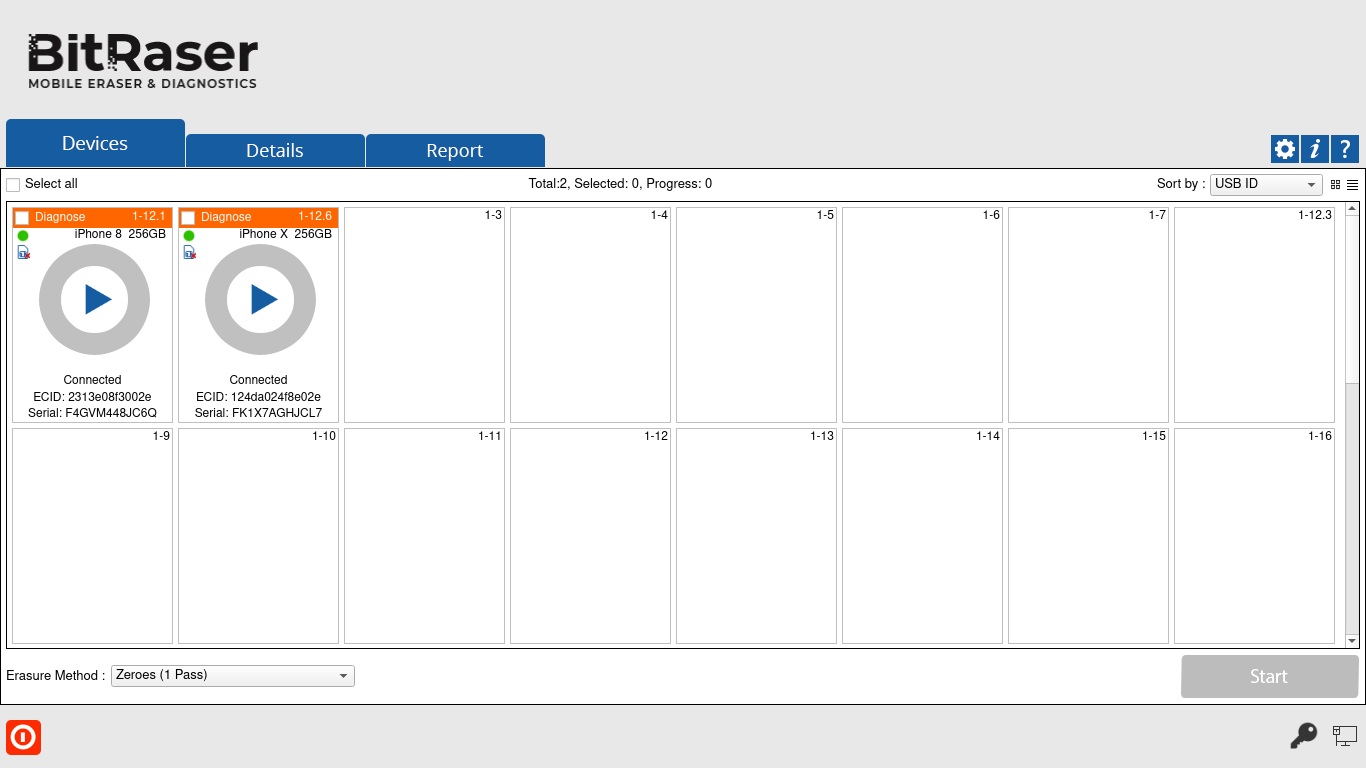
- STEP 3 Click the green colored Erase band for each connected device to toggle on Diagnose function.
- STEP 4 Select the checkbox for each device and then click Start to initialize the Diagnostics process
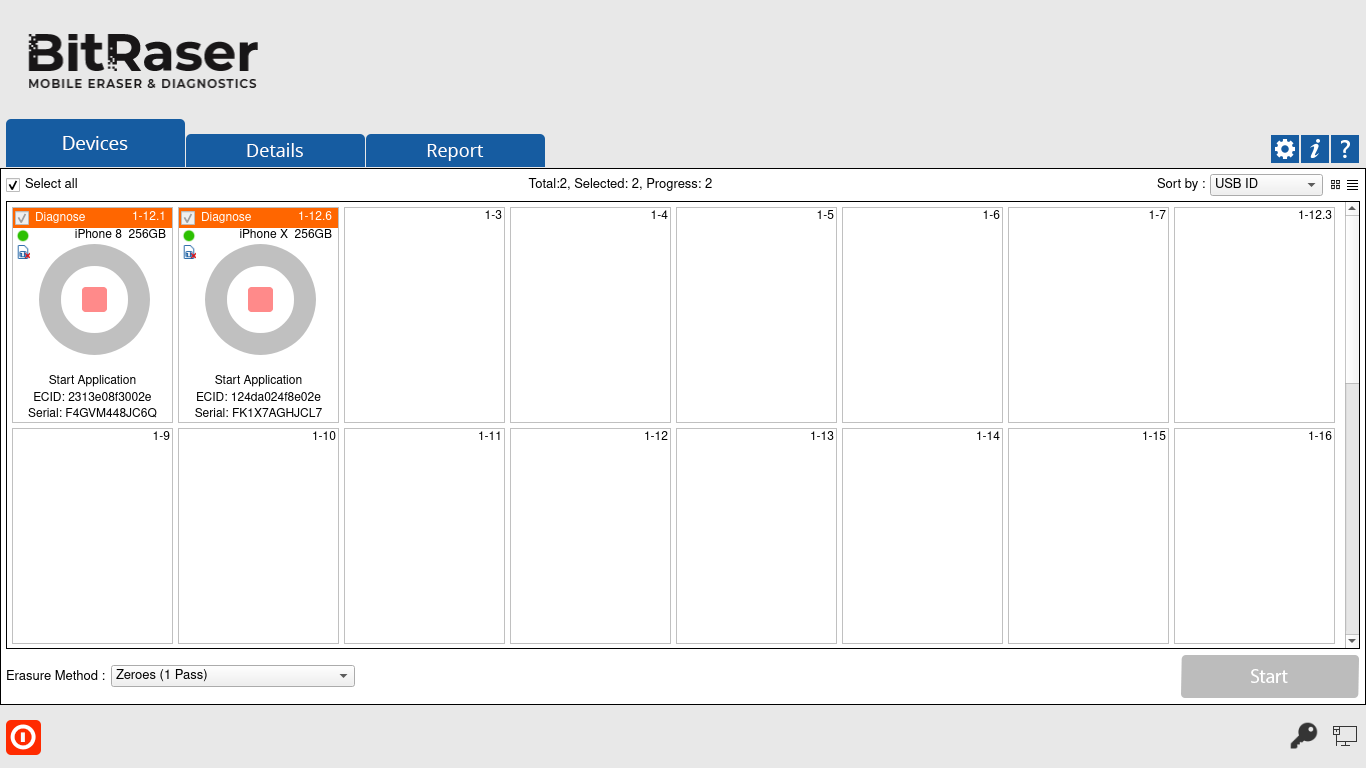
- The software will start analyzing the connected devices to the host machine. The software will list Device Status, Device Type, ECID/IMEI and Serial Number of the connected devices.
- Next, it will start automated diagnostic tests for all the selected devices.
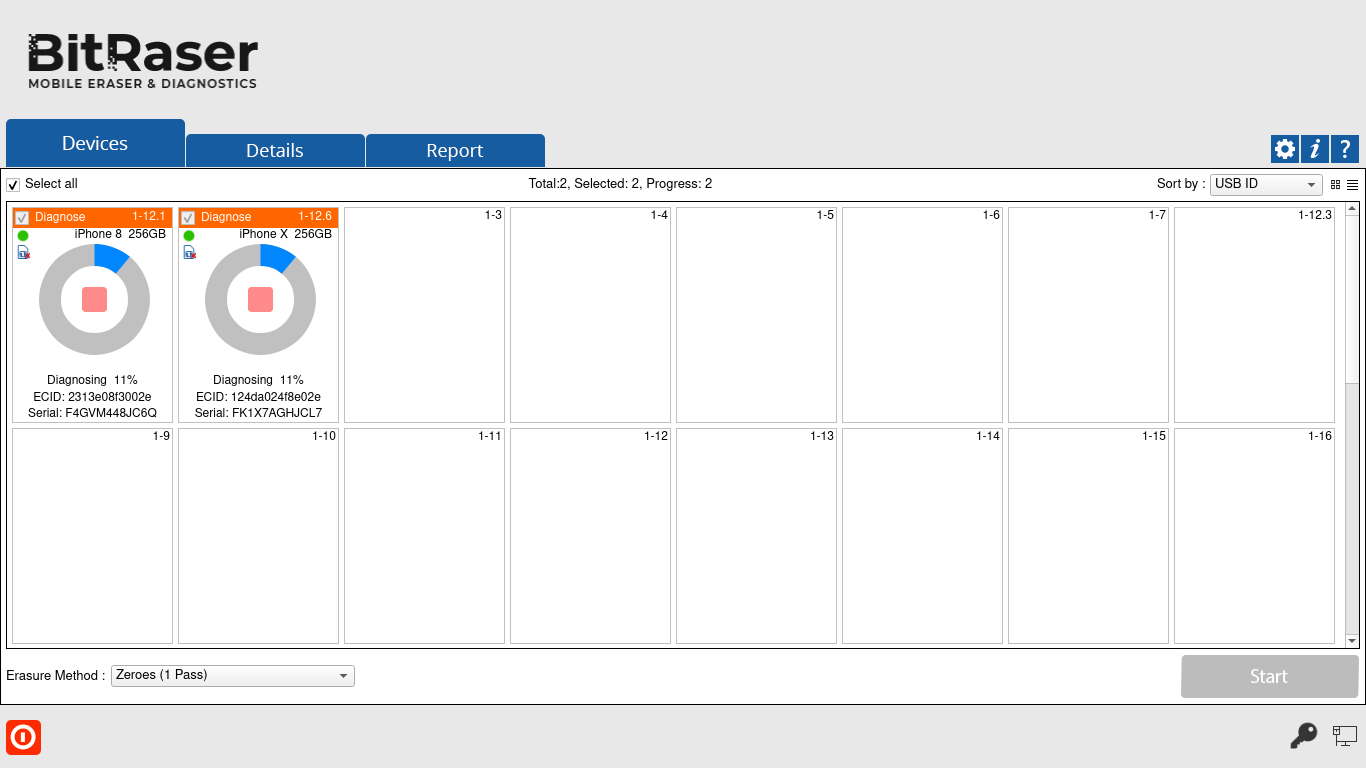
- Once the automatic tests are completed, the software will ask you to initiate manual tests.
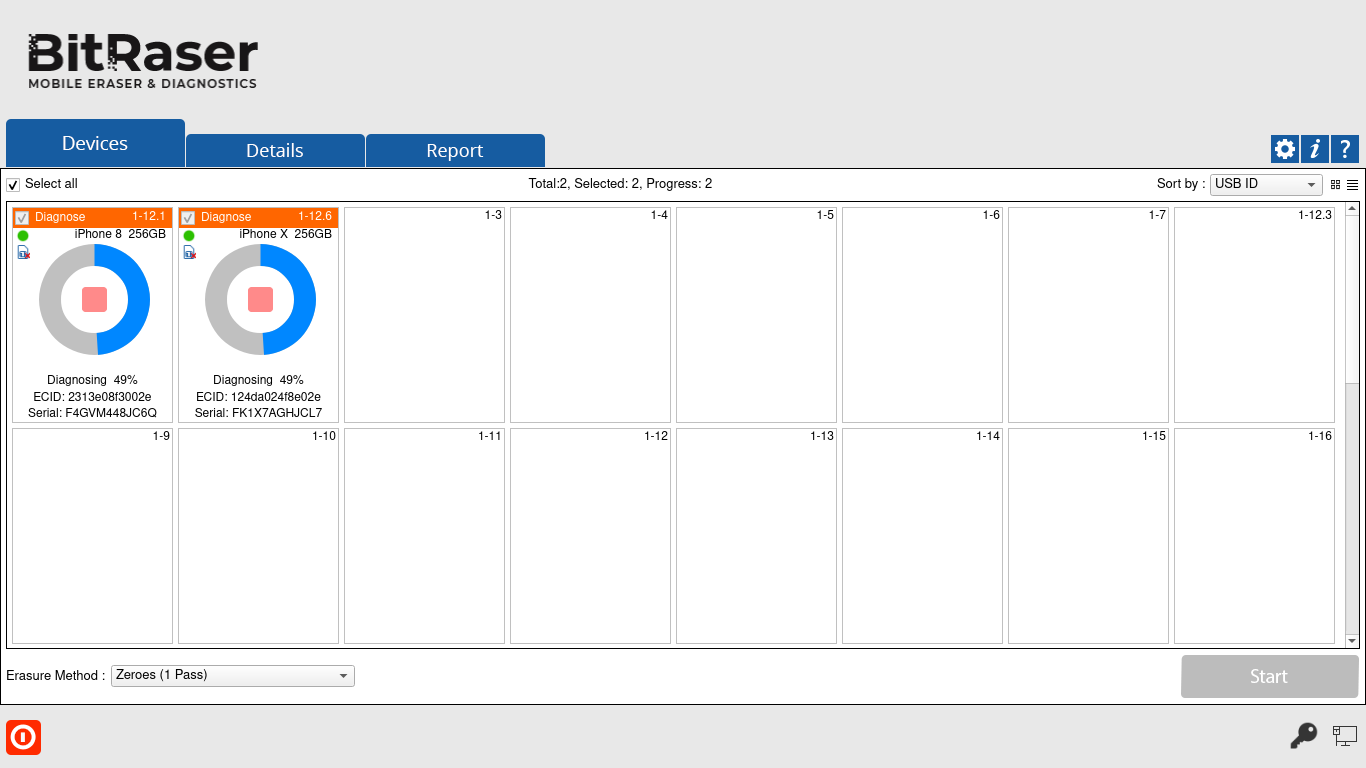
- After successful completion of the diagnostic tests, the software interface will display Completed as the final status for all the diagnosed devices.
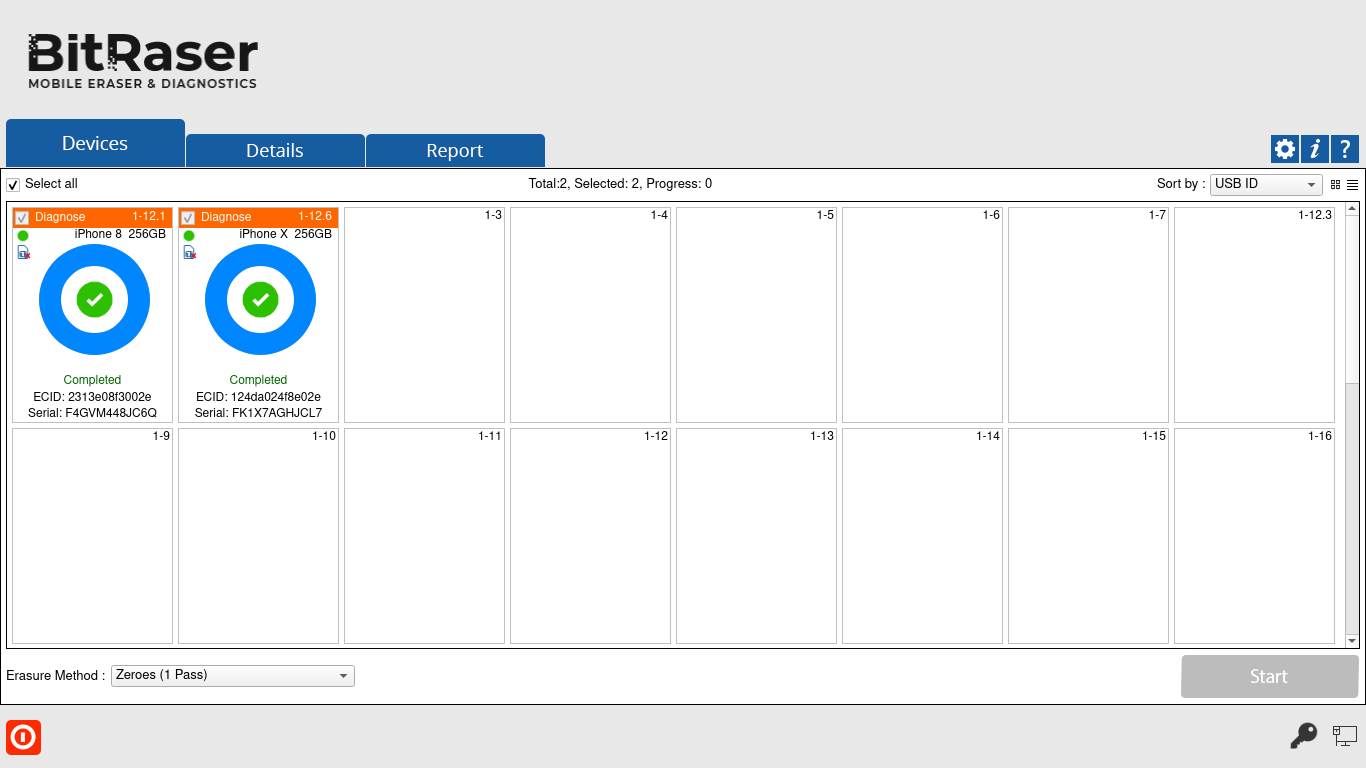
After the process is completed, the software will generate digitally signed reports for all the diagnosed iOS devices (phones & tablets), like iPhone 12 Pro, iPhone 12 Pro Max, iPhone 12 mini, iPhone 12, iPhone 11 Pro Max, iPhone 11, Apple iPhone XR, Apple iPhone XS Max etc. You can save the reports automatically on your BitRaser Cloud account.
You have successfully diagnosed your iOS devices using
BitRaser Mobile Eraser & Diagnostics software.
iOS is a registered trademark of Cisco.
