How to Wipe a Laptop or PC?
Using BitRaser® Drive Eraser: Cloud Variant
This guide walks you through simple instructions to permanently wipe data from laptops, PCs, and connected drives using the Cloud Variant of BitRaser Drive Eraser software at Internet-enabled locations.
Instructions in this deployment guide are broken down into two stages to make it easy to navigate and wipe drives and devices with minimal effort. For this Deployment guide, we will be erasing a Laptop. The steps to wipe a PC remain the same, making this guide applicable to both.
Stage 1: Download & Create a BitRaser Drive Eraser Bootable USB
Stage 2: Wipe Laptops, PCs & Connected Drives with BitRaser Drive Eraser
Note: The total wiping time will vary depending on the drive type, storage capacity, and erasure method.
Stage 1: Download & Create a BitRaser Drive Eraser Bootable USB.
Follow these instructions to download BitRaser ISO and create a bootable USB in less than 5 minutes:
- Step 1: Log in to your BitRaser Cloud account using the credentials received in your e-mail.
- Step 2: Click on the ‘Download BitRaser’ panel on the left side of the main dashboard, then click on ‘Cloud Variant: BitRaser Drive Eraser’ to download the BitRaser ISO image file.
- Step 3: Download Rufus - an open-source application for creating bootable USB flash drives.
- Step 4: Install Rufus on your system and connect the USB drive to the system. Next, launch Rufus and select the downloaded BitRaser ISO in ‘Boot selection,’ then click on ‘START.’ Follow on screen instructions to create a bootable USB. For detailed steps, see our KB: How to Create a Bootable USB with Rufus?
Your BitRaser Drive Eraser Bootable USB will be ready within a few minutes. Now you can begin wiping your Laptop.
Stage 2: Wipe Laptops, PCs & Connected Drives with BitRaser Drive Eraser
The following steps allow you to wipe a laptop, desktop, and connected drives using the BitRaser bootable USB:
- Step 1: Connect the bootable USB media to the host machine you want to wipe.
Note: For UEFI machines where Secure Boot is enabled, please remember to DISABLE SECURE BOOT to allow the device to boot using BitRaser Drive Eraser. To learn how to do that, read our KB article: How to Disable Secure Boot?
- Step 2: Switch ‘ON’ the host machine and enter the Boot Menu by pressing the applicable Function keys based on the device 'make' and 'model.' In the Boot Menu, select the BitRaser USB you created and press ‘Enter’ to boot the device with the BitRaser application. (Refer to Image 1)
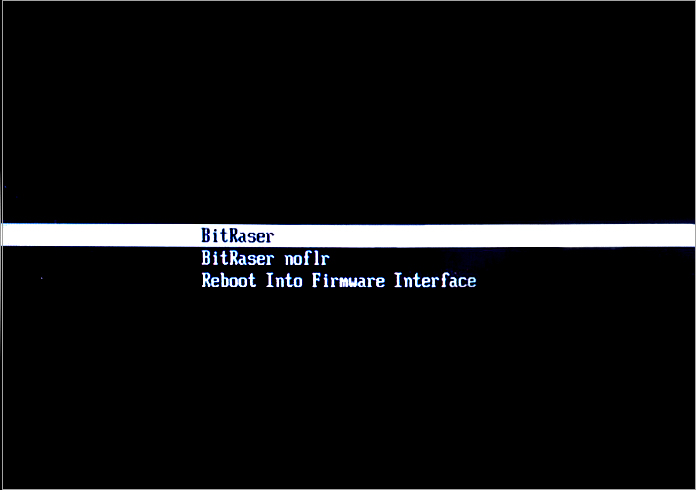
You will see the BitRaser Boot Menu after the host computer boots with BitRaser successfully. (Refer to Image 2)
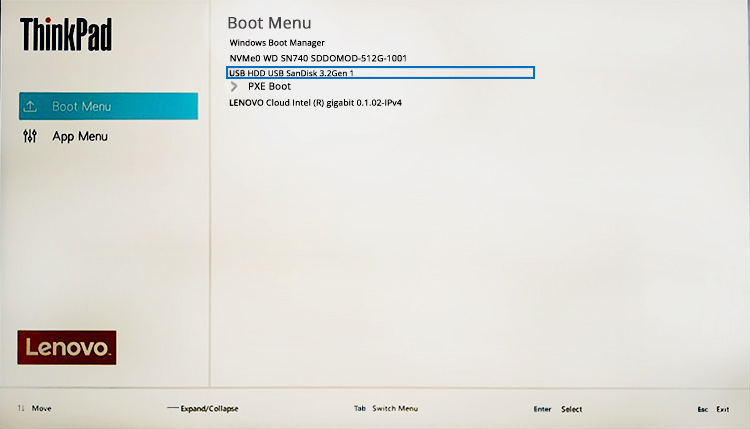
Image 1: Go to Boot Menu, then Select BitRaser USB & Press Enter
 Image
Image
Image 2: BitRaser Software UEFI Boot Menu
- Step 3: Select ‘BitRaser’ and press ‘Enter’ to initialize BitRaser Drive Eraser software.
After initialization, the BitRaser Home screen will appear, listing all the drives - including build-in & USB drives - connected to the host machine. The interface will display the number of licenses left as '0'. (Refer to Image 3)
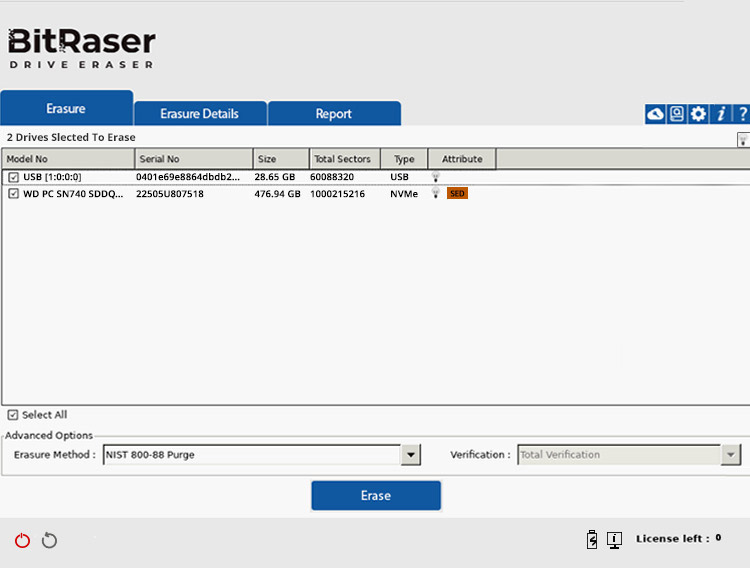
Image 3: BitRaser Drive Eraser Main Interface
You must connect the host machine to the Internet at this stage and log in to BitRaser cloud to acquire erasure licenses.
- Step 4: Go to ‘Settings < Network’ on the top right corner of the Home screen and enter your Wireless or Ethernet details, then click ‘Connect.’ (Refer to Image 4)
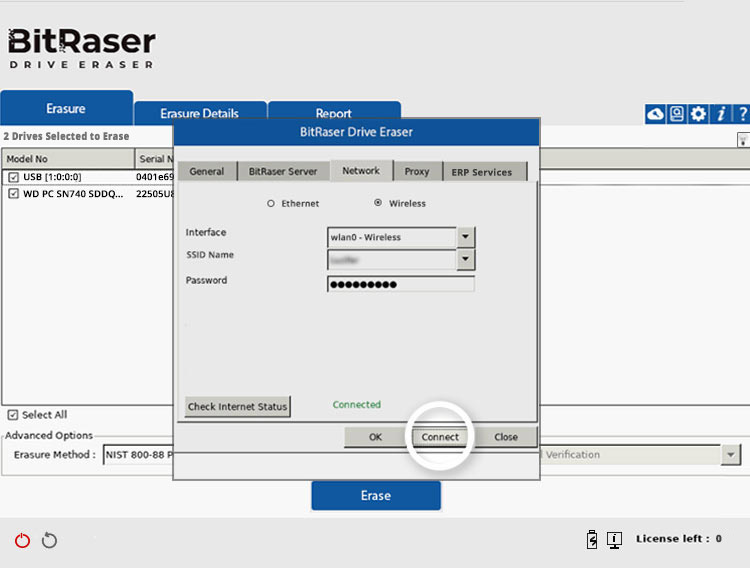
Image 4: Connect BitRaser Drive Eraser Application to the Internet
- Step 5: Go to ‘Settings < BitRaser Server’ and enter login user name & password, then click ‘Connect.’ (Refer to Image 5)
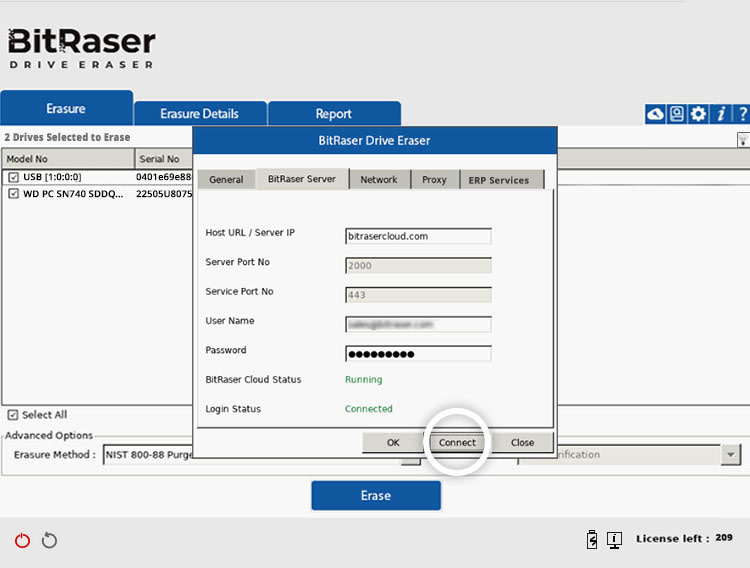
Image 5: Connect the BitRaser Application to the BitRaser Server
The software will automatically acquire licenses from your BitRaser cloud account. You can see the License Left count in the bottom right corner.
- Step 6: Select the checkbox for all the drives you wish to erase. Select the ‘Erasure Method,’ ‘Verification’ type, and click ‘Erase.’ Click ‘Yes’ in the final confirmation window to initiate the erasure process. (Refer to Image 6)
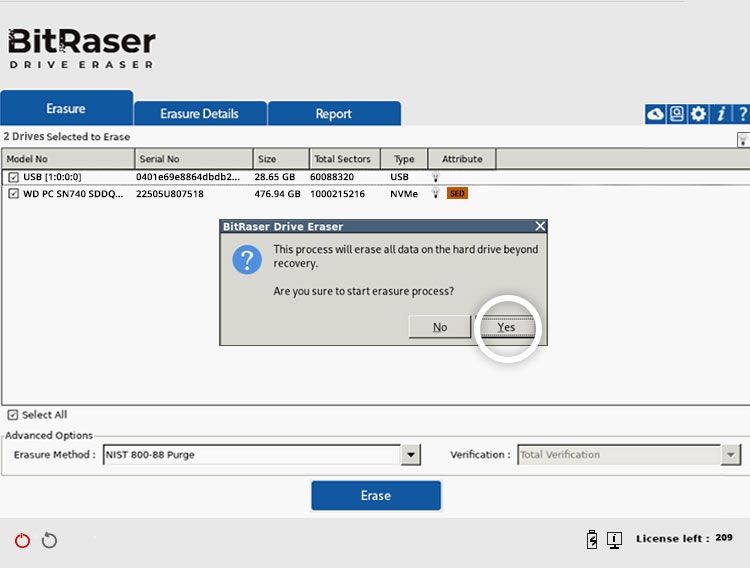
Image 6: Click Erase, then Click Yes on the BitRaser Alert Screen
The software will start wiping the laptop and external drive(s), displaying the erasure progress on the main interface. (Refer to Image 7)
Important: If your laptop contains a Self-Encrypting Drive, like the one we are using, it will be listed as ‘SED’ in the ‘Attribute’ section. You must know either the decryption key or the PSID number to erase an SED. To learn how to erase SEDs, refer to our article on How to Erase Self-Encrypting Drives.
Once the Erasure Process is completed, you will see a Green Tick Screen on the BitRaser Drive Eraser screensaver. (Refer to Image 8)
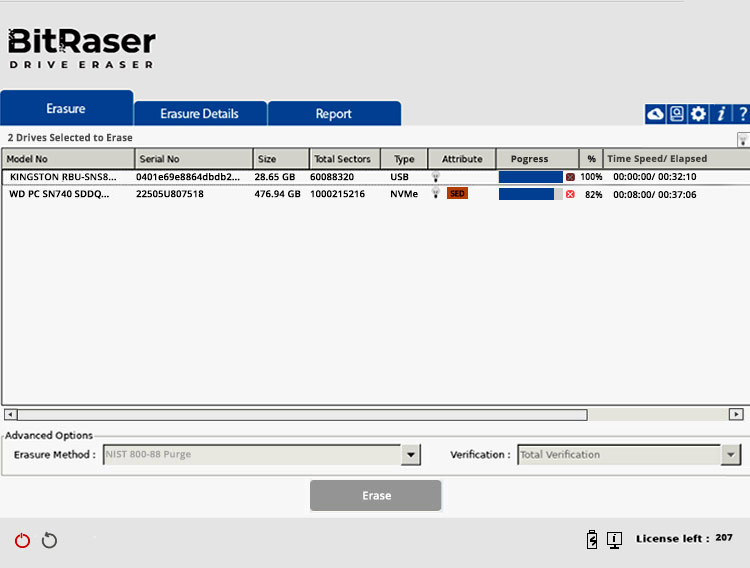
Image 7: Erasure Progress Screen BitRaser Drive Eraser
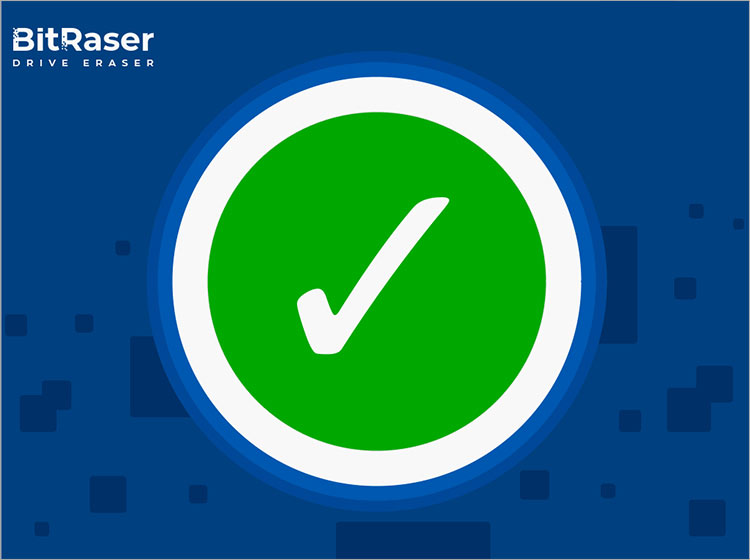
Image 8: Erasure Completion Screen BitRaser Drive Eraser Screensaver
After wiping the PC clean, the software will generate digitally signed reports for all the erased drives and save them automatically on your BitRaser Cloud account. (Refer to Report below)
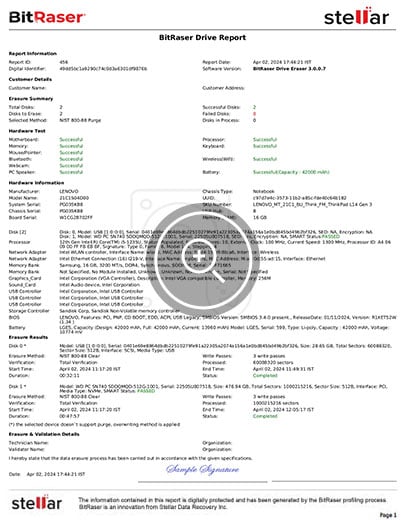
Report: BitRaser Drive Eraser Laptop Wiping Report
You have successfully learned how to wipe laptops, PCs, and drives clean using the Cloud Variant of BitRaser Drive Eraser software.