What is an NVMe SSD?
Non-volatile Memory Express (NVMe) is a host controller interface that helps increase the data transfer speed of laptops, PCs, and gaming consoles. (Refer to Image 1)

Image 1: M.2 NVMe SSD
NVMe was developed by the NVM Express Workgroup to replace the Serially Attached Small Computer System Interface (SAS) and the Serial Advanced Technology Attachment (SATA) protocols. NVMe offers a super-fast way (900% faster than the AHCI equivalent) to access non-volatile memory. Built on a high-speed PCIe interface, NVMe is also known as NAND flash memory that comes in several forms, including SSDs, PCI Express (PCIe) add-in cards, M.2 cards, and U.2 connectors. The advent of NVMe has propelled the development of other modern technologies like AI, ML & IoT. NVMe has been specifically designed for SSDs, so they are fast becoming popular storage choices for laptops, PCs, Mac devices, and servers.
What is M.2 SSD?
M-dot-2 or M.2 is the Next Generation Form Factor (NGFF), a dynamic form factor SSD used in internally mounted storage expansion cards. It endures high data storage in thin, power-constrained devices like Ultrabook laptops and tablets. The size of an M. 2 SSD is smaller than that of other mini-Serial Advanced Technology Attachments (mSATA), but it can process data much faster than SATA or SAS SSDs.
What is PCIe Interface?
PCIe (Peripheral Component Interconnect Express) is a motherboard interface that acts as a high-speed serial expansion bus slot. (Refer to Image 2)
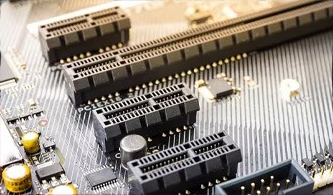
Image 2: PCIe Slots Image Credit: https://www.hp.com/
It was designed to replace the PCI, PCI-X, and AGP bus standards and connects various hardware components like SSDs, HDDs, graphic & sound cards, Wi-Fi, Ethernet, etc. PCIe is much smaller in size as compared to other legacy standards and offers high data throughput, lower I/O pin count, better reporting mechanism (AER—Advanced Error Reporting), scalability for bus systems, and hot swapping capability.
PCIe technology was the first transport interface that NVMe supported and is currently found in most modern laptops, desktops, and Mac devices. Given their extensive use, NVMe drives are widely used in today’s computers. Therefore, as a business, it's important to understand the process of erasing NVMe drives.
Before you begin erasing M.2 SSDs and NVMe drives, ensure you have met the below key requirements.
Key Requirements:
- USB flash drive: 2 GB or more to create a bootable USB
- Desktop/Laptop: To connect the M.2 NVMe Drive
- Internet: Wi-Fi/Ethernet
The KB has been divided into 3 stages for ease of navigation:
Follow the steps below to understand how to wipe NVMe drive within 15 minutes.
Stage 1: Download BitRaser Drive Eraser
Step 1: Go to bitrasercloud.com and log in with the credentials you received via e-mail after purchasing the BitRaser Drive Eraser software.
Step 2: Go to the 'Download BitRaser' section and then click on 'Cloud Variant: BitRaser Drive Eraser' to download the BitRaser Drive Eraser software. (Refer to Image 3)
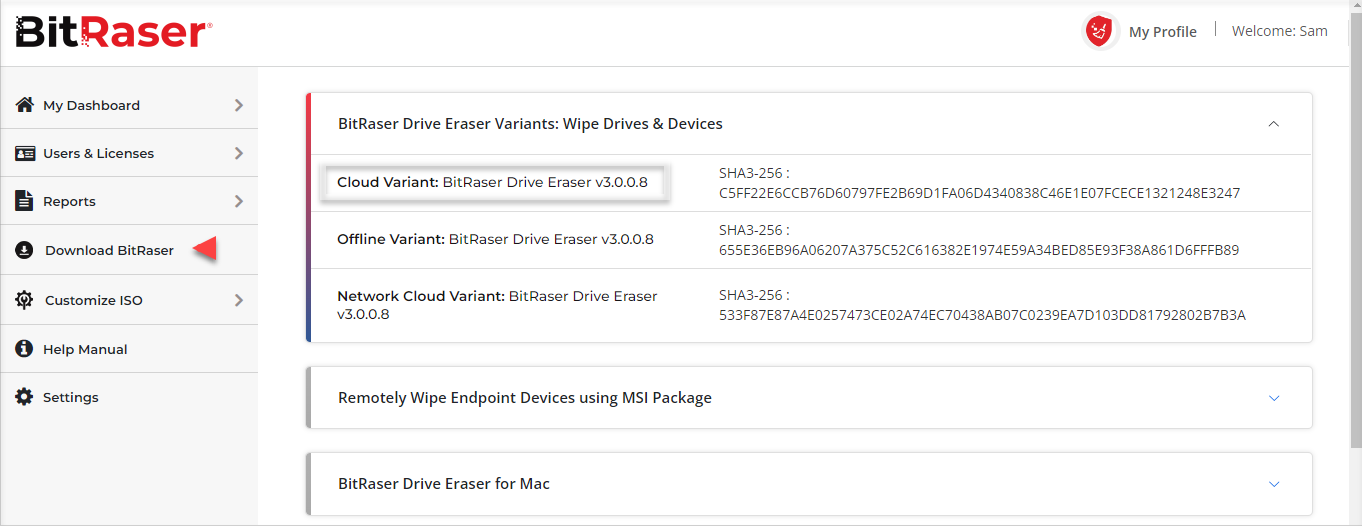
Image 3: Download BitRaser Drive Eraser ISO from BitRaser Cloud Console
Stage 2: Create a BitRaser Bootable USB Drive
Step 1: The downloaded ISO file must be mounted on a USB drive using a freely available utility like ‘Rufus.’ Connect a blank USB to your machine and launch Rufus, then select the ISO file and click on the ‘START’ button. (Refer to Image 4)
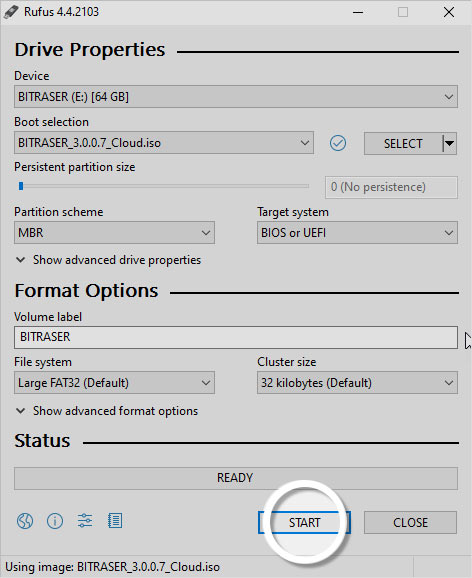
Image 4: Create a BitRaser Bootable USB with Rufus
Step 2: Follow the on-screen instructions to create the bootable USB. (Refer to Image 5)
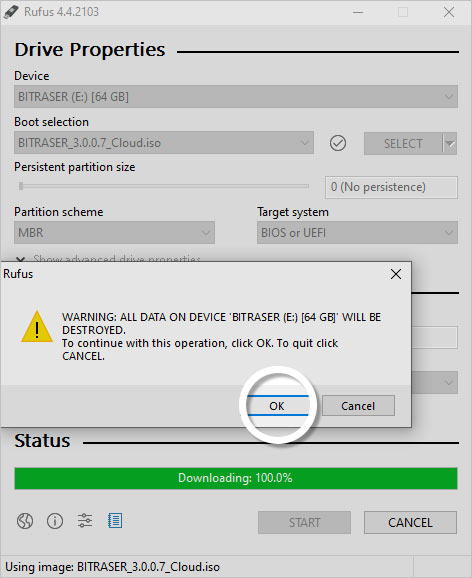
Image 5: In the Rufus Alert Window, Click OK
Note: To wipe NVMe drives on a Mac device, you must download BitRaser Drive Eraser for Mac. Further, please note that Rufus bootable USB creator will not work for Mac machines. You need to download the BitRaser USB Creator for Mac application from the BitRaser Cloud Console after you have purchased the software. For instructions, refer to our deployment guide on How to Wipe Mac devices.
Your BitRaser bootable USB is ready; now, you can begin wiping the NVMe drive with BitRaser. For this KB, we will be wiping the NVMe drive of an HP EliteBook laptop.
Stage 3: Erase M.2 SSD and NVMe Drives with BitRaser Drive Eraser
Step 1: Connect the BitRaser bootable USB drive to the host machine and switch it ‘ON.’ Press the relevant function key to go to the 'Boot/UEFI Menu' (The key varies per make & model of Laptop/Desktop). Select the USB media from the boot menu and press the ‘Enter’ key. (Refer to Image 6)
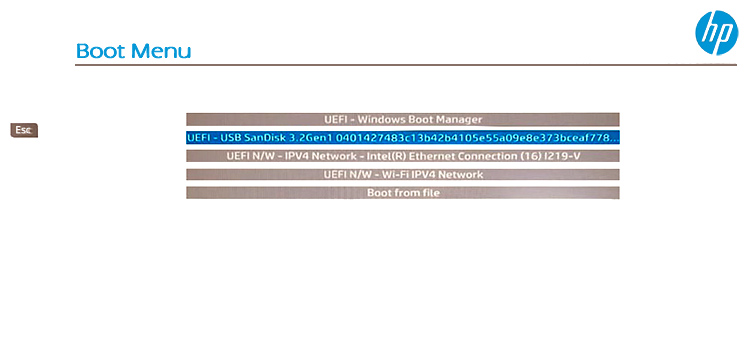
Image 6: Boot Device Using BitRaser Bootable USB
The computer will boot with BitRaser, and you will see your internal NVMe drive listed on the main interface of the BitRaser Drive Eraser. (Refer to Image 7)
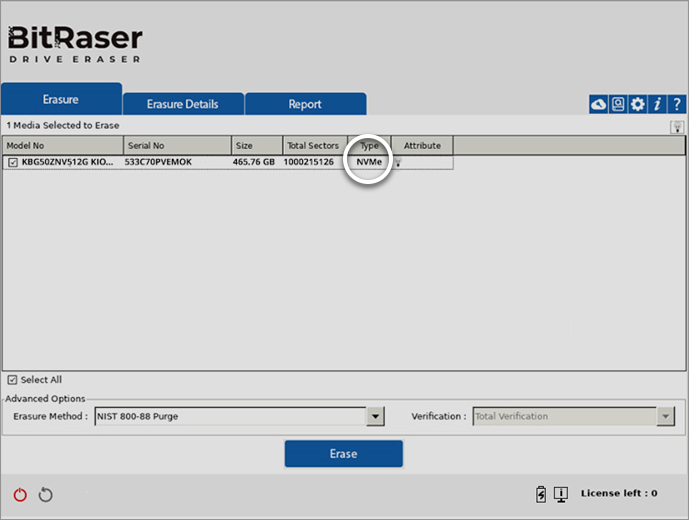
Image 7: BitRaser Drive Eraser Main Screen with NVMe Drive
Step 2: Connect the BitRaser application to the internet via Wi-Fi or Ethernet, go to 'Settings < Network,' and input your network credentials. This step is necessary to retrieve BitRaser licenses from the cloud console. (Refer to Image 8)
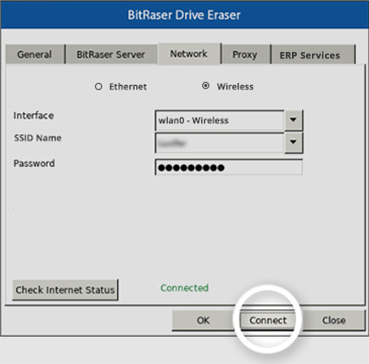
Image 8: Connect the BitRaser Application to the Internet
Step 3: Now, connect the application to BitRaser Server by navigating to ‘Settings < BitRaser Server’ and entering your ‘User Name’ and ‘Password’ to authenticate the purchased licenses. Use the same credentials that you used when accessing BitRaser Cloud Console. (Refer to Image 9)
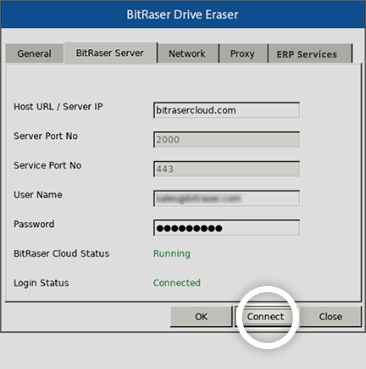
Image 9: Connect BitRaser to BitRaser Cloud Server
Step 4: Select the NVMe drive to erase. You can also select the desired data erasure method from the dropdown menu and click the ‘Erase’ button. You will see an erasure confirmation window. Click ‘Yes’ to begin erasure. (Refer to Image 10)
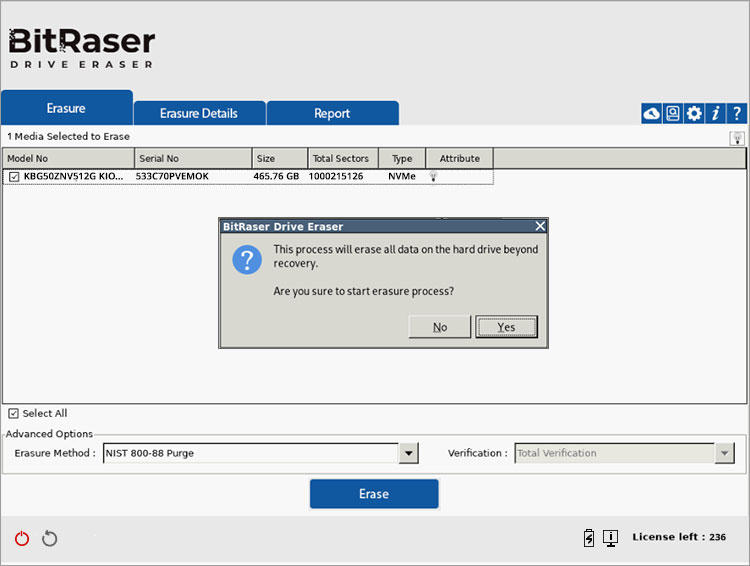
Image 10: Click Erase, then Click Yes to Begin NVMe Erasure
Note: NIST (National Institute of Standards and Technology) recommends using NIST Purge to wipe SSDs. Since NVMe is an SSD interface, we are using the NIST Purge method to wipe it.
You can see the erasure progress of the NVMe drive on your screen and BitRaser Screensaver. (Refer to Image 11)
Once the process is completed, you will see a Green Tick on the screen. (Refer to Image 12)
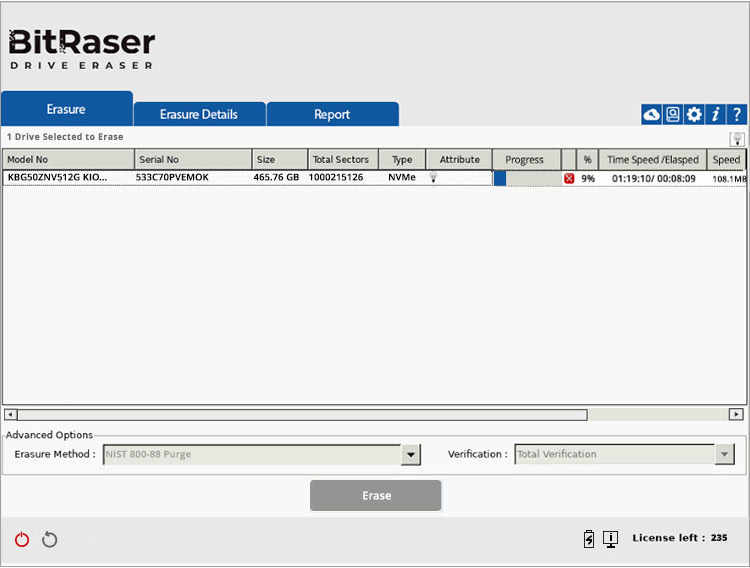
Image 11: Erasing NVMe BitRaser Erasure Progress Screen

Image 12: NVMe Erasure Completed Green Tick Screen
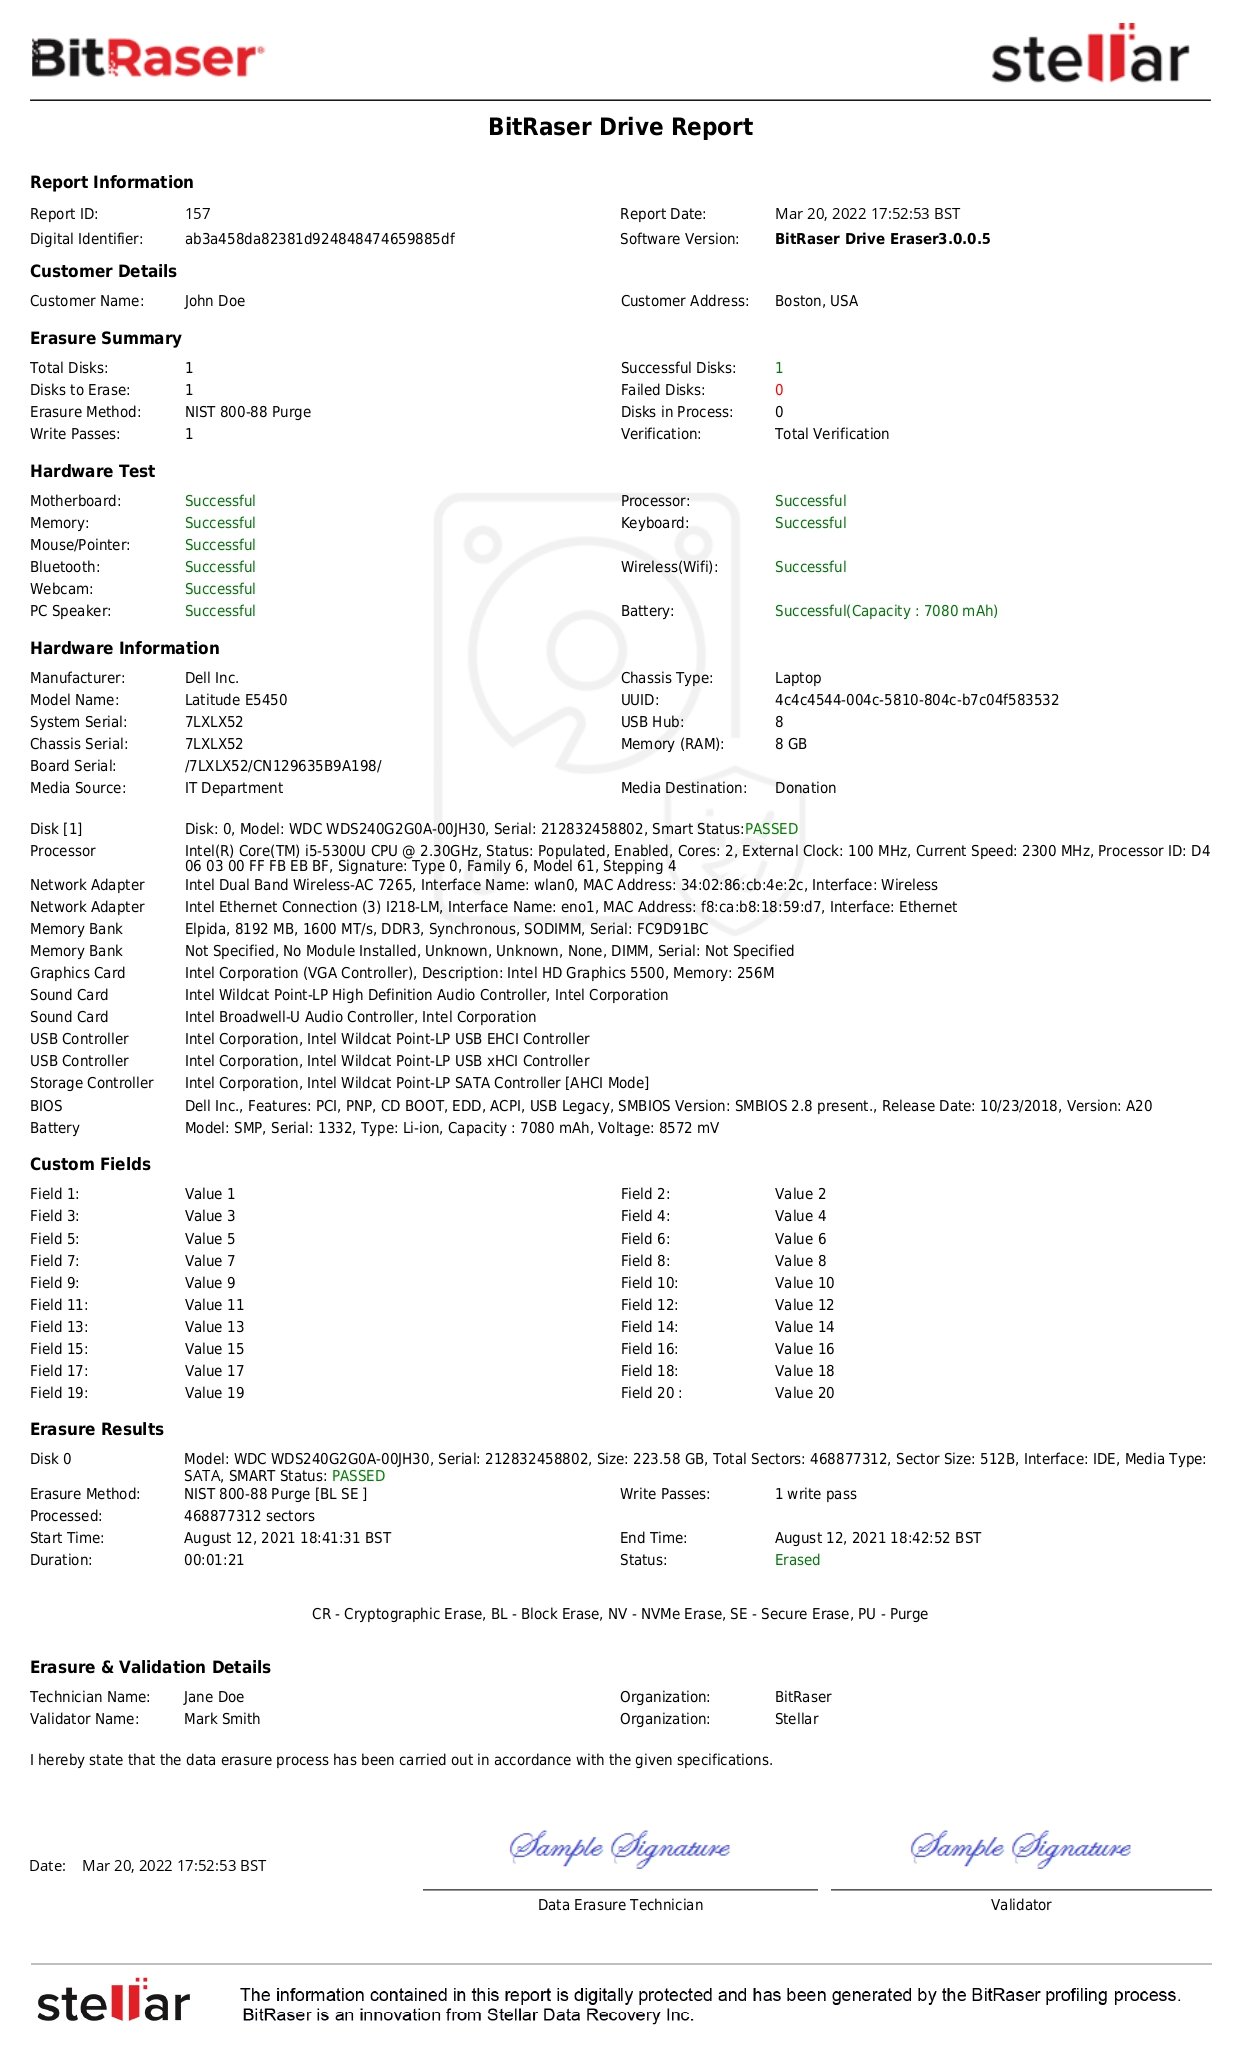
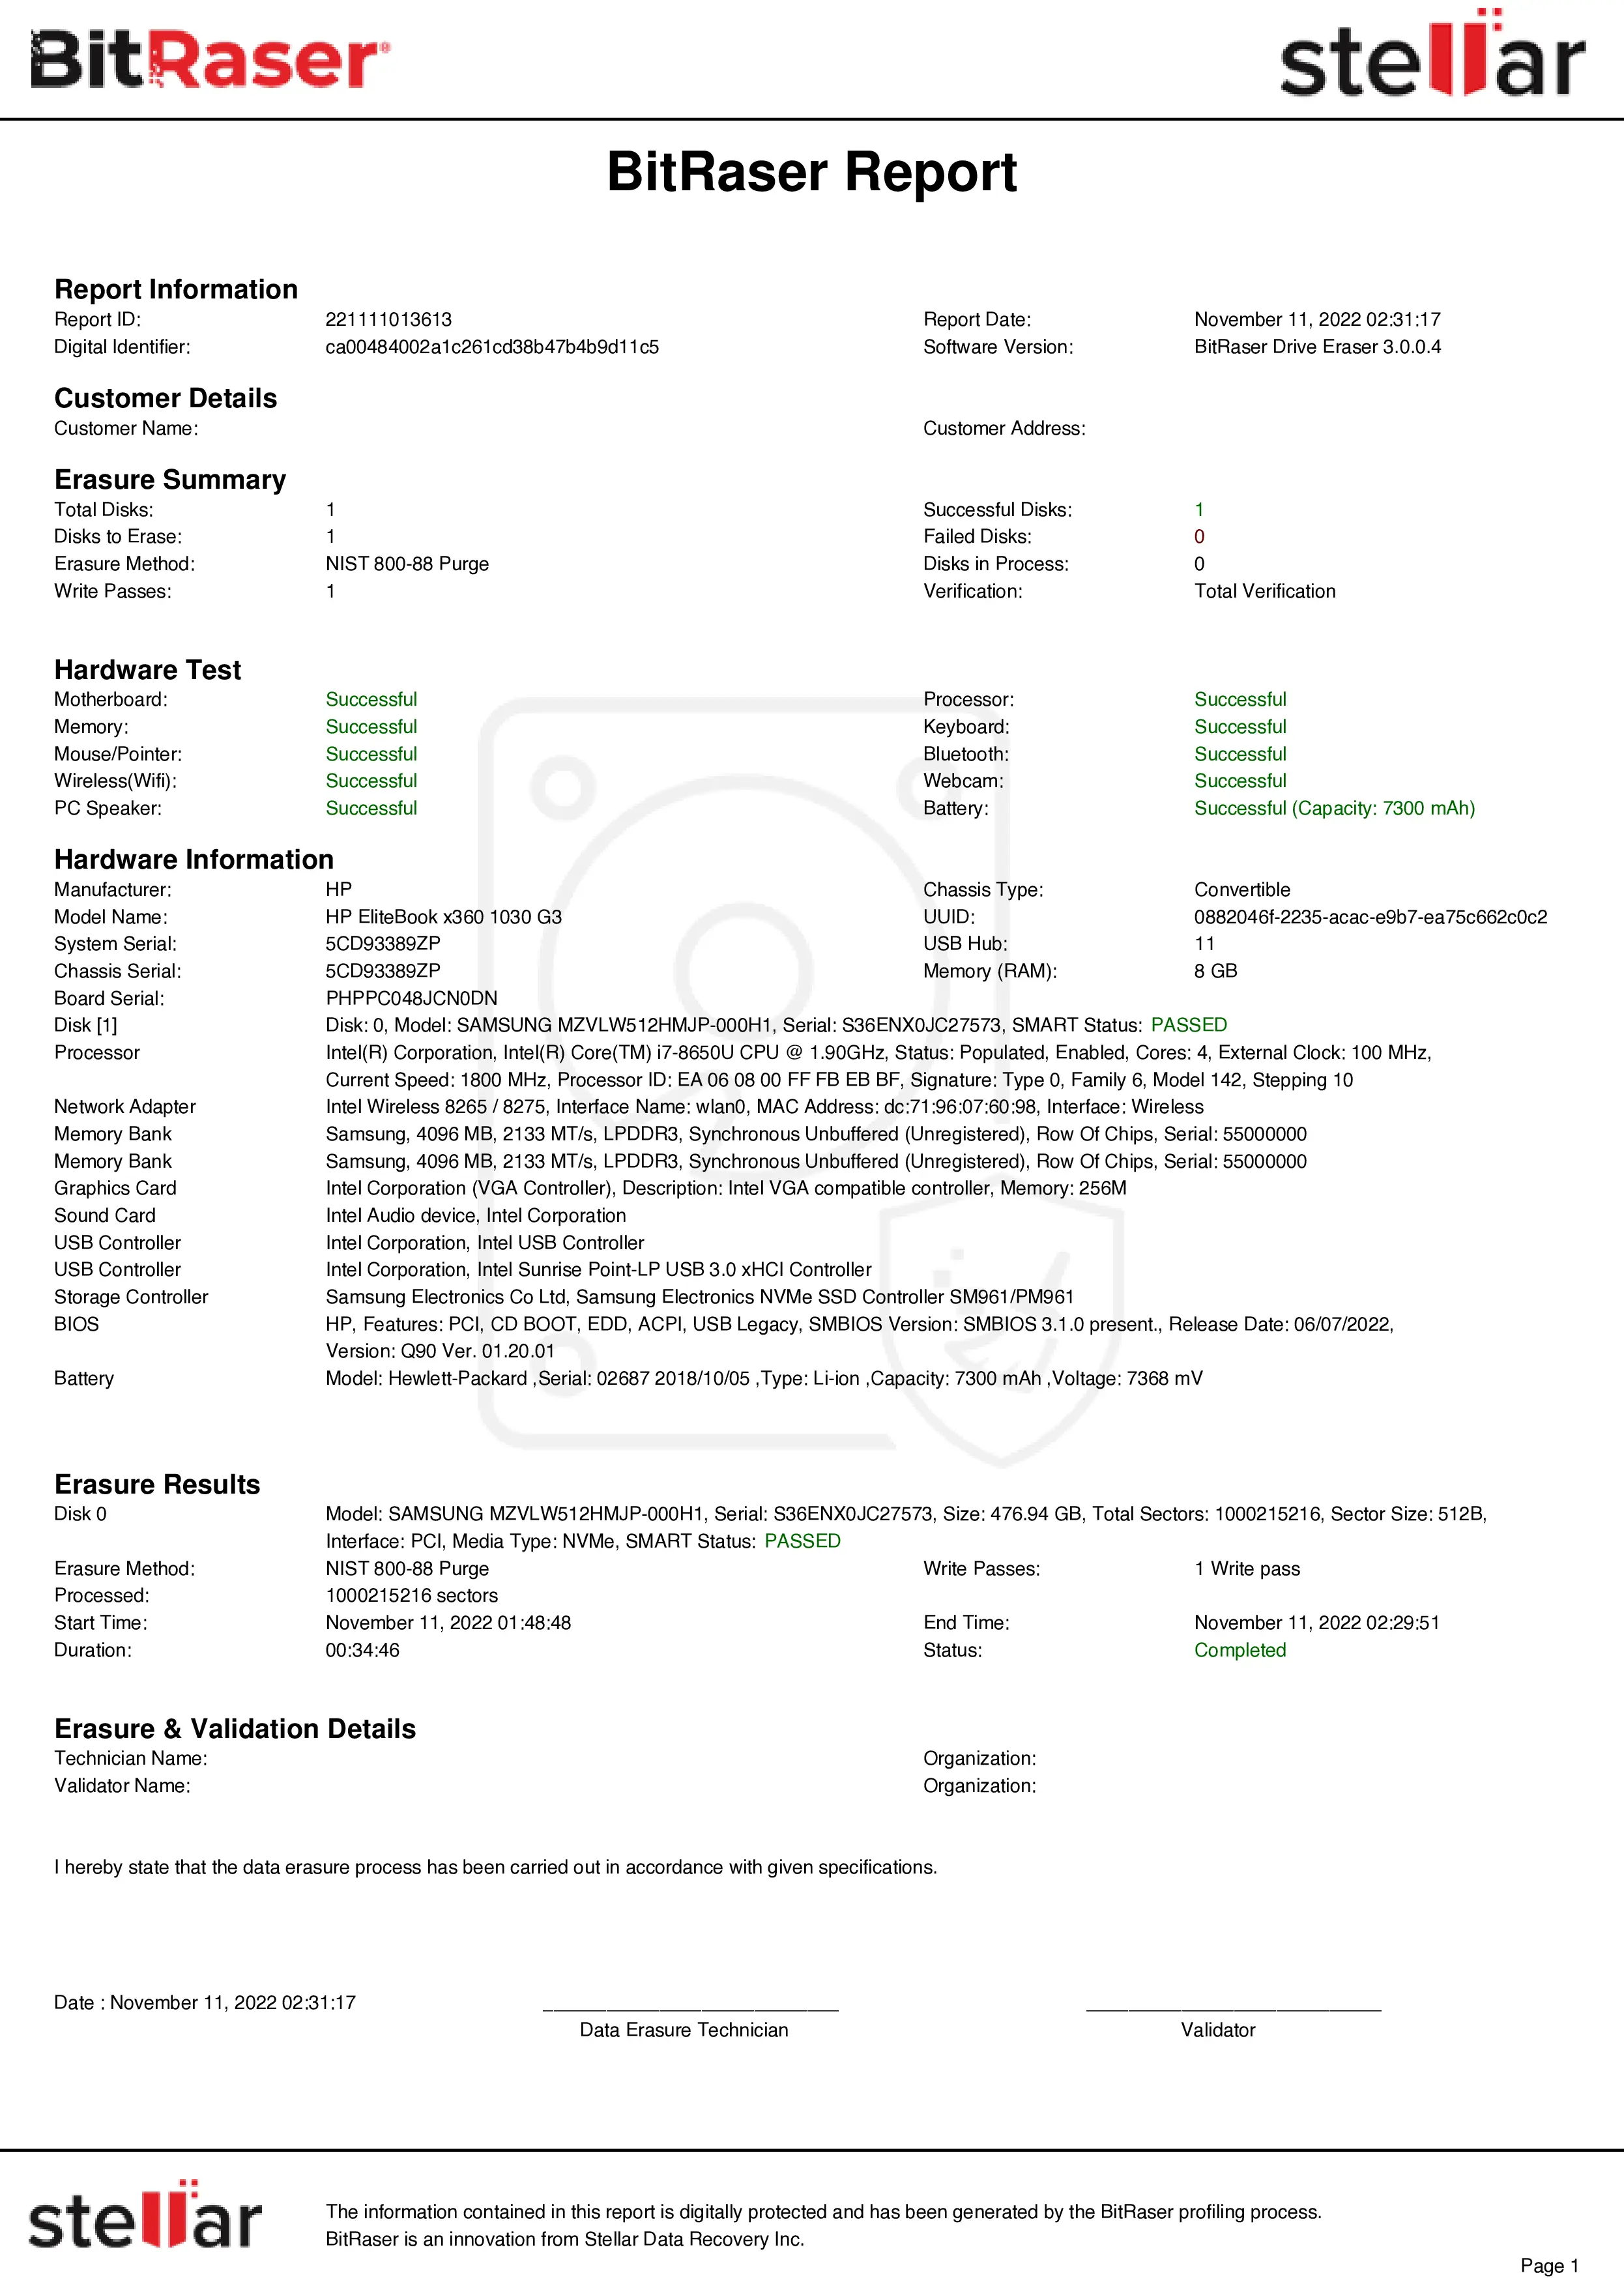
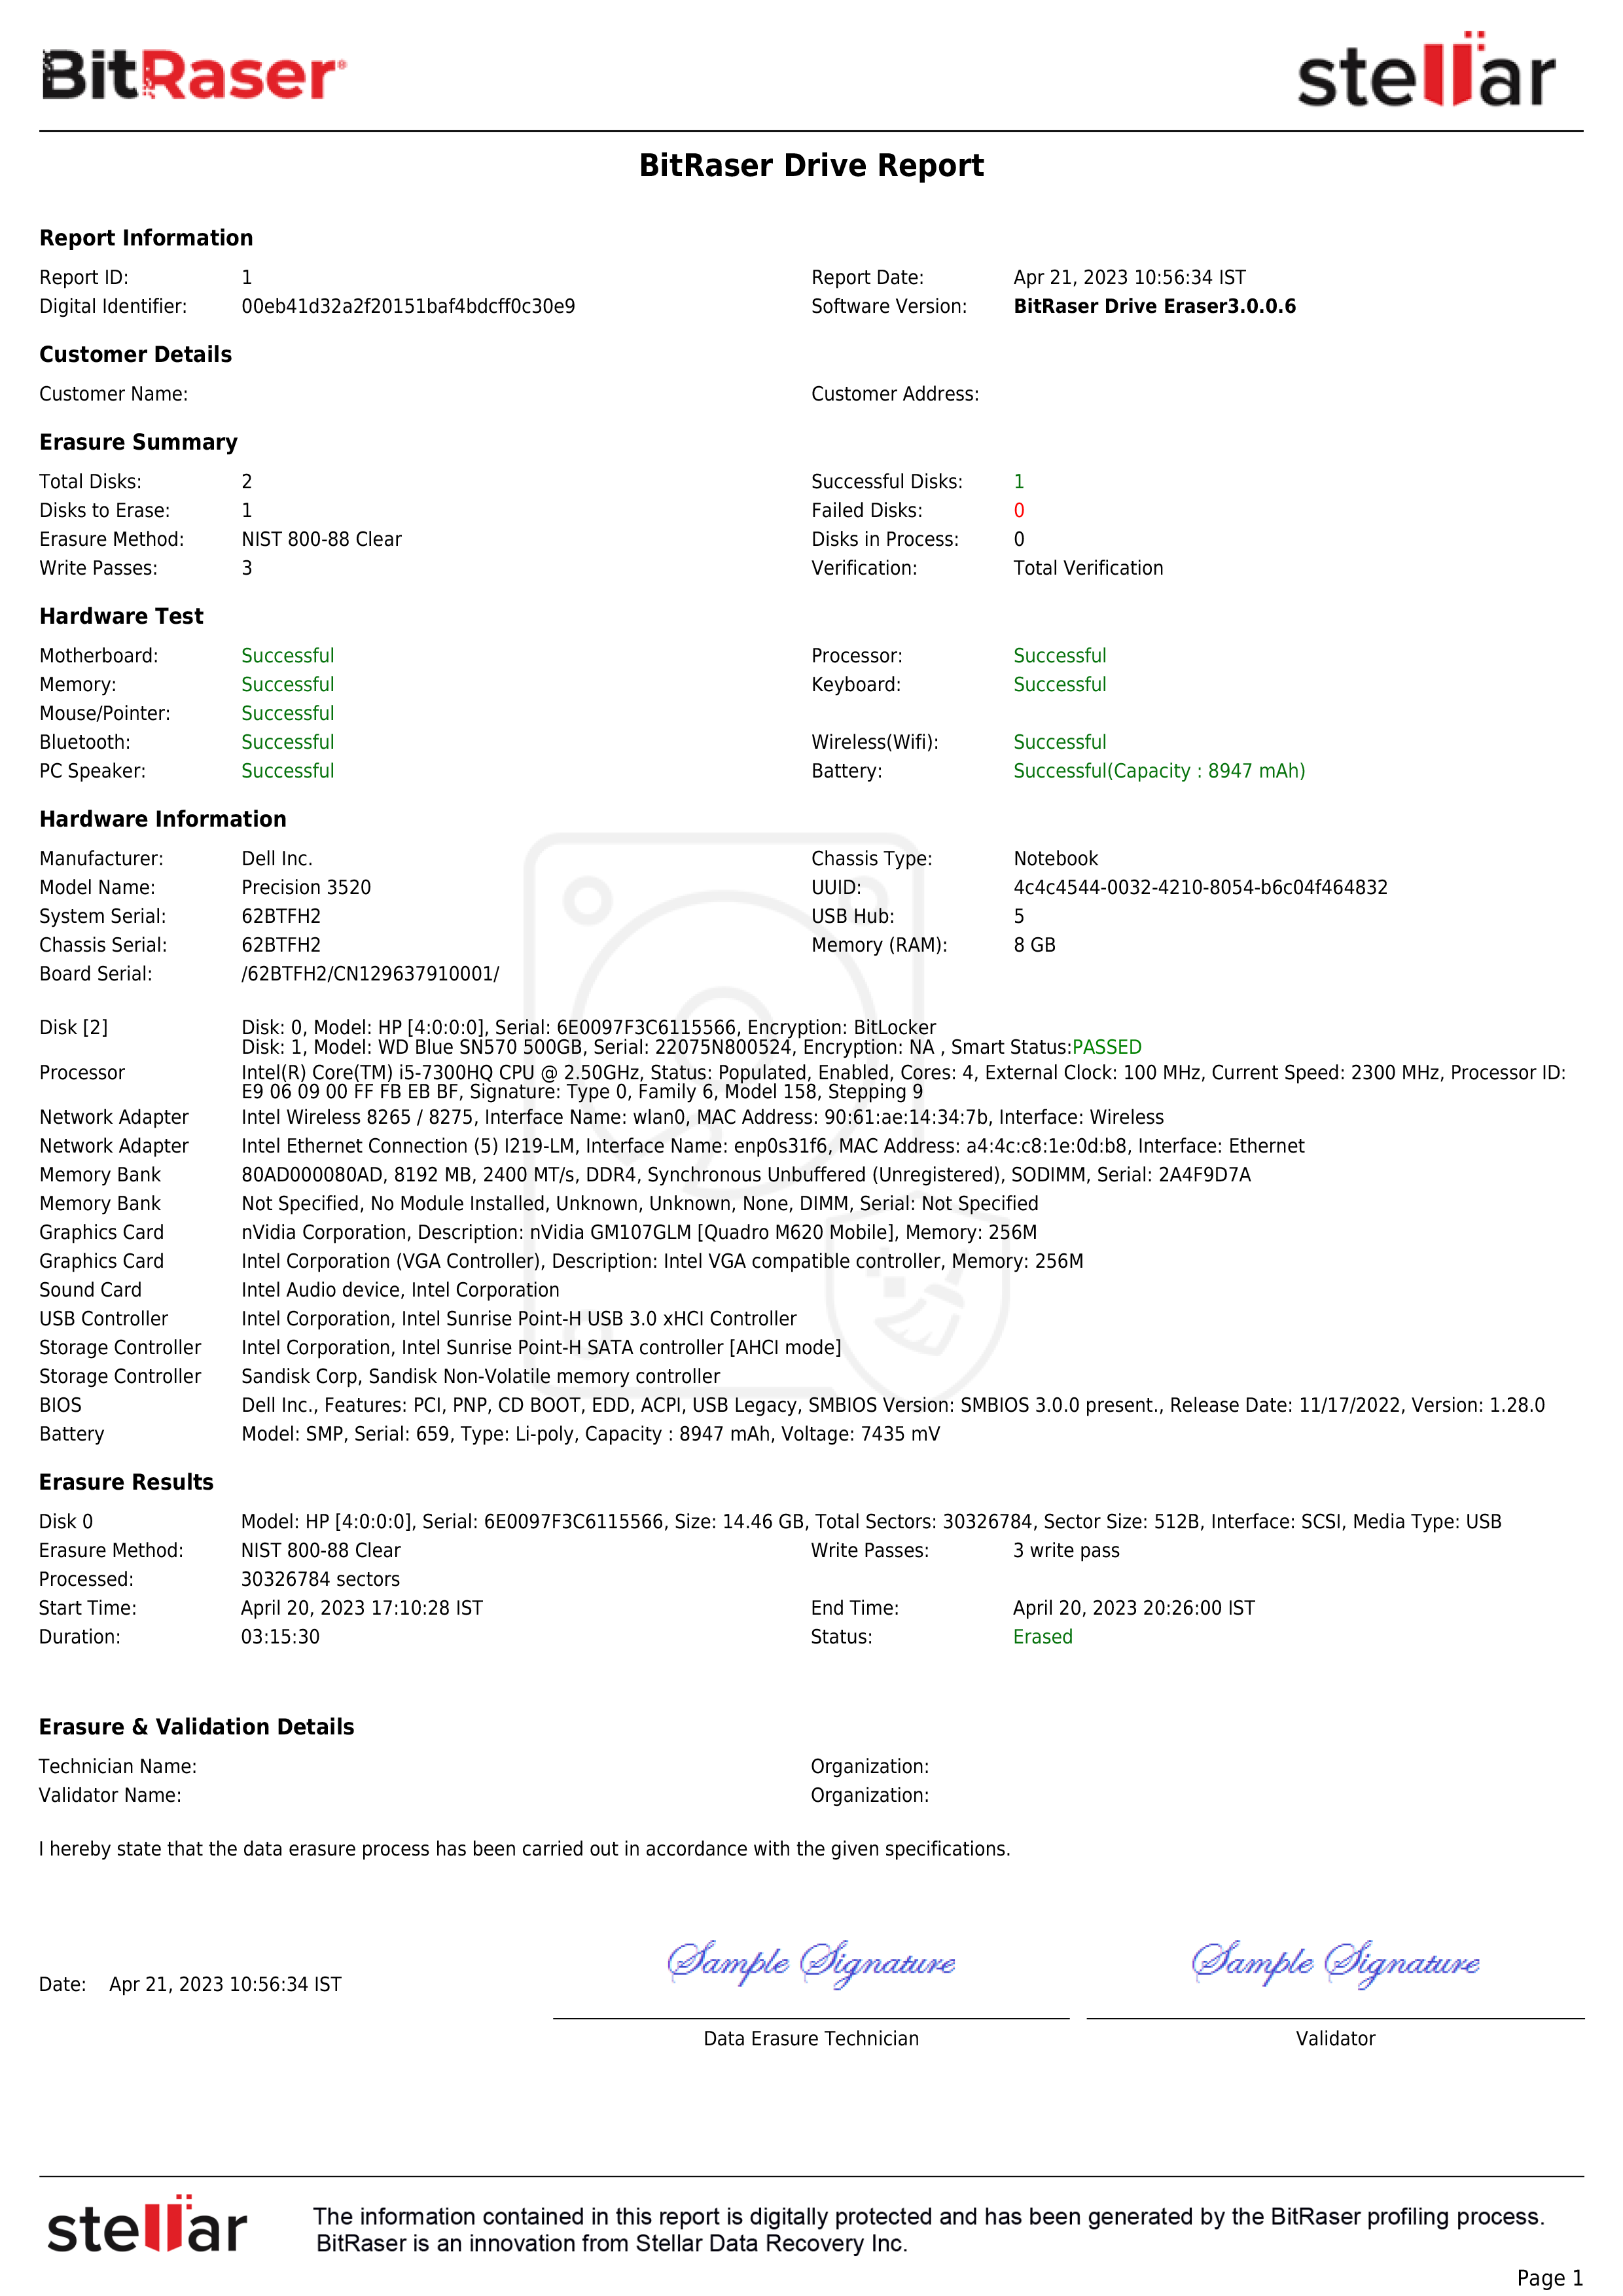
Congratulations! You have understood how to wipe NVMe drive and have successfully erased it. A tamper-proof data eraser report and certificate will automatically be saved in your BitRaser Cloud account.

