Hewlett-Packard, or HP, introduced its high-end business laptops and mobile workstations, the HP EliteBook Series, in 2008. Designed to meet the stringent MIL-STD-810 standards, these laptops are engineered for reliability and performance in demanding environments. In July 2024, HP unveiled the EliteBook Ultra G1q series, the latest evolution in this lineup. EliteBooks combines sleek, sturdy designs with cutting-edge technology. They are known for their powerful processors, enhanced speed, and comprehensive functionality, making them a preferred choice for businesses worldwide.
However, once these EliteBooks reach the end of their lifecycle and have to be returned, resold, repurposed, recycled, donated, or disposed of, securely erasing all stored data is critical for meeting compliance with data protection laws and industry regulations.
The KB will provide steps to securely erase an HP EliteBook with BitRaser Drive Eraser software.
Wipe HP EliteBook using BitRaser with NIST 800-88 Purge Method
Using BitRaser Drive Eraser software, you can wipe all laptops, including HP EliteBooks model series like EliteBook Ultra, EliteBook X, EliteBook 1040 G10, HP EliteBook x360 1040 G10, EliteBook 1040 G9, HP EliteBook v 630, EliteBook G9 630 Series, EliteBook G9 830 Series, and HP Elite x360 1040 G9. Whether the EliteBook has an HDD or an SSD/NVMe, BitRaser Drive Eraser software is a one-stop solution for wiping any HP EliteBook model. The recommended method to wipe HP EliteBooks is using the NIST 800-88 Purge method, a method best suited for wiping SSDs.
Note: NIST 800-88 recommends the following methods for securely erasing SSDs: Overwrite, Block Erase, and
Cryptographic Erase.
While multiple HP EliteBook models have been announced for each generation, the data-wiping process for permanently erasing data stored on the EliteBook remains unchanged.
We will erase an HP EliteBook 640 G9 for this KB using BitRaser Drive Eraser software that supports the NIST 800-88 standard. (Refer to Image 1)

Image 1: HP EliteBook 640 Image Source: HP
Step 1: Download the Cloud Variant of BitRaser Drive Eraser ISO from the BitRaser Cloud console. The ISO is located under the ‘Download BitRaser’ section. Click on 'Cloud Variant: BitRaser Drive Eraser' to begin the download. (Refer to Image 2)
This ISO is compatible with all laptop makes and models. However, for HP EliteBook and HP ProBook models specifically, please contact our tech support team via chat or email to request a special ISO file.
Note: If you are wiping multiple HP EliteBooks over a network, you need to download the Network Cloud ISO from the Support section of the BitRaser Cloud Console. The deployment steps will differ; please refer to the article How to Wipe Over a Network - PXE Boot.
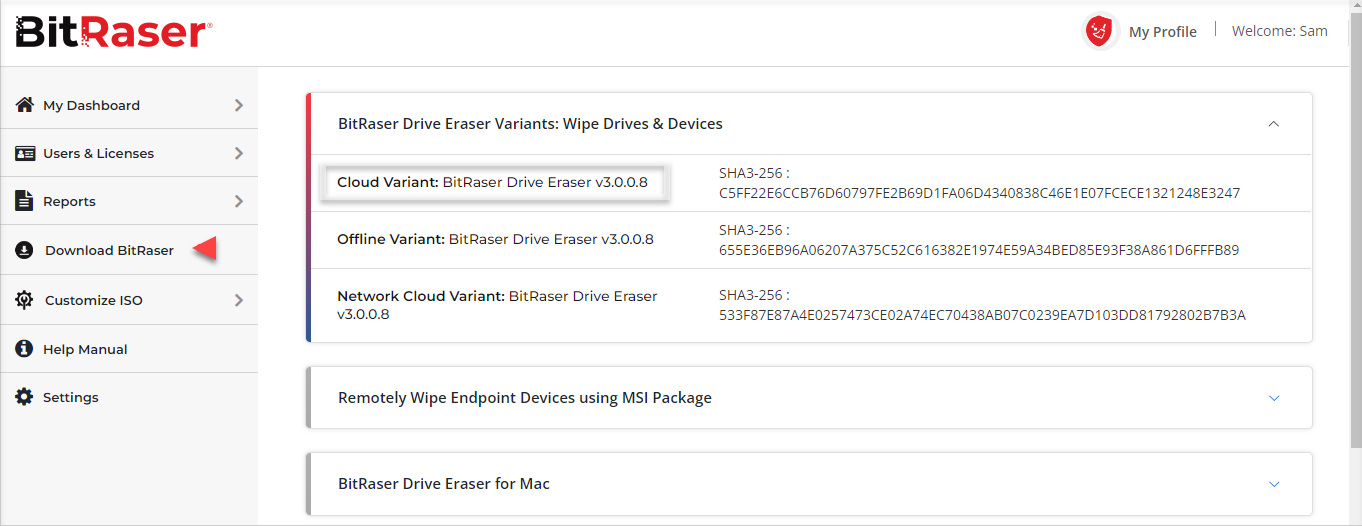
Image 2: Download BitRaser Drive Eraser ISO from BitRaser Cloud
Step 2: Download Rufus (a Third-party Bootable USB Creator application). Connect a USB drive to your HP EliteBook and open the Rufus application; select the connected USB and the downloaded BitRaser ISO file. Now, click ‘START’ to create your BitRaser bootable USB. (Refer to Image 3)
For step-by-step instructions on how to create a bootable USB using Rufus, you may read our KB article.
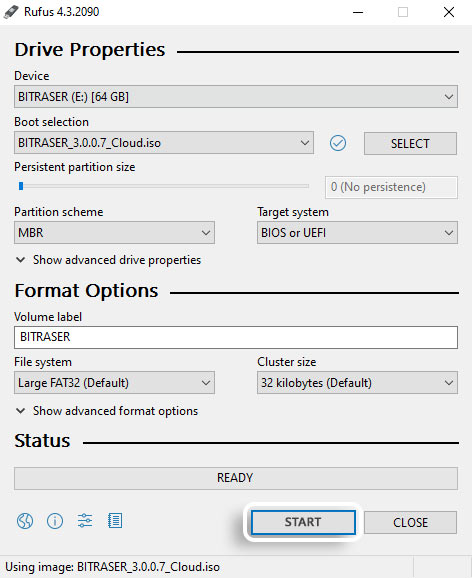
Image 3: Create a BitRaser Bootable USB to Erase HP EliteBooks
Step 3: Restart the HP EliteBook with BitRaser by accessing the Boot Menu by pressing the ‘Esc’ key as soon as you power on the machine. Select and boot the device with the BitRaser USB you created. (Refer to Image 4)
Note: The HP EliteBooks series comes with pre-activated Secure Boot in all Windows 10 and above models by default, prohibiting the use of bootable drives or CDs/DVDs. To use BitRaser, you need to disable secure boot to boot the HP EliteBook with BitRaser USB. You may refer to our KB article on How to Disable Secure Boot.
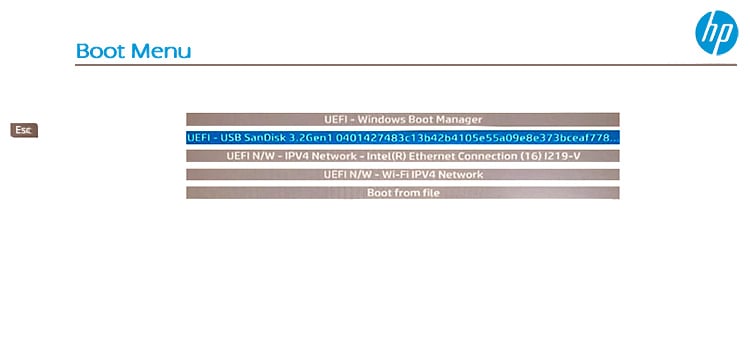
Image 4: Select BitRaser USB to Boot HP EliteBook with BitRaser
Step 4: Once the device boots with BitRaser, your internal and external drives are listed on the BitRaser main screen. Here, in image 5, only one internal drive is shown. (Refer to Image 5)
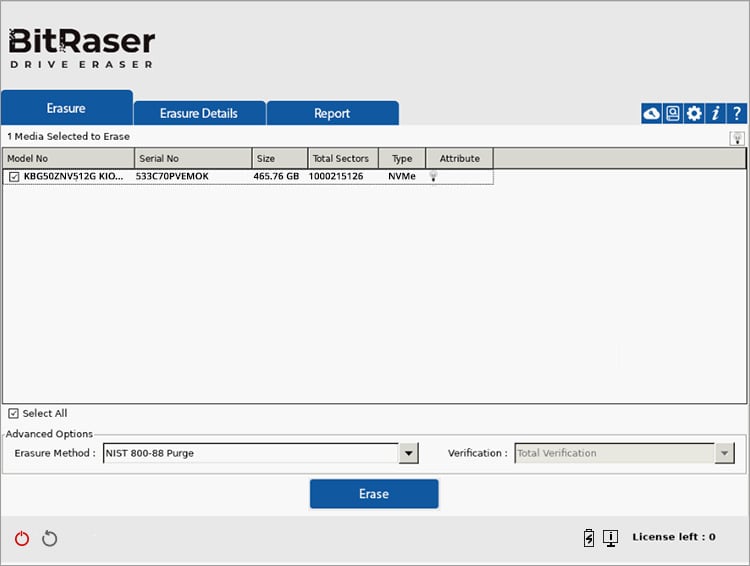
Image 5: BitRaser Main Screen with HP EliteBook Drive
Step 5: Connect the application to the internet to get your erasure licenses and automatically upload erasure reports to the BitRaser cloud account.
To do this, go to ‘Settings’ and select the 'Network' tab, then enter your 'Ethernet' or 'Wireless' details. Now, click 'Connect'. (Refer to Image 6)
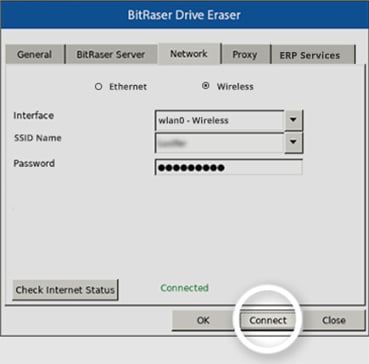
Image 6: Connect the Application to the Internet
Step 6: Now connect the application to the BitRaser cloud by entering the credentials received by e-mail. If you cannot find your e-mail credentials, you may create a ticket on the BitRaser Support page. (Refer to Image 7)
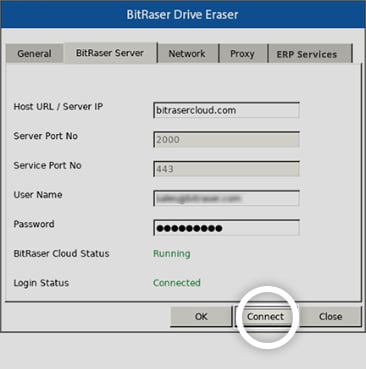
Image 7: Connect Application to BitRaser Cloud
Step 7: Now, select the erasure method you want to use, the verification type, and the drives you want to wipe, then click ‘Erase.’ Since, we are wiping HP EliteBook that has SSD, the method chosen by default is NIST 800-88 Purge. You will see an alert box informing you that all data will be erased beyond recovery; click ‘Yes.’ (Refer to Image 8)
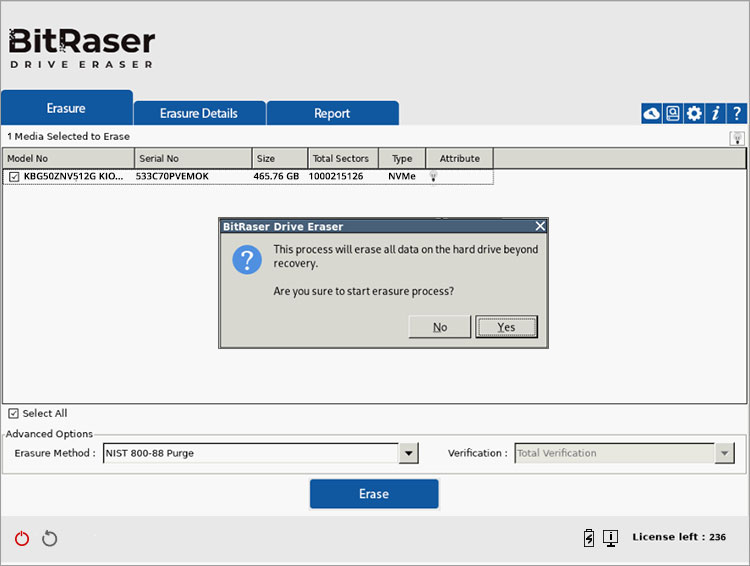
Image 8: Select the Erasure Method and Other Details, then Click Erase. Click Yes in Alert Windows
The HP EliteBook erasure process has begun, and you can see the erasure progress on your screen. (Refer to Image 9)
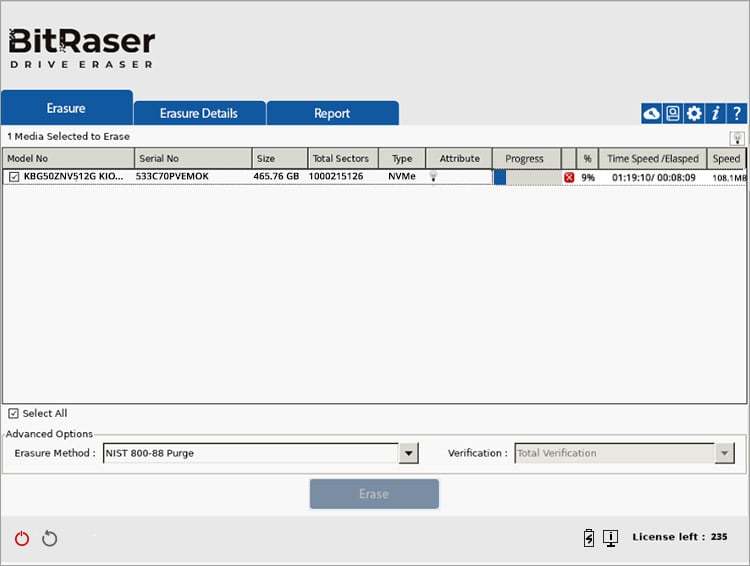
Image 9: BitRaser Drive Eraser Wiping HP EliteBook
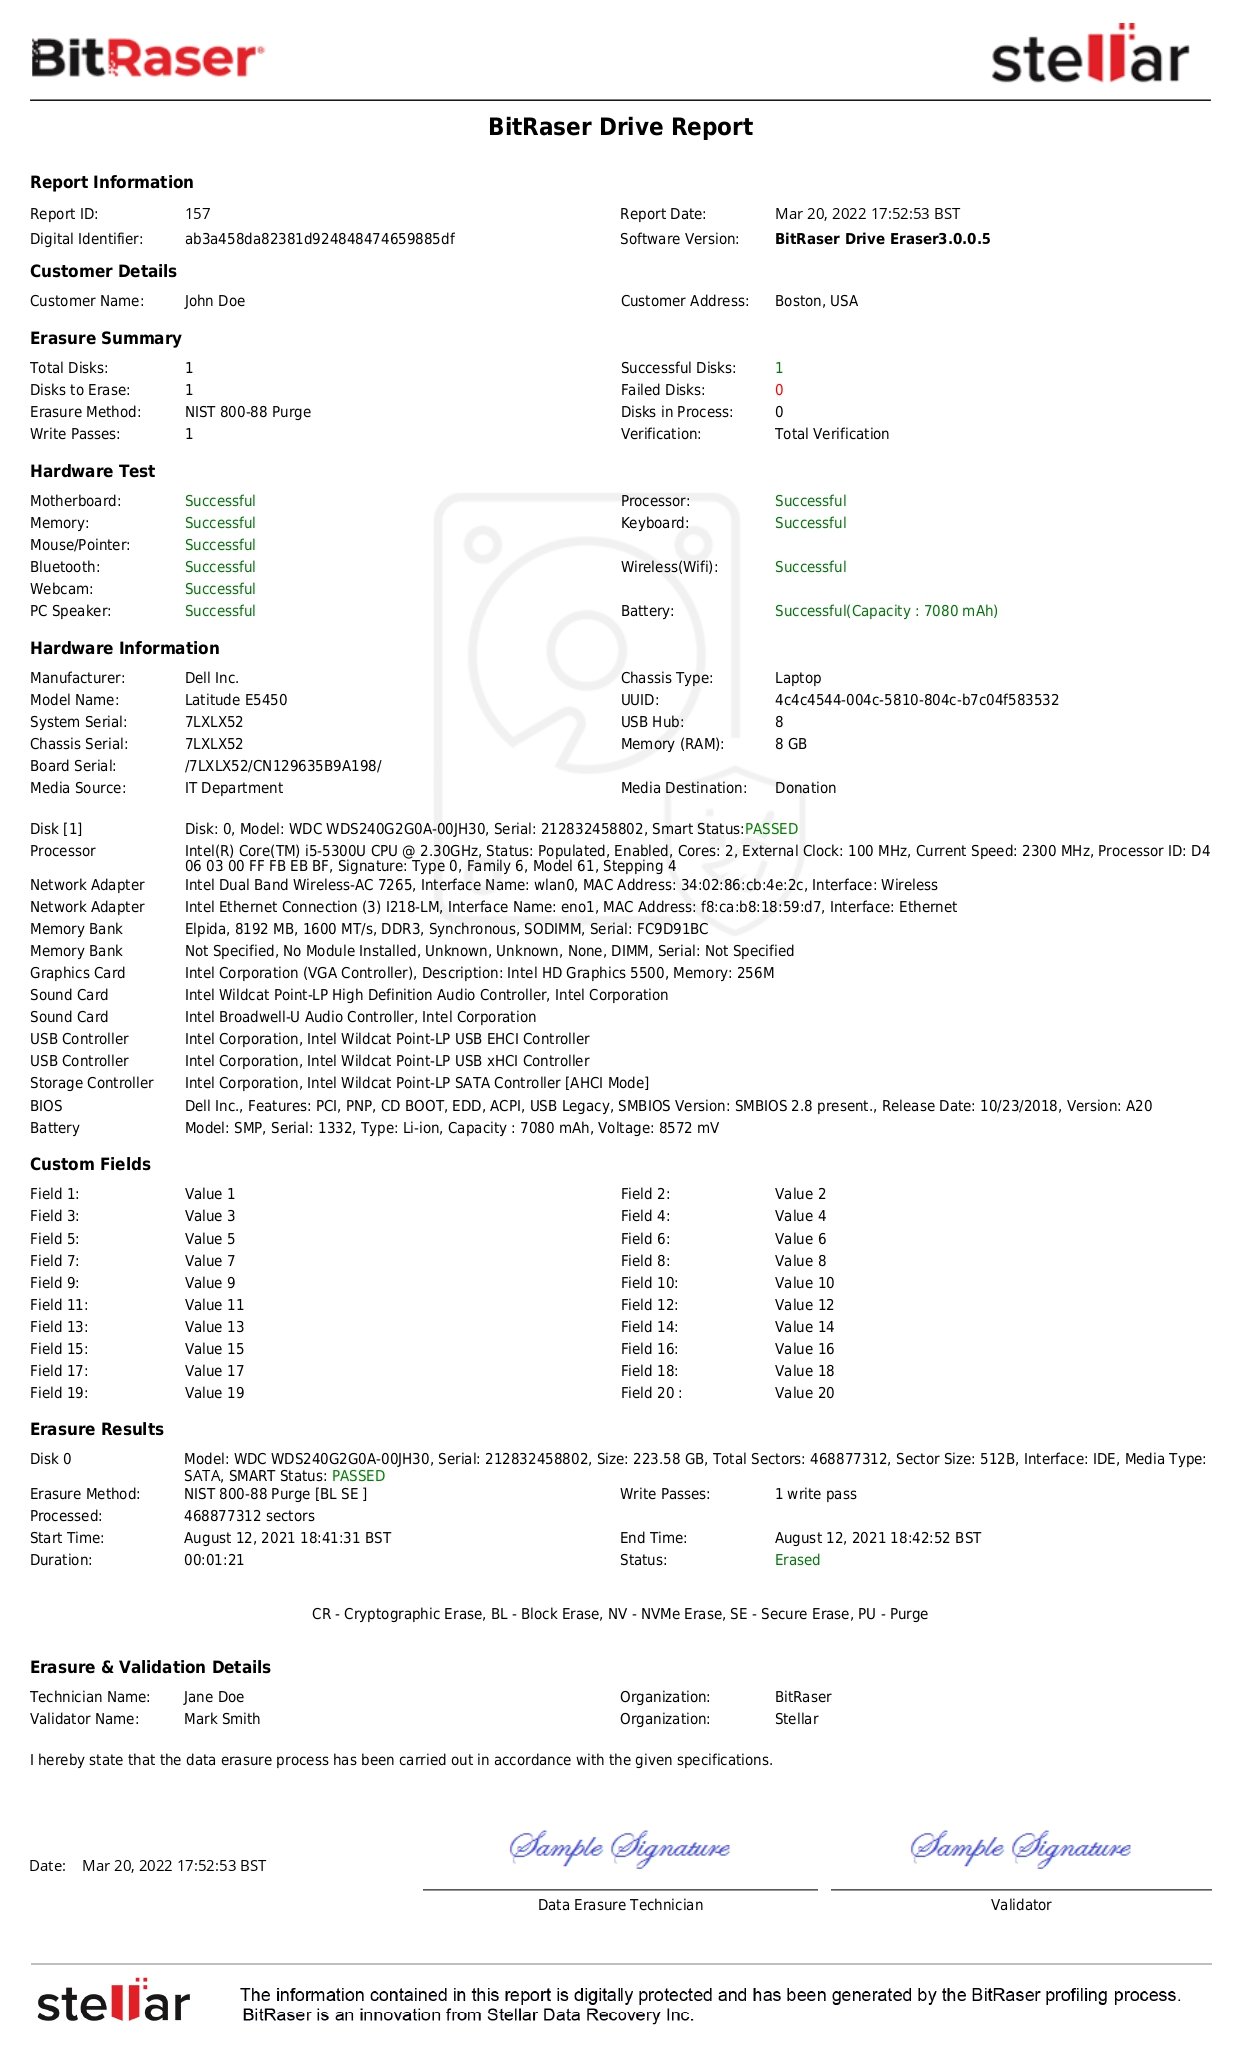
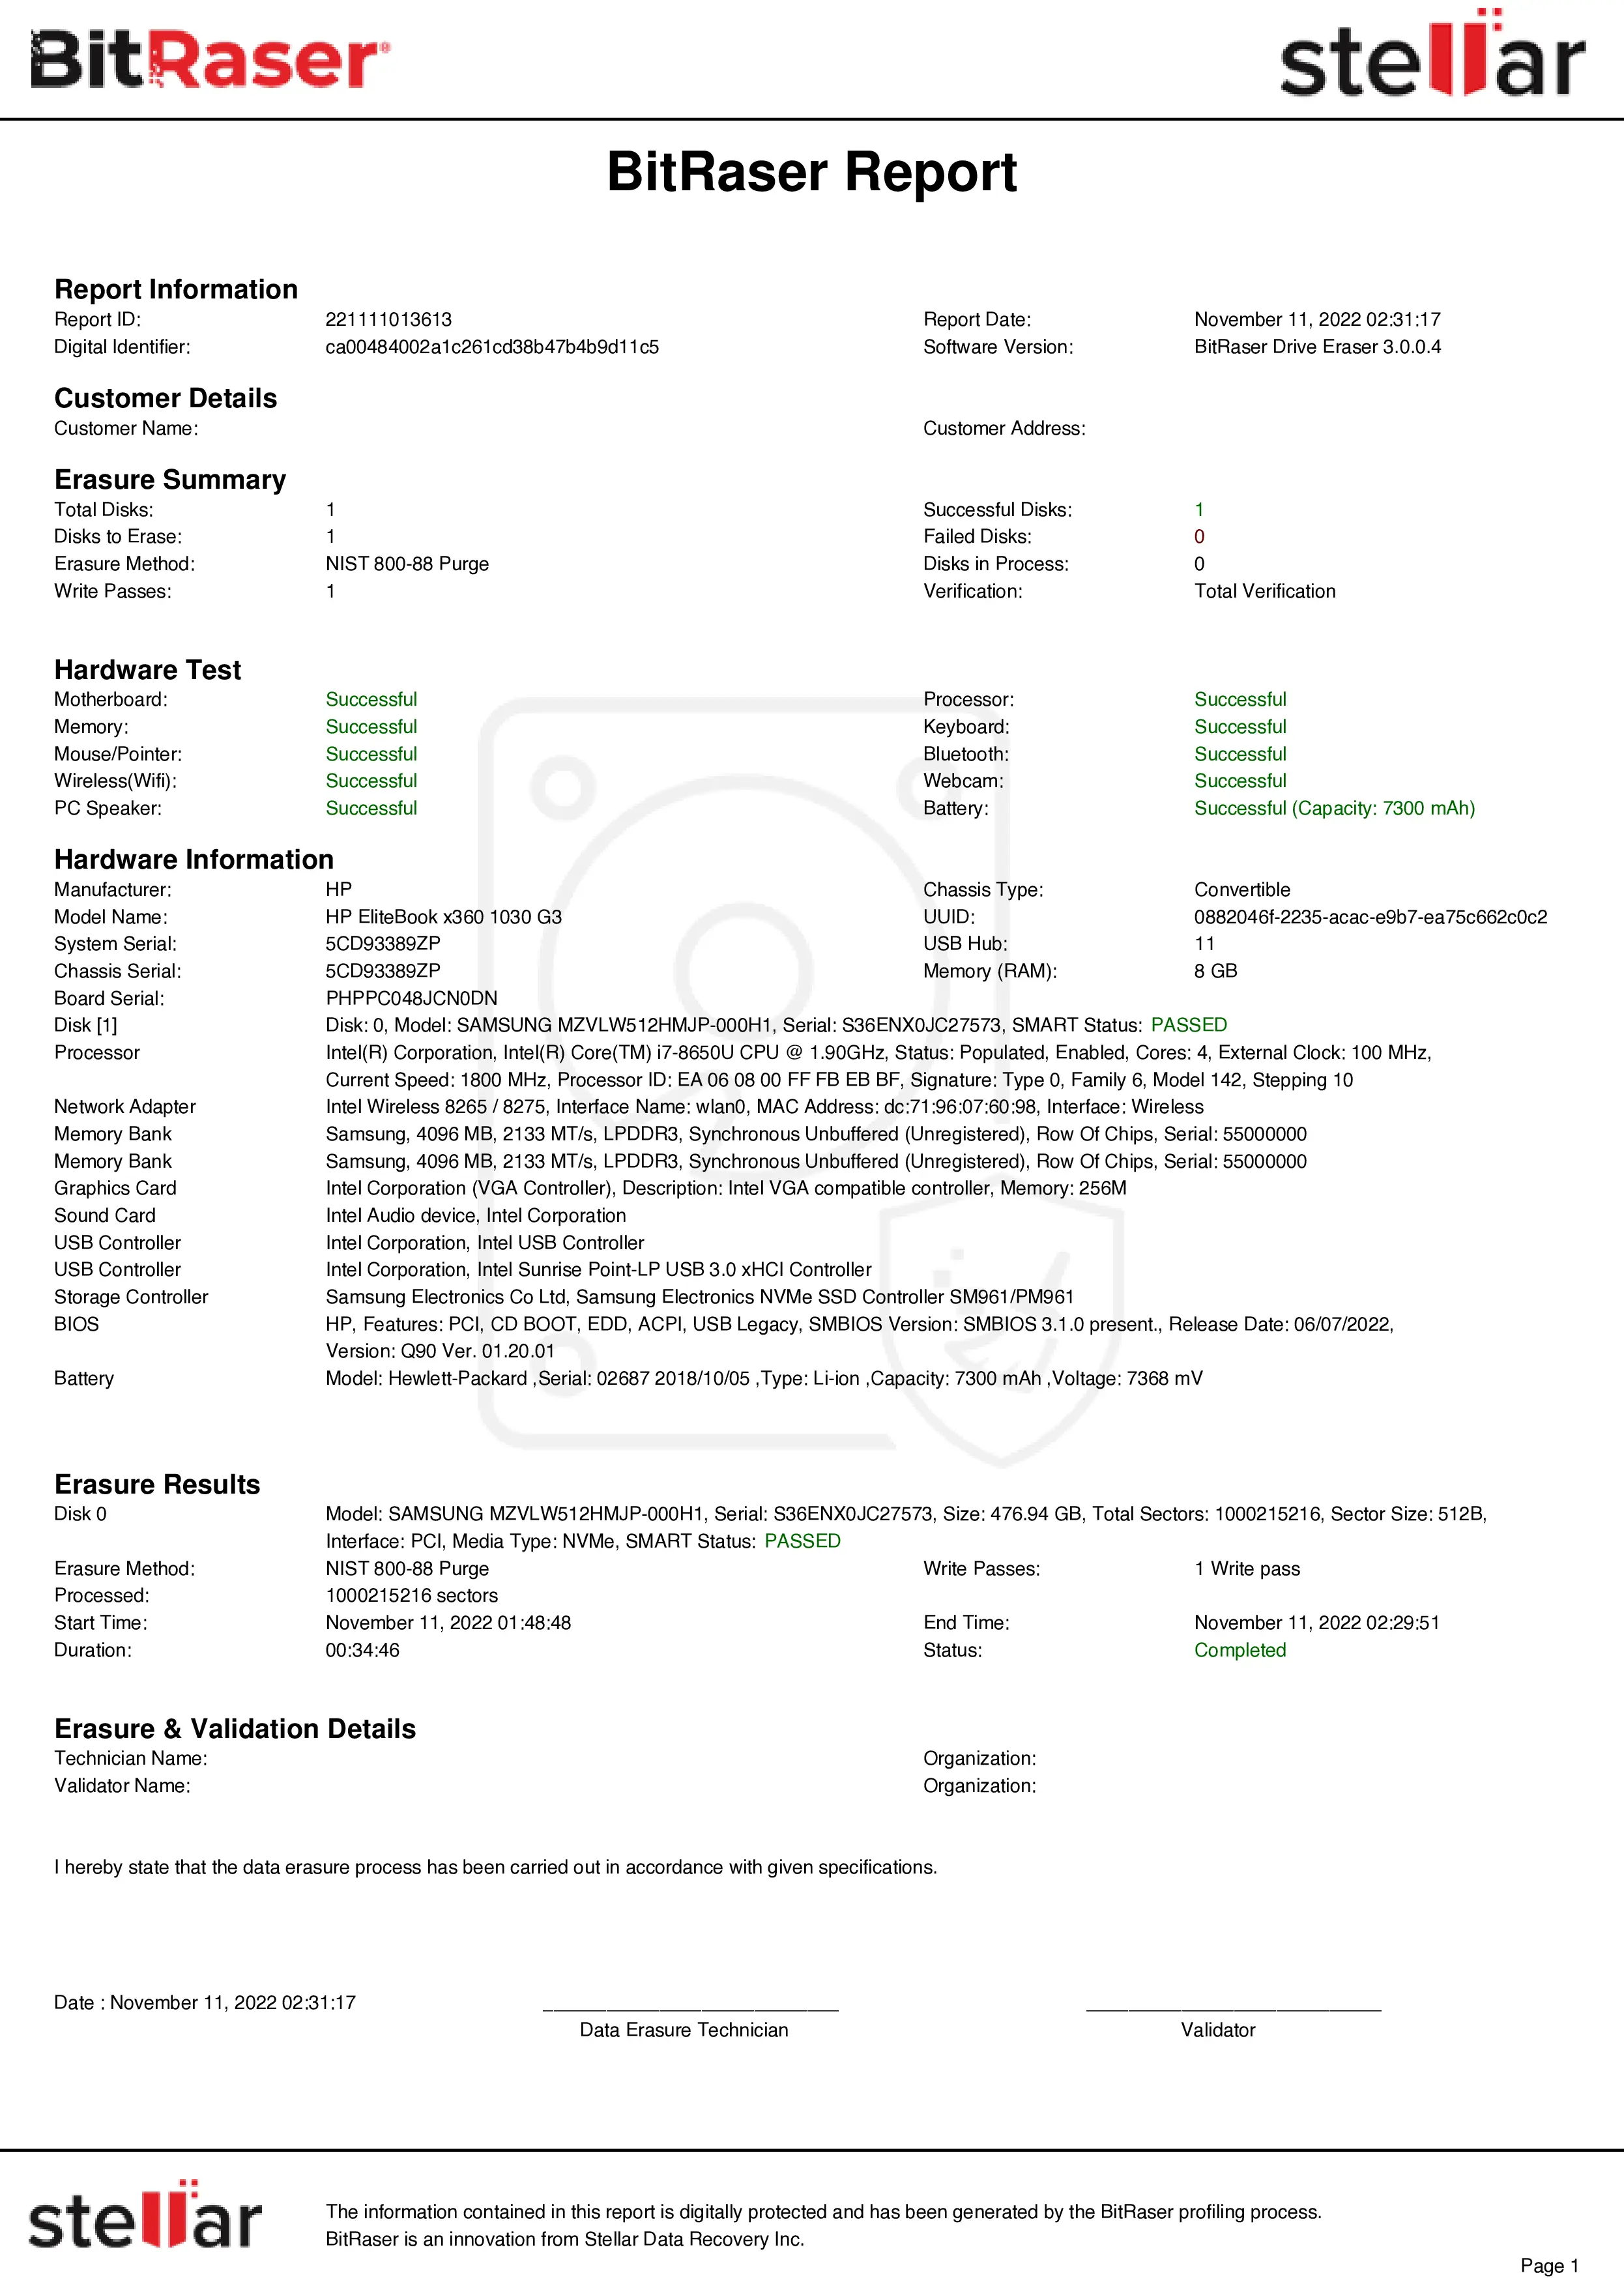
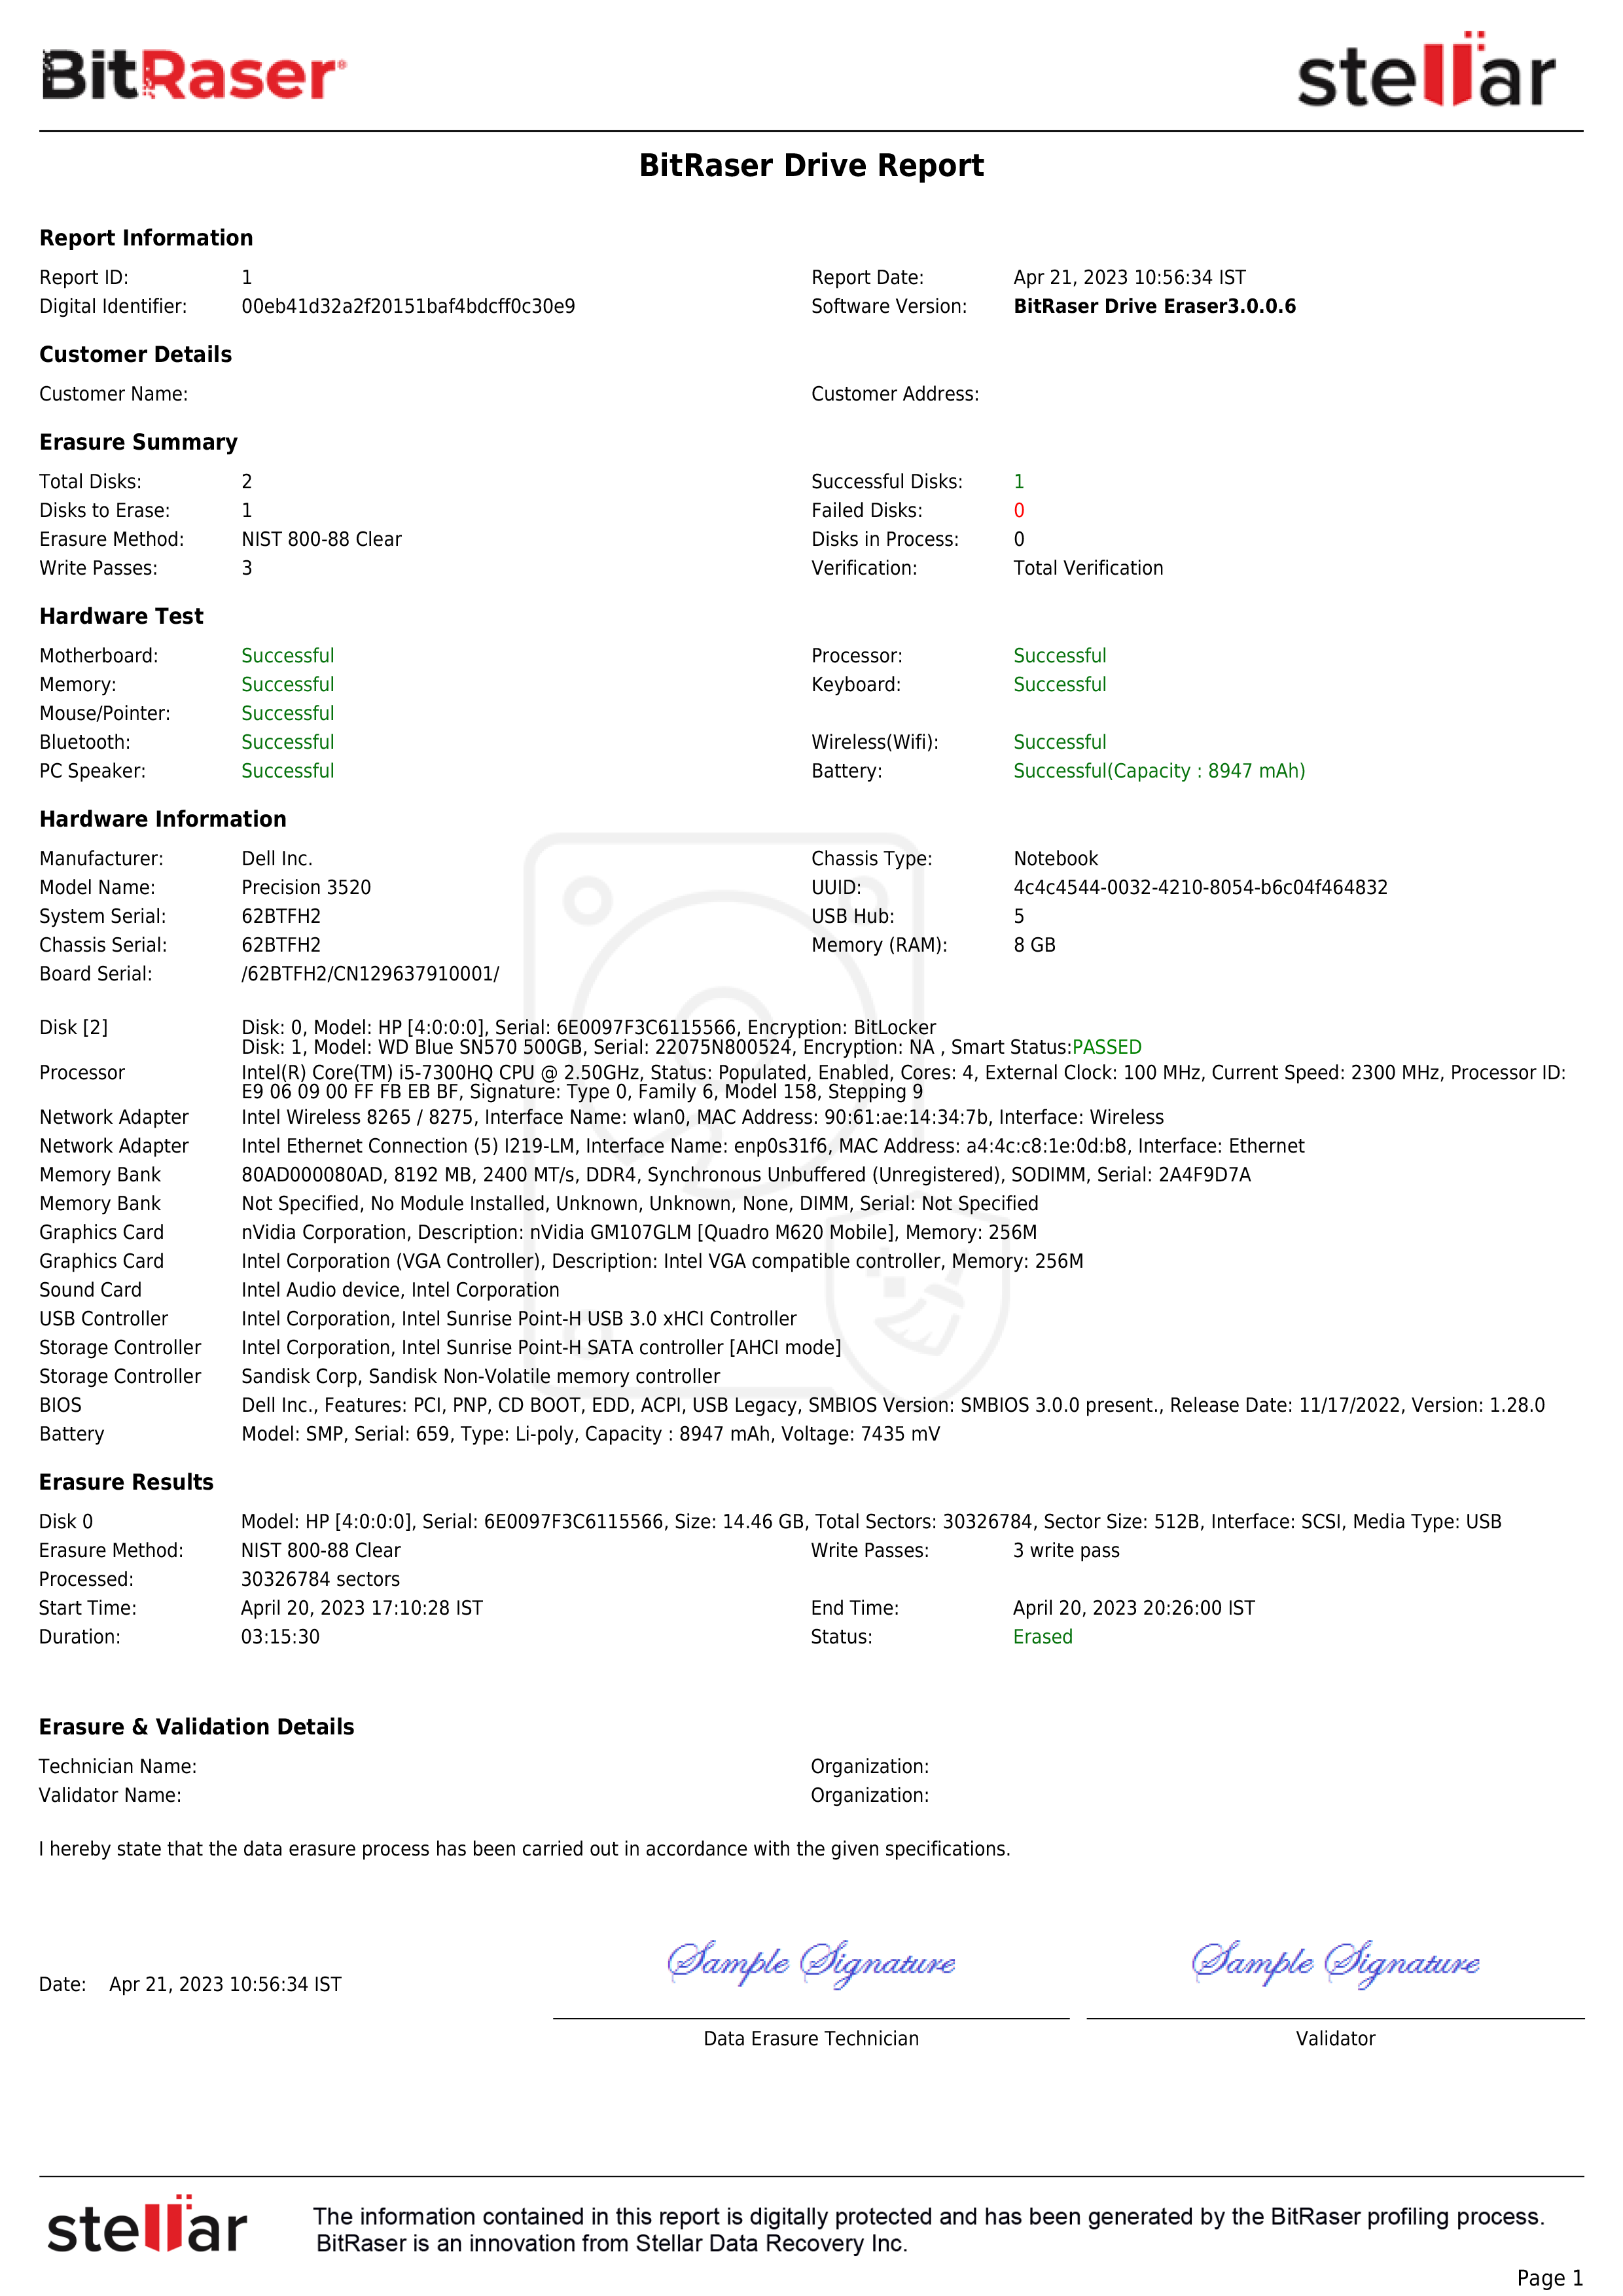
Once the process is finished, the HP EliteBook erasure report will automatically be uploaded to your BitRaser Cloud account.
P.S.: For facilities without internet, the BitRaser Drive Eraser Offline variant is available to wipe HP EliteBooks. Ask our sales team about this through chat.

