Businesses widely use Dell EMC storage solutions for their high-performance storage capabilities and reliability, making them essential for managing vast amounts of critical data. However, when upgrading, decommissioning, or repurposing these servers, ensuring permanent data erasure is crucial to prevent unauthorized access and comply with data privacy regulations. A secure erasure tool like BitRaser Drive Eraser guarantees complete data sanitization, ensuring no residual data remains on the server drives.
BitRaser Drive Eraser is available as a downloadable ISO file for secure server wiping. It can be deployed via a bootable USB or mounted virtually for remote erasure. In this KB article, we will show how to erase a Dell EMC PowerEdge R550 server via the LOM (Lights Out Management) iDRAC interface. While the deployment method differs, the erasure steps remain the same for both. If you want to see the USB method to erase servers, you may refer to our KB: Erase Dell PowerEdge Servers with RAID Storage
To learn how to access the server remotely and perform RAID dismantling, refer to our KB article: How to Perform RAID Dismantling on Dell Server?
The KB article has been divided into 2 stages for ease of navigation:
Stage 1: Download & Boot Dell Server with BitRaser Drive Eraser ISO
Stage 2: Erase Dell EMC PowerEdge Server with BitRaser
Let’s see the steps involved.
Stage 1: Download & Boot Dell Server with BitRaser Drive Eraser ISO
- Step 1: Go to BitRaser Cloud and log in using the credentials that were sent via e-mail after you purchased the software. (Refer to Image 1)
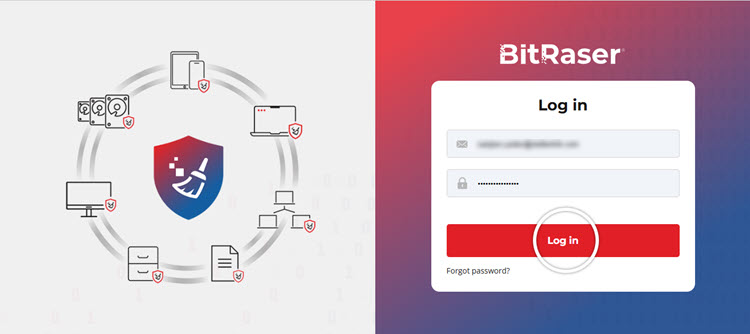
Image 1: BitRaser Cloud Console Log-in Screen
- Step 2: Navigate to the Download BitRaser section and click on ‘Network Cloud Variant: BitRaser Drive Eraser’ to download the software. (Refer to Image 2)
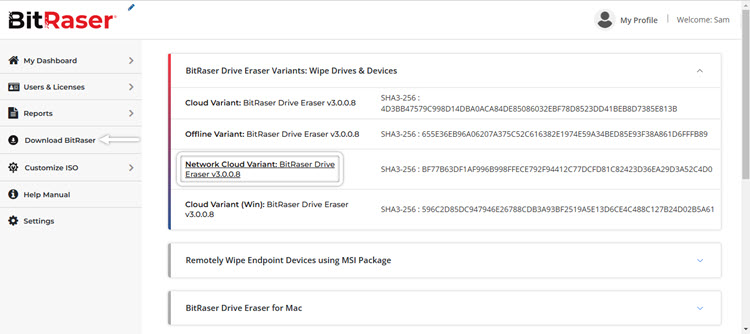
Image 2: Download BitRaser Drive Eraser Network Cloud Variant
- Step 3: Once connected to the server, scroll down and start the Virtual Console. This provides a virtual rendering of the server screen. (Refer to Image 3)
This step requires a remote connection to the server via iDRAC.
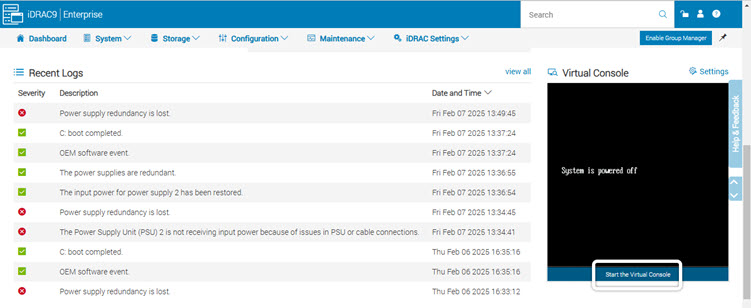
Image 3: iDRAC 9 Dashboard, Start Virtual Console
- Step 4: Power down the server, then navigate to the top menu and click on ‘Virtual Media.’ In the pop-up window, select ‘Connect Virtual Media.’ (Refer to Image 4)
Next, click ‘Choose File’ and select the downloaded BitRaser Drive Eraser ISO file, then click ‘Open’ followed by ‘Map Device.’ (Refer to Image 5)
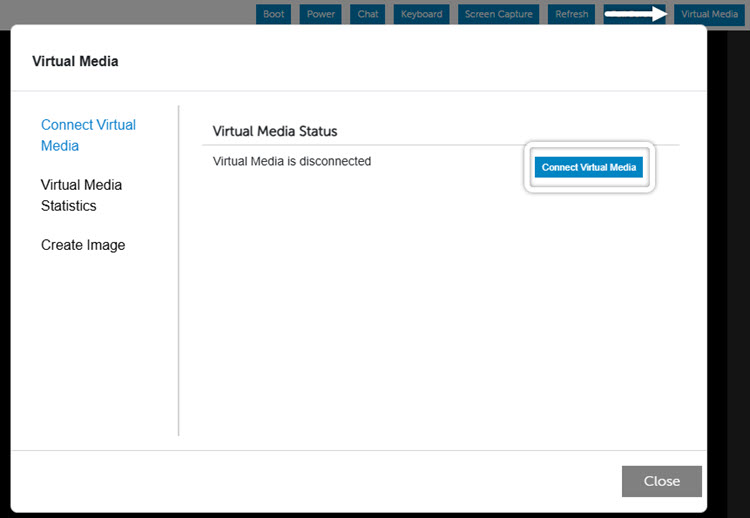
Image 4: Connect Virtual Media
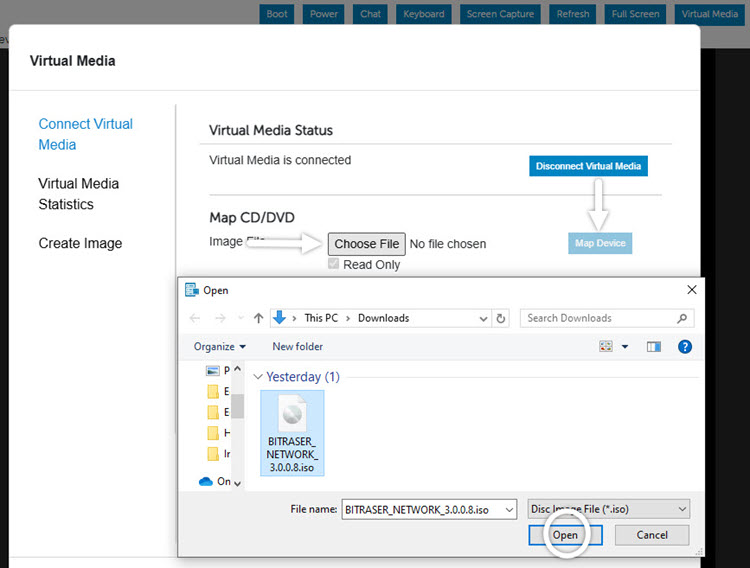
Image 5: Mount BitRaser Drive Eraser ISO
- Step 5: To securely erase the Dell EMC server, boot the system with BitRaser ISO. Go to the Boot menu and select Virtual CD/DVD/ISO. (Refer to Image 6)
Click ‘Yes’ in the ‘Confirm Boot Action’ screen. (Refer to Image 7)

Image 6: In Boot Control, Select Virtual CD/DVD/ISO
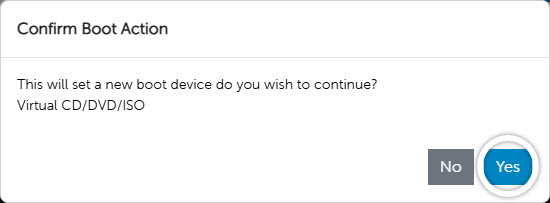
Image 7: Confirm Boot from Virtual ISO
- Step 6: Go to ‘Power’ and click on ‘Power On System.’ (Refer to Image 8)
Click ‘Yes’ in the ‘Confirm Power Action’ window. (Refer to Image 9)
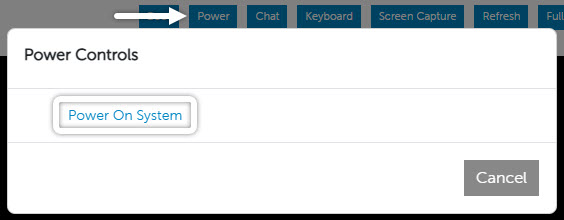
Image 8: Power On System
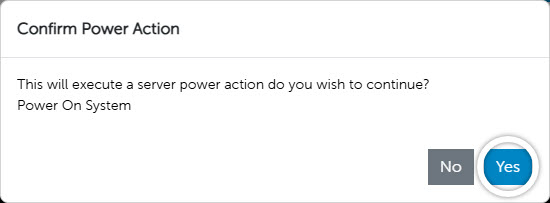
Image 9: Confirm Power Action
The server will boot with BitRaser and is now ready for erasure.
- Step 1: The server automatically boots with BitRaser Drive Eraser and displays all connected drives. (Refer to Image 10)
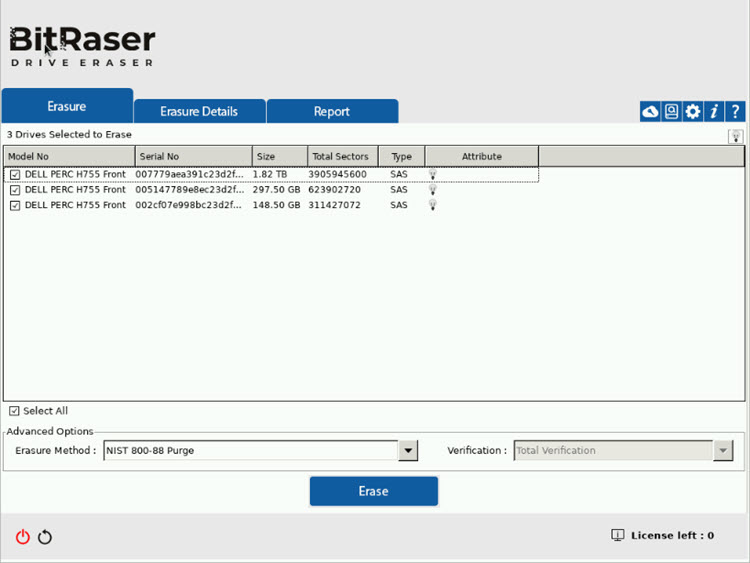
Image 10: BitRaser Drive Eraser Network Main Interface
- Step 2: Connect the application to the Internet and BitRaser Cloud console to fetch erasure licenses by going to settings. Next, connect it to BitRaser Cloud using the credentials received in the mail. (Refer to Images 11 & 12)
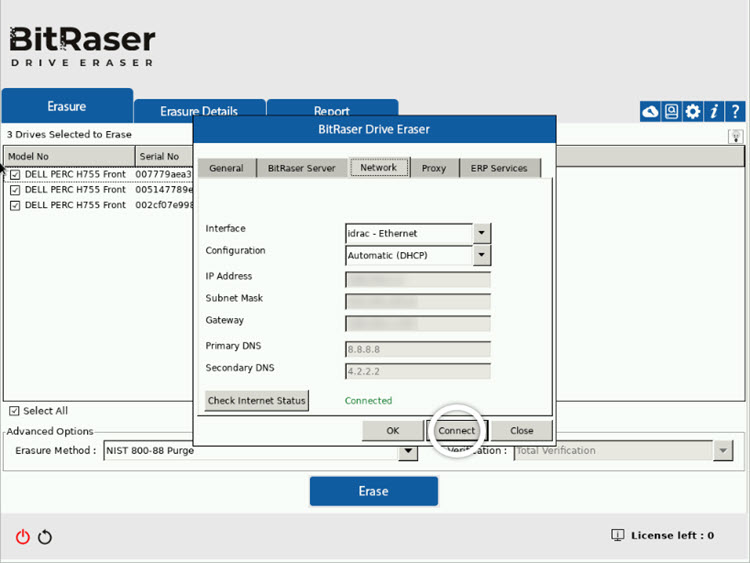
Image 11: Connect BitRaser Drive Eraser Network to the Internet
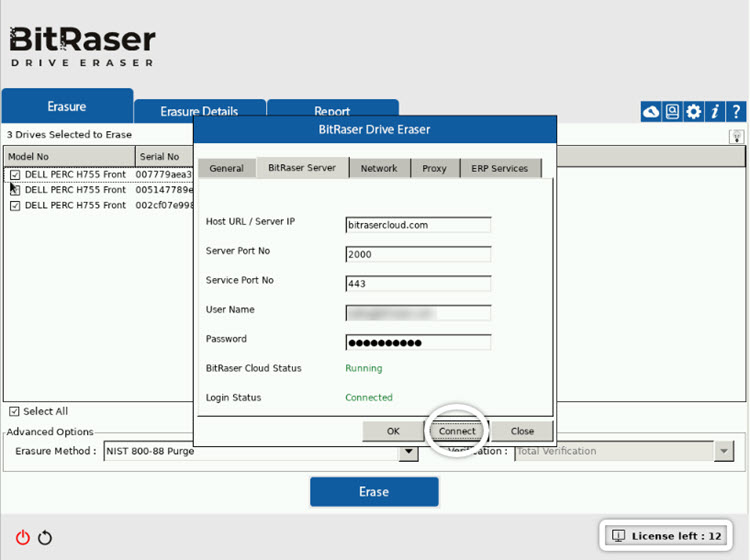
Image 12: Connect to BitRaser Cloud Console
- Step 3: Choose the Erasure Method and Verification Type, then click ‘Erase.’ We’ve selected NIST 800-88 Clear as the erasure method. Total Verification is fixed as the verification type for NIST Clear & Purge methods.
Click ‘Yes’ in the Alert window. (Refer to Image 13)
The drives will start getting erased; you will be able to see erasure progress on the BitRaser screen. (Refer to Images 14)

Image 13: Choose the Erasure Method, then Click Erase and then Yes
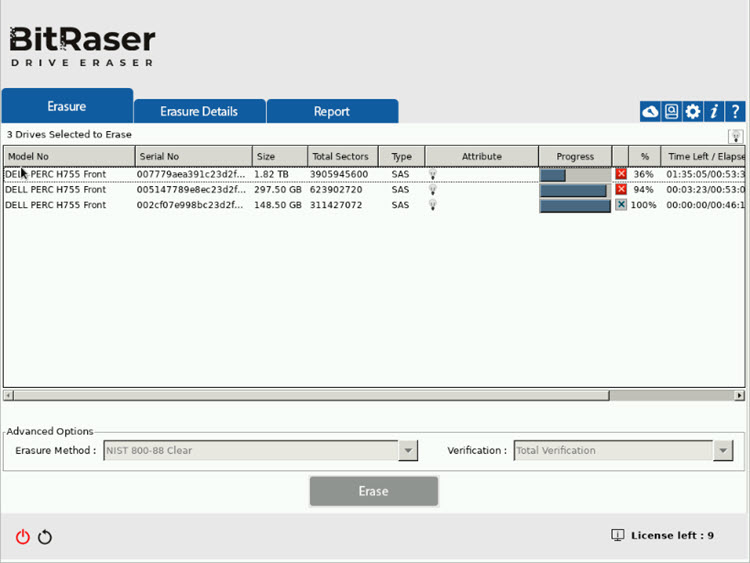
Image 14: Erasure Progress Screen
Once the erasure process is complete, a detailed erasure report and a certificate of destruction will be generated and sent to your BitRaser Cloud account.