BitLocker, introduced in 2006 with Windows Vista, is a full-disk encryption tool designed to enhance data security. It encrypts entire drives, including operating systems, system files, and user data, protecting against unauthorized access. Encryption can be secured with a password or smart card, ensuring sensitive data remains confidential.
BitLocker allows users to choose how much of their drive they want to encrypt, i.e., either they can encrypt used disk space only or they can choose to encrypt the entire drive. (Refer to Image 1) While it provides robust protection, challenges arise when users forget the BitLocker password or lose the recovery key. In such cases, securely erasing the encrypted drive is essential to prevent data leaks and ensure privacy.
This KB explains how to wipe a BitLocker-encrypted drive (Used Disk Space Only) using BitRaser Drive Eraser software, even without a password or recovery key.
Note: For Wiping drives encrypted with the "Encrypt Entire Drive" option, the BitRaser application requires the recovery key or password for erasure.
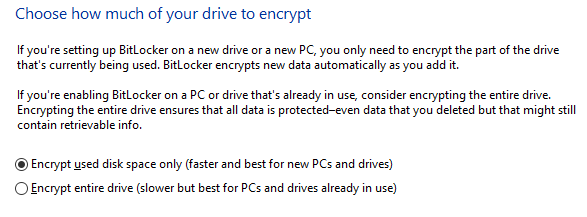
Image 1: Choose the Portion of the Drive to Encrypt
Steps to Wipe BitLocker Encrypted Drive
In this KB, we will be erasing the internal BitLocker encrypted drive of a Dell laptop. Follow the steps to wipe the encrypted drive's user disk space without a password.
- Step 1: Download the BitRaser Drive Eraser ISO file from the BitRaser Cloud console using the credentials delivered via e-mail post-purchase. (Refer to Image 2)
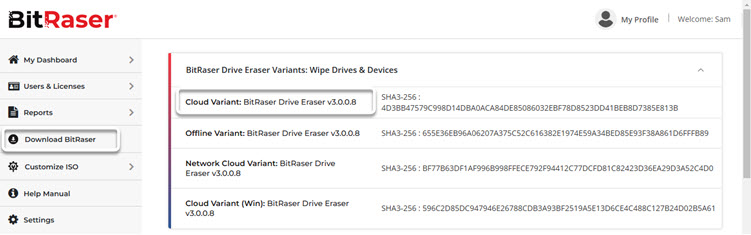
Image 2: Download Section BitRaser Cloud Console
- Step 2: Download Rufus (Bootable USB creating software), and create a BitRaser Drive Eraser bootable USB following the onscreen instructions. (Refer to Image 3)
For step-by-step instructions see our KB article on How to Create a Bootable USB with Rufus?
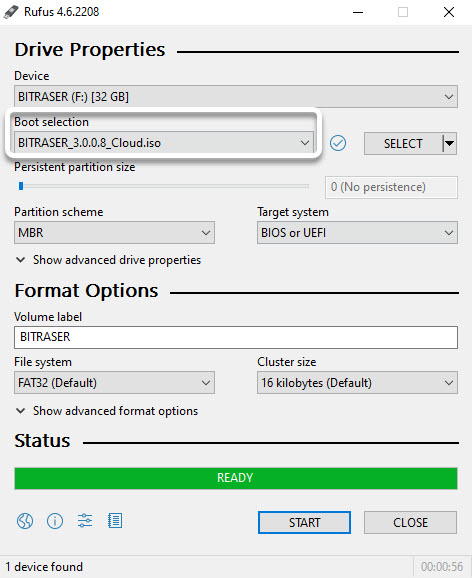
Image 3: BitRaser Bootable USB Created Using Rufus
Once the bootable USB has been created, you can start wiping the BitLocker encrypted Drive.
- Step 3: Connect the BitRaser Drive Eraser bootable USB to the laptop and power it up. For Dell laptops, press the F12 key and go to the ‘One Time Boot Settings.’ Select the BitRaser Drive Eraser USB and press 'Enter.' (Refer to Image 4)
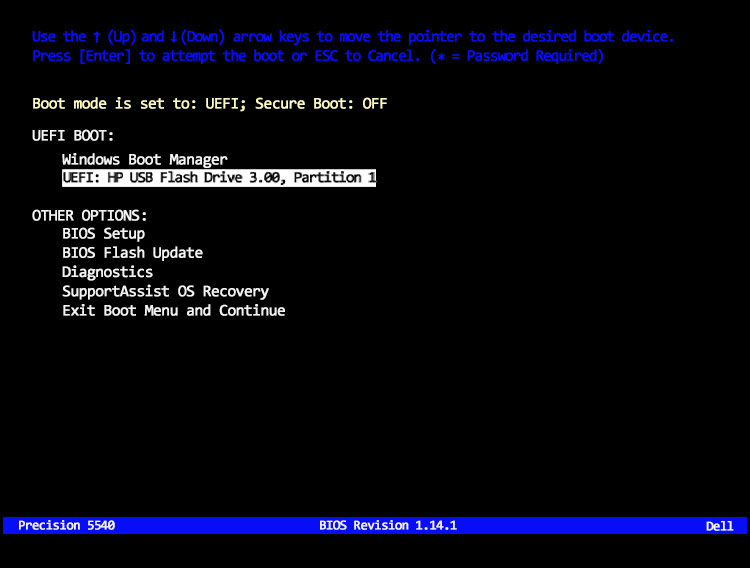
Image 4: Select BitRaser USB to Boot with BitRaser Drive Eraser
- Step 4: You will see the 'BitRaser Boot options' page. By default, the option 'BitRaser' is selected, and the software automatically boots the laptop with BitRaser Drive Eraser. (Refer to Image 5)
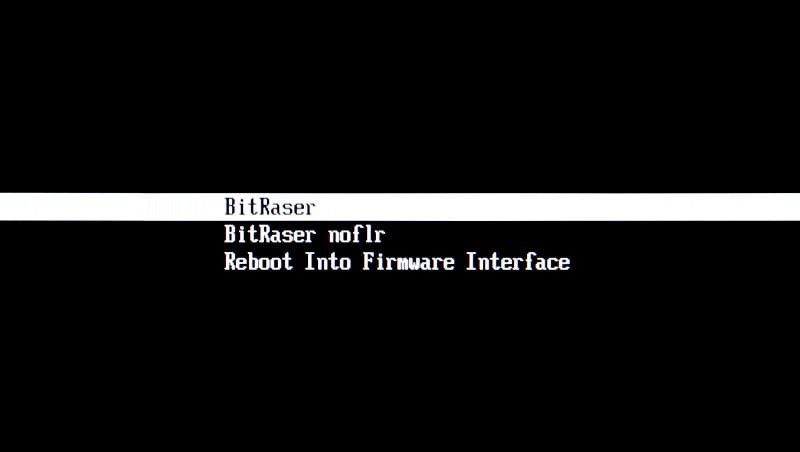
Image 5: Select BitRaser to Boot Device
- Step 5: The main interface of the software (Refer to Image 6) is shown. Connect the application to the internet by clicking on the settings icon in the top right corner. Then, click on the 'Network' tab and select from Ethernet or Wireless option for connecting to the internet.
We have selected the Wireless method. Enter your Wi-Fi credentials and then click on connect. (Refer to Image 7)
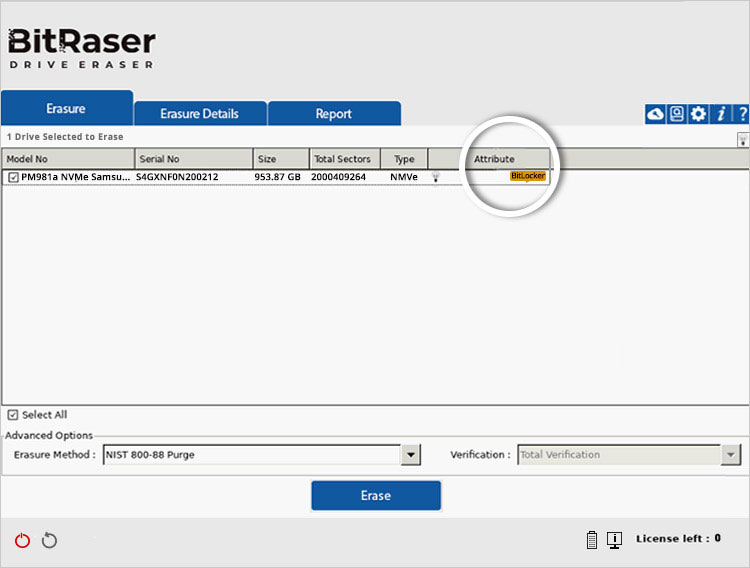
Image 6: BitRaser Drive Eraser Main Screen
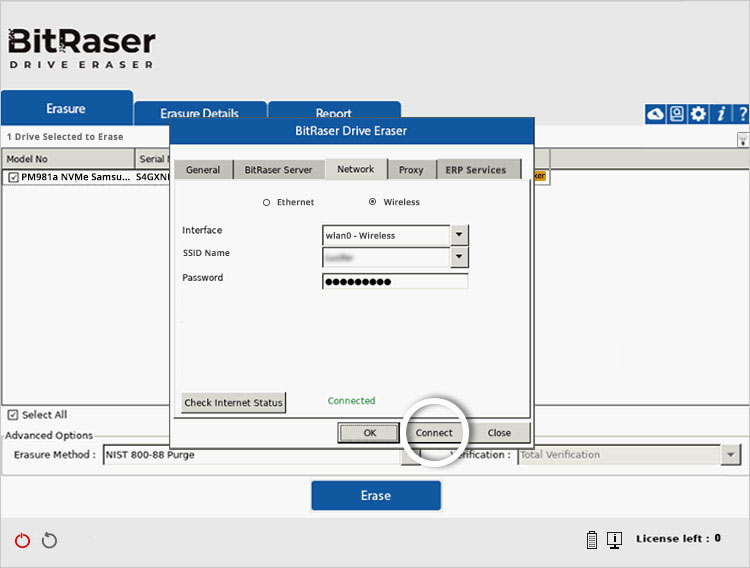
Image 7: Connect BitRaser to the Internet Using Wi-Fi
- Step 6: Once connected to the internet, click on the 'BitRaser Server' tab to enter the login credentials received in the mail to establish a connection with the BitRaser Cloud console. As soon as you are connected to BitRaser Cloud, the number of licenses available to you will appear in the bottom right corner. (Refer to Image 8)
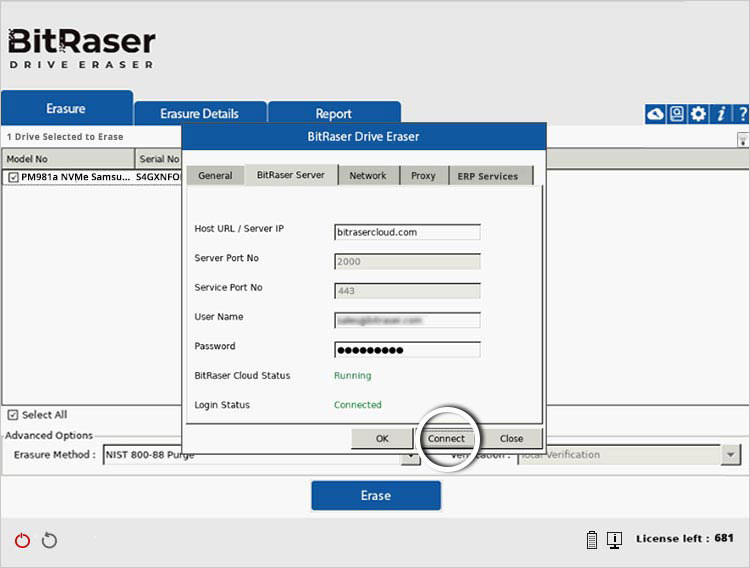
Image 8: Connect BitRaser Software to BitRaser Cloud Console