Step 1: The BitRaser Drive Eraser for Chromebook will start. You will see a window prompting you to enter your BitRaser Cloud credentials to access the ‘BitRaser Cloud Console.’ Use the credentials delivered to you via email. There are two ways by which you can enter your login credentials.
- Using a Barcode Scanner
- Entering Credentials Manually
Once the credentials are entered, the application automatically connects with BitRaser Cloud. You will now see the main screen of the BitRaser Drive Eraser for the Chromebook application. The number of erasure licenses is displayed in the bottom right corner. (See Image 6)
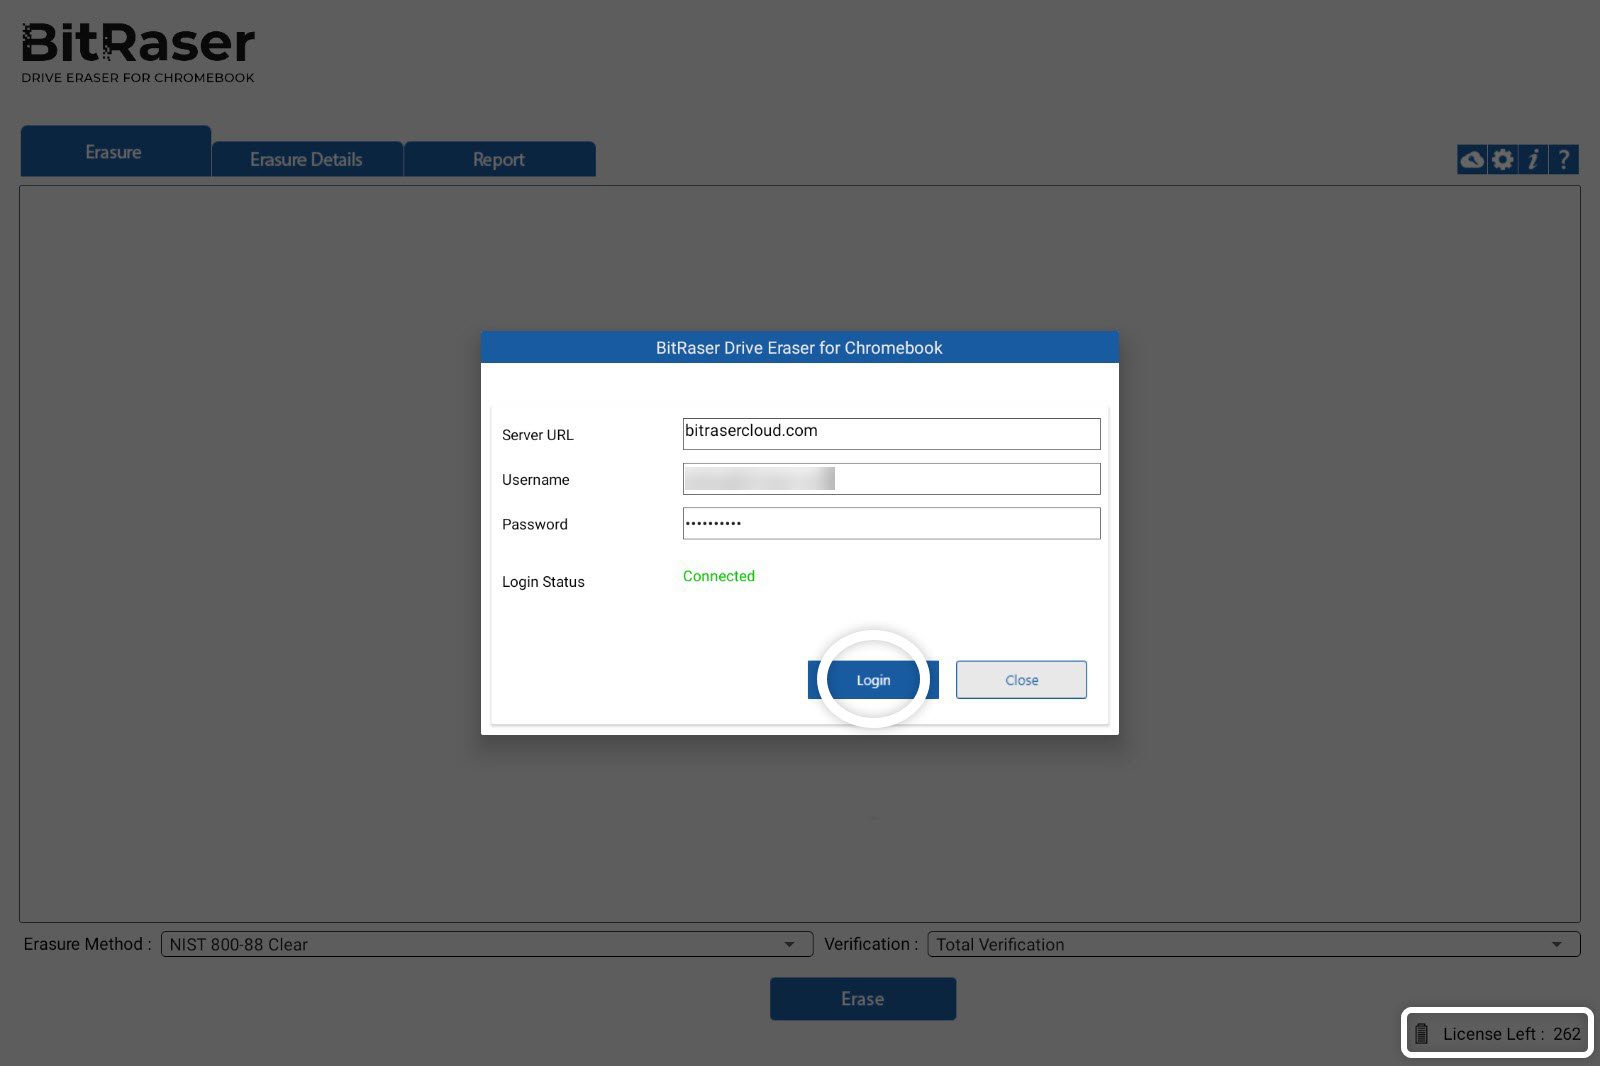
Image 6: Enter Credentials to Connect the Application to BitRaser Cloud
Step 2: Select the ‘Erasure Method’ and ‘Verification’ according to your data destruction policy. We are using the default erasure method - ‘NIST 800-88 Clear’ and ‘Total Verification.’ Post selection, click ‘Erase.’
You will be able to see the Chromebook erasure progress at the bottom. One erasure license will be deducted from your earlier count. (Refer to Image 7)
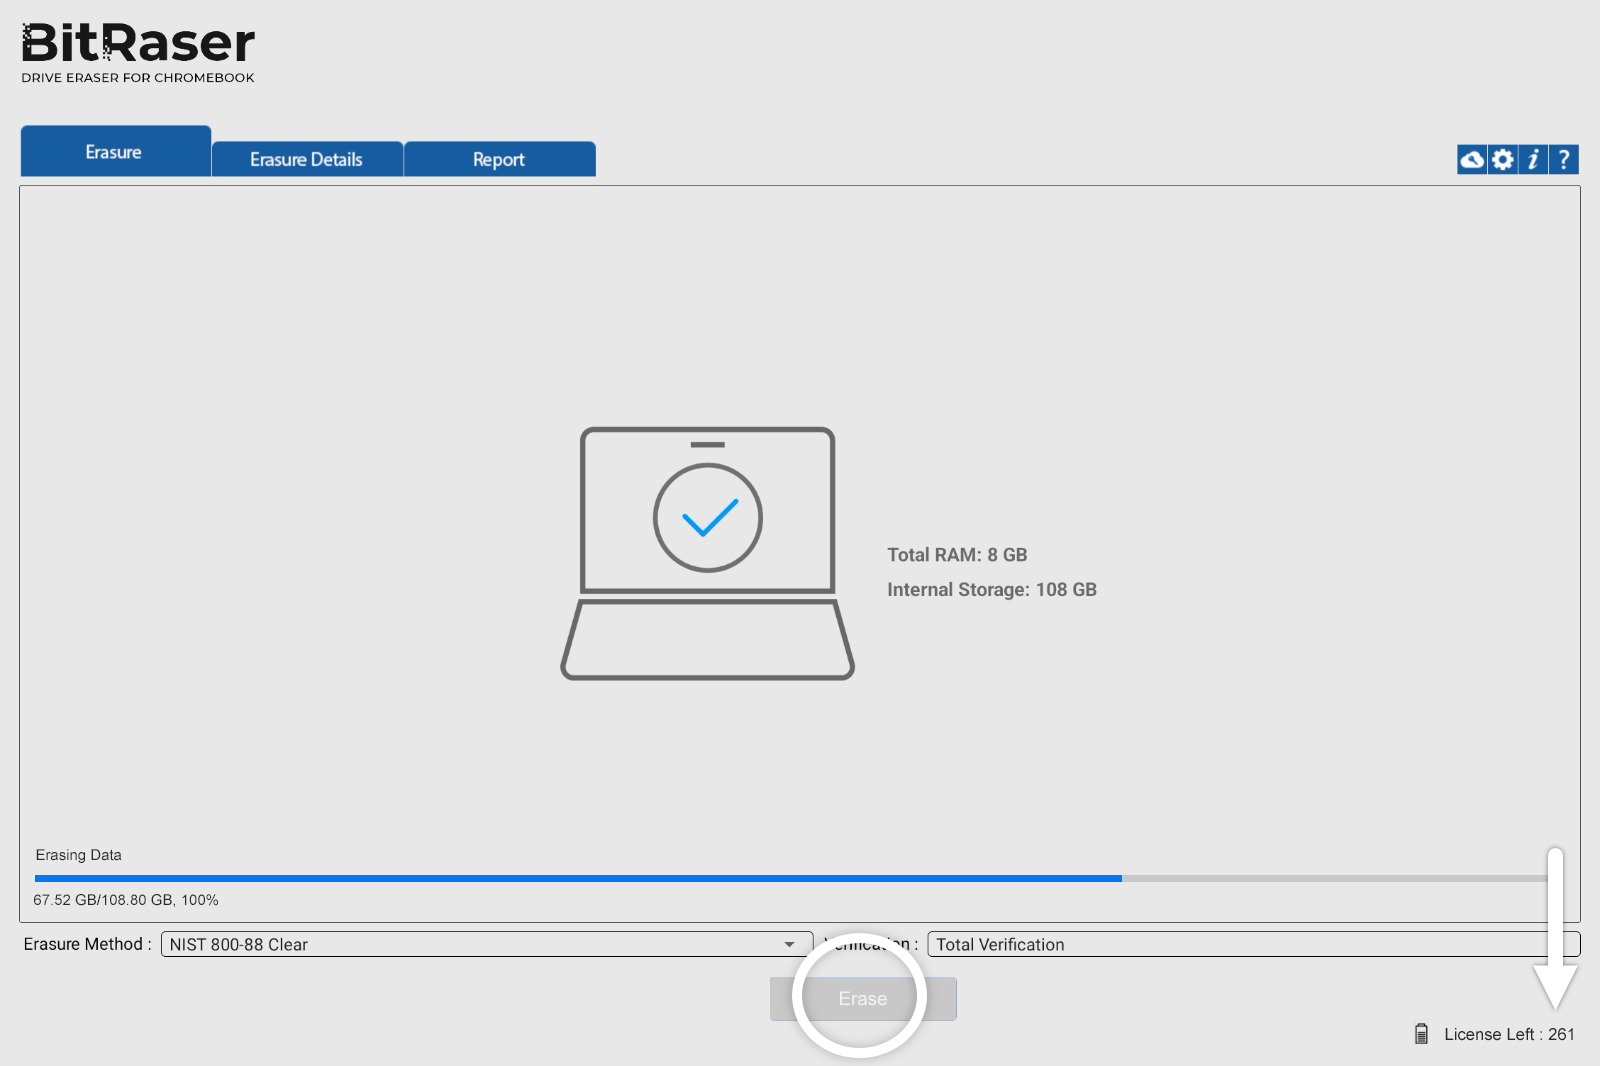
Image 7: Chromebook Erasure in Progress
The erasure process will be completed in a few minutes, permanently removing all sensitive data from the Chromebook. Post erasure, the application will prepare and perform a ‘Powerwash’ on the Chromebook. (See Image 8)
Note: Powerwash is a Chromebook feature that resets the device to its original factory settings. It is required to complete the erasure process and make the device ready for reuse.
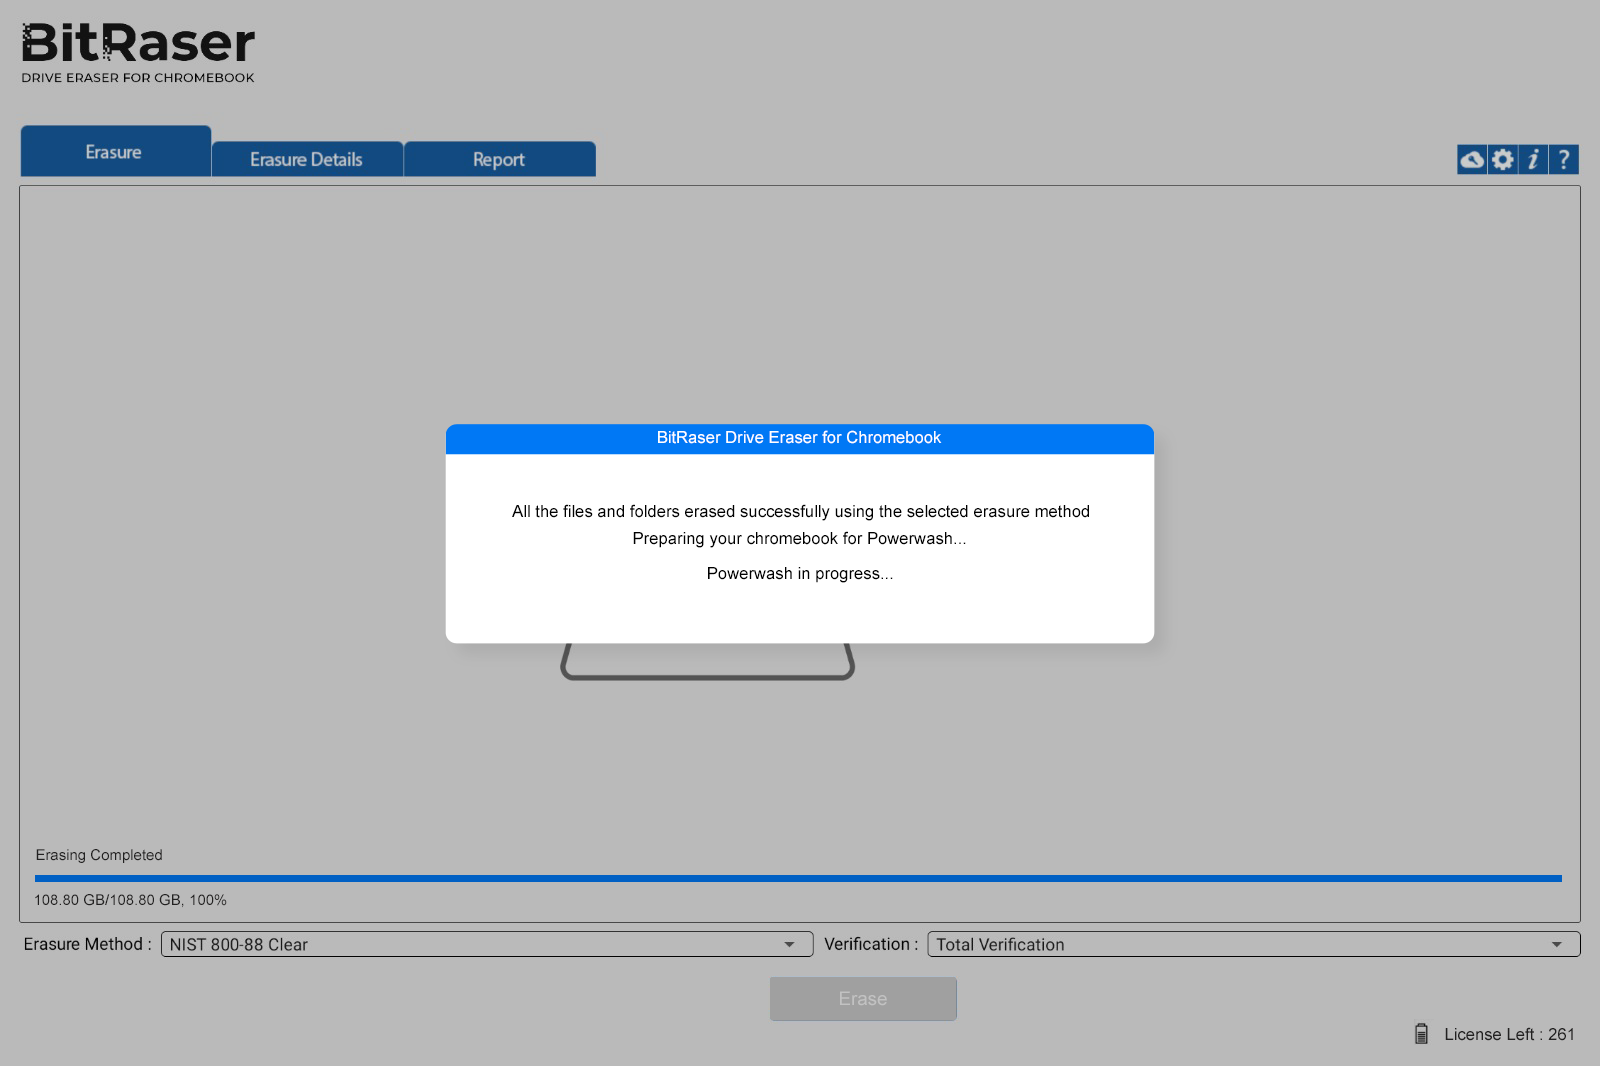
Image 8: Preparing for Powerwash Screen BitRaser
Once the Powerwash is complete, all data on your Chromebook is permanently and irreversibly erased. You have successfully wiped the Chromebook using BitRaser software. This ensures it is safe for resale, disposal, or reallocation without any risk of data leakage. You can verify the erasure status through a tamper-proof Chromebook erasure report, which is automatically saved to your BitRaser Cloud account. (See Report below)