Mac devices like MacBook Pro, MacBook Air, MacBook Mini, iMac, and Mac Pro are used extensively in organizations due to their advanced features. These devices require data wiping especially when data has served its purpose, to limit the chances of sensitive information falling into the wrong hands. Files & folders need to be erased to ensure compliance with standards and laws that mandate Data Minimization, such as EU-GDPR, CPRA, HIPAA & ISO 27701.
How to Erase Files & Folders on a Mac?
To erase files on Mac devices, download, install & activate the BitRaser File Eraser for Mac software. You can then select files & folders to erase. The software provides an option to schedule erasure tasks at pre-defined intervals.
For this KB article, we will be erasing files, folders & traces on a Mac device with the following configuration:
- Model: MacBook Air
- Chip: M3
- Memory: 8 GB
Stage 1: Download, Install & Activate BitRaser
Step 1: Download BitRaser File Eraser Corporate for Mac using the instructions received via email post-purchase of the software. Install the product on the MacBook, and then activate it using the Activation Key received in the mail. (Refer to Image 1)
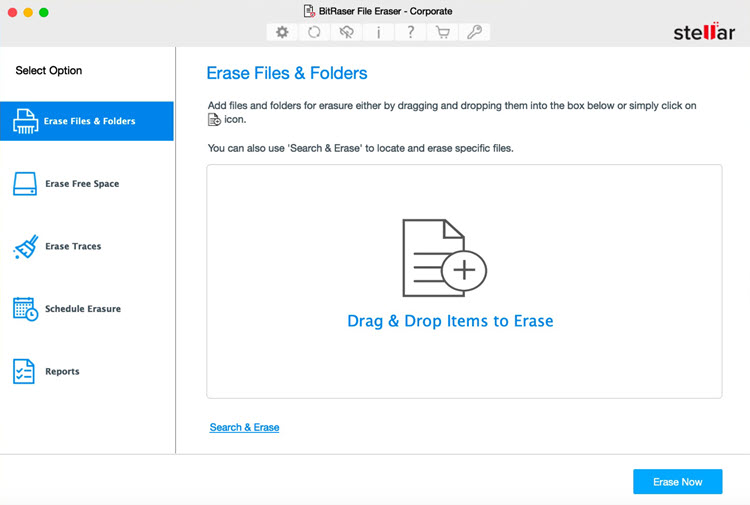
Image 1: BitRaser File Eraser Corporate Mac Main Interface
BitRaser File Eraser Mac requires 'Full Disk Access' to access files and data on the system to perform 'Data Erasure' on the Mac device. To provide full access, go to –
System Settings > Privacy & Security > Full Disk Access
Grant access to BitRaser File Eraser. (Refer to Image 2)
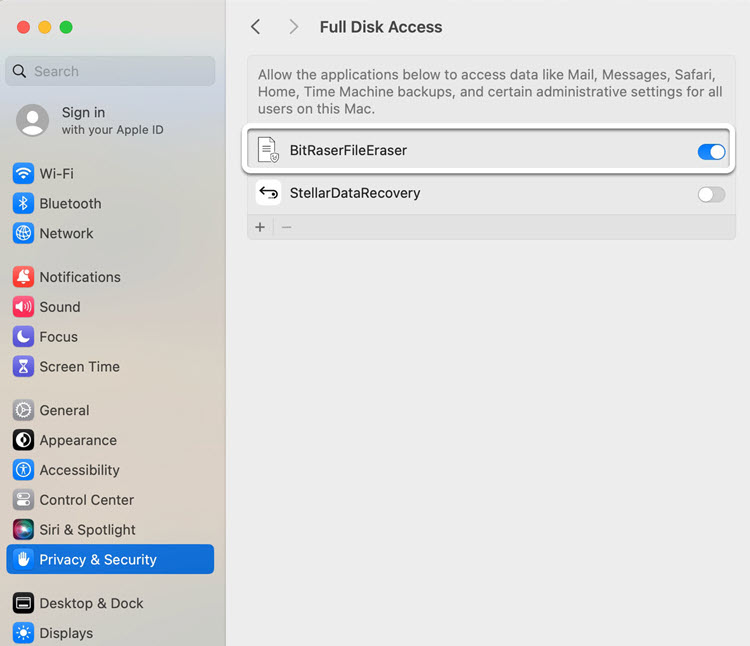
Image 2: Give Full Disk Access to BitRaser File Eraser
Step 2: Activate the software by clicking the ‘Key' icon on the top menu. Enter the key you received via email, then click on ‘Activate.’ (Refer to Image 3)
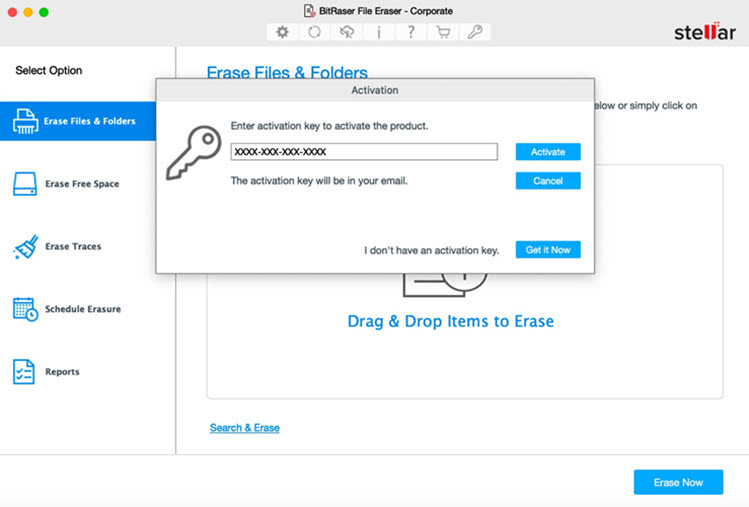
Image 3: Activate BitRaser File Eraser Corporate Mac by Entering the Activation Key
Note: You can enter BitRaser Cloud credentials in ‘Settings’ to save the erasure reports in the centralized cloud console for anytime/anywhere access. To connect, click on the cloud icon and enter your BitRaser Cloud Console login credentials as received via email. This can be done either before or after erasure. (Refer to Image 4)
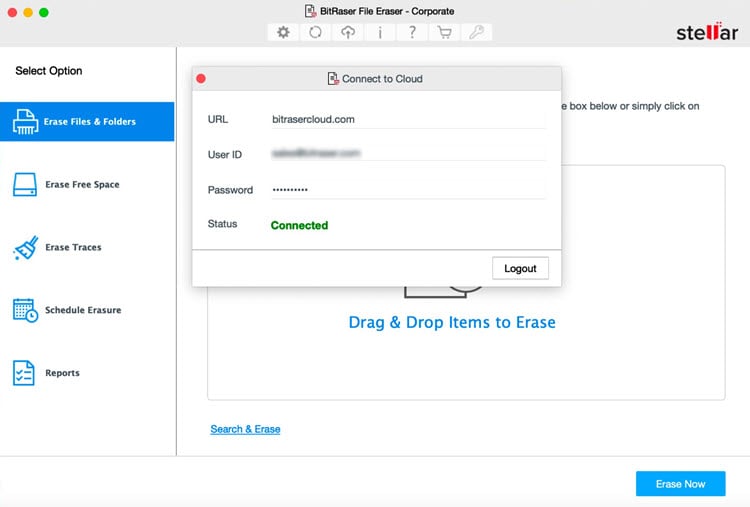
Image 4: Connect Application to BitRaser Cloud Console
Stage 2: Erase Files, Folders, Traces & More
- Erase Files & Folders: BitRaser File Eraser Corporate for Mac provides you the option to select multiple files and erase them simultaneously. You can add files to erase in the following ways:
- Drag & Drop Items to Erase: Drag the files or folders directly into the application.
- Search & Erase: You can search with file names or locations.
- Add Items: You can also add files or folders directly by browsing and selecting them.
Note: In case your organizational
Data Destruction Policy mandates a specific data wiping standard like NIST 800-88 Clear, then you can select the erasure method via
‘Settings.’ The software supports 18 erasure methods like NIST 800-88 Clear, US DoD 5220.22-M, etc.
(Refer to Image 5)
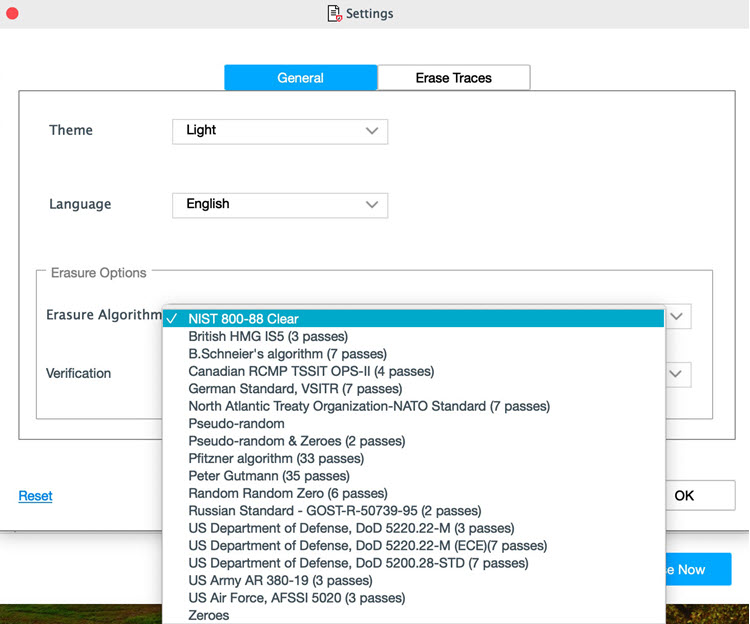
Image 5: Choose Erasure Method & Verification
Post file selection, click on ‘Erase Now’ to proceed with the erasure process. Click on ‘Proceed’ in the erasure confirmation window to erase files on Mac devices. (Refer to Images 6 & 7)
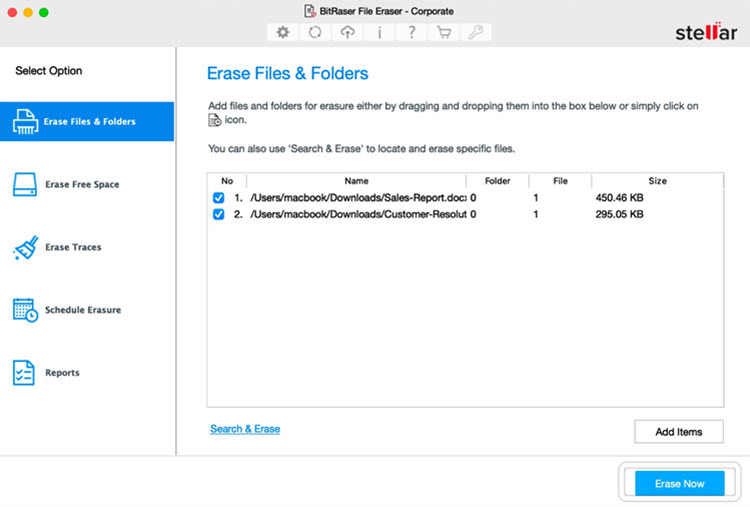
Image 6: Click Erase Now
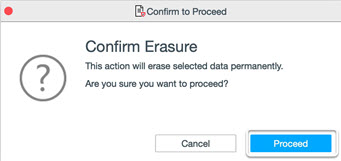
Image 7: Click on Proceed to begin Erasure
The selected files are erased beyond the scope of recovery, and a tamper-proof erasure report is generated that can be stored on both the local system and BitRaser Cloud.
- Erase Free Space: Using the software, free space on your Mac device can be erased to ensure that deleted data cannot be recovered.
For this go to the ‘Erase Free Space’ module and select the internal drive of the Mac device. Click ‘Erase Now’ and then click ‘Proceed.’ (Refer to Image 8)
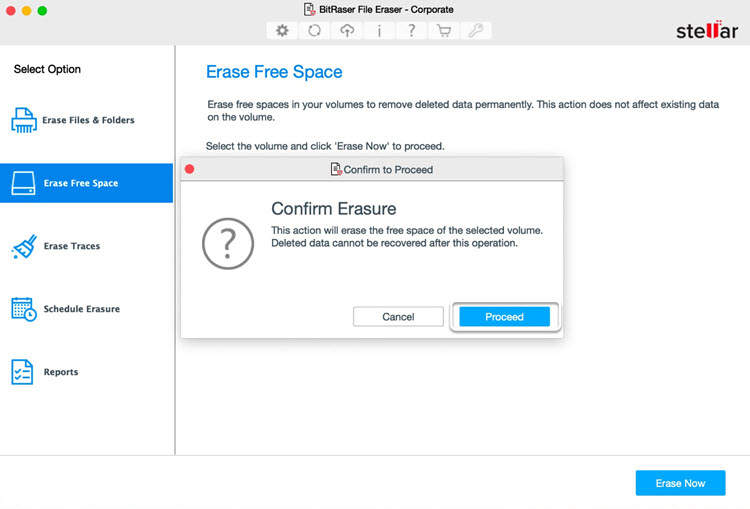
Image 8: Erase Free Space
- Erase Traces & Internet Activity: The application erases your digital data by permanently wiping application & system traces. You can also erase your Internet activity from popular browsers like Chrome, Firefox & Safari.
Go to the ‘Erase Traces’ module, select the ‘Application Traces’ you want to erase, and then click ‘Erase Now.’ (Refer to Image 9)
Next, click on ‘Proceed’ to begin erasing application traces.
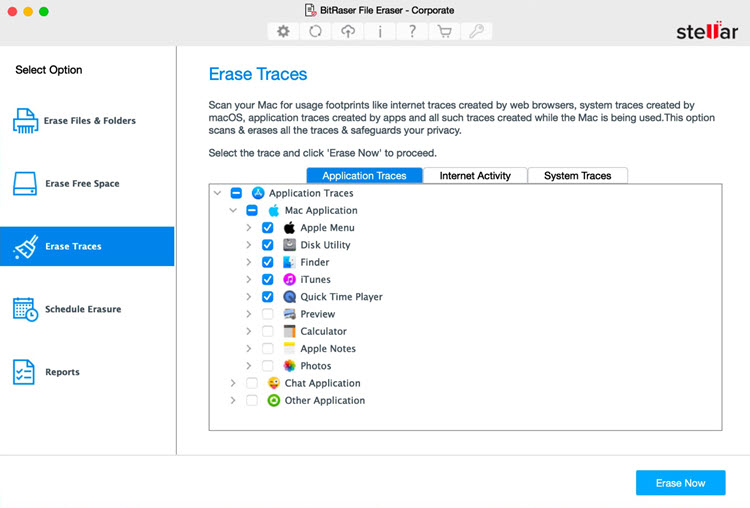
Image 9: Select Application Traces to Erase
You have successfully erased the application traces from your Mac device; a similar process can be followed to erase Internet Activity & System Traces.
Did You know?
BitRaser File Eraser Mac software also has a Scheduler Feature to wipe data at regular intervals to remain compliant with global data privacy laws.
Schedule Erasure
The 'Schedule Erasure' is a powerful feature of BitRaser File Eraser Corporate Mac that allows users to schedule their erasure tasks at periodic intervals. It gives you the option to schedule a task to:
- Erase Files & Folders
- Erase Traces
You can erase data 'Daily,' 'Weekly,' or 'Monthly' at a specific time of your choice.
Step 1: Go to the 'Schedule Erasure' module and select 'Erase Traces' or 'Erase Files & Folders'.
Now, select the periodicity and time.
Click 'OK' post selection. Your erasure task is scheduled; click 'OK' to close the window.
(Refer to Image 10)
On the scheduled date & time, the application will automatically erase the contents of the selected folder.
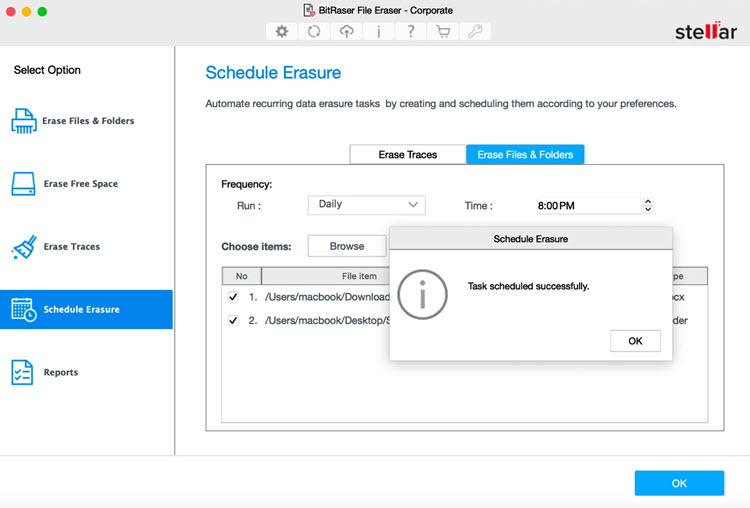
Image 10: Schedule File & Folder Erasure
Note: For automatic startup of the Scheduler, it's necessary to input your Mac 'User ID' and 'Password' within the BitRaser application. The password remains on your system and is not synced with the cloud console.
Post erasure, the report summary can be seen in the ‘Reports’ module. If connected to the BitRaser Cloud Console, the report will also be available there.
The software is also available in the following editions: