This knowledge base (KB) article provides step-by-step instructions for dismantling a RAID configuration on a Dell server using device settings.
BitRaser Drive Eraser software can automatically dismantle RAID configuration on select RAID controllers such as LSI, Dell PERC & Adaptec. This KB specifically covers the RAID dismantling process on a Dell PowerEdge R550 server with a Dell PERC H755 RAID Controller.
How to Access Dell Servers?
You can access the server in two ways, either directly or remotely, and then perform RAID dismantling.
- Directly Access: Connect to the server directly using a monitor and keyboard.
- Remotely Access: Use a Lights Out Management (LOM) port such as iDRAC (Integrated Dell Remote Access Controller) to manage the server remotely.
Once you have access to the Dell server, you can start the RAID dismantling process. To learn how to access the server using iDRAC, refer to the section How to Access Dell Server Using iDRAC
RAID Dismantling Via BIOS:
Once you have access to the Dell PowerEdge R550 server either directly or remotely, follow the steps below as they apply to both methods.
- Step 1: Change the default boot to ‘BIOS Setup’ and restart the server.
The server will reboot and open the Dell EMC System Setup screen. Click on ‘Device Settings.’ (Refer to Image 1)
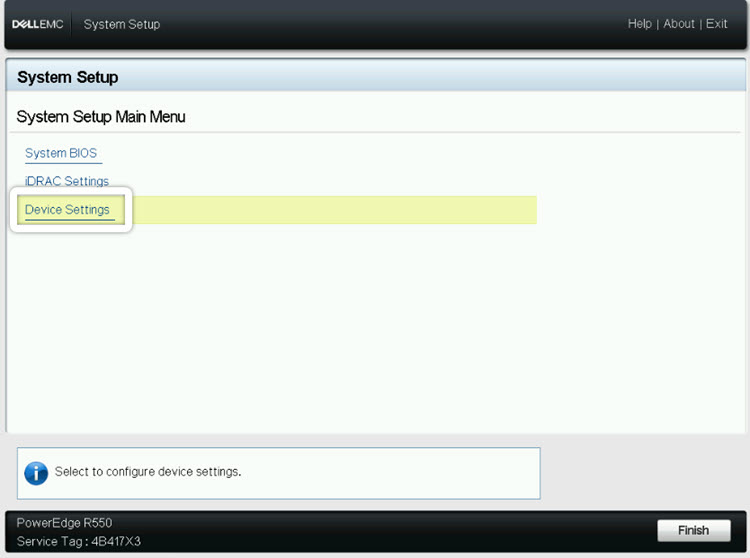
Image 1: Dell EMC System Setup screen, click on Device Settings
- Step 2: Click on Dell PERC H755 RAID Controller. (Refer to Image 2)
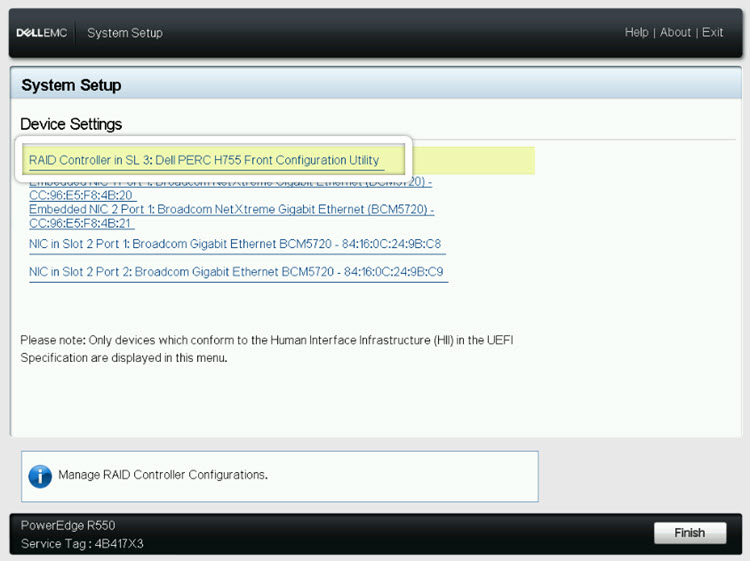
Image 2: Under Device Settings, Click on RAID Controller
- Step 3: You will see the RAID Controller’s dashboard; click on ‘Main Menu.’
In the Main menu, click on ‘Configuration Management.’ (Refer to Images 3 & 4)
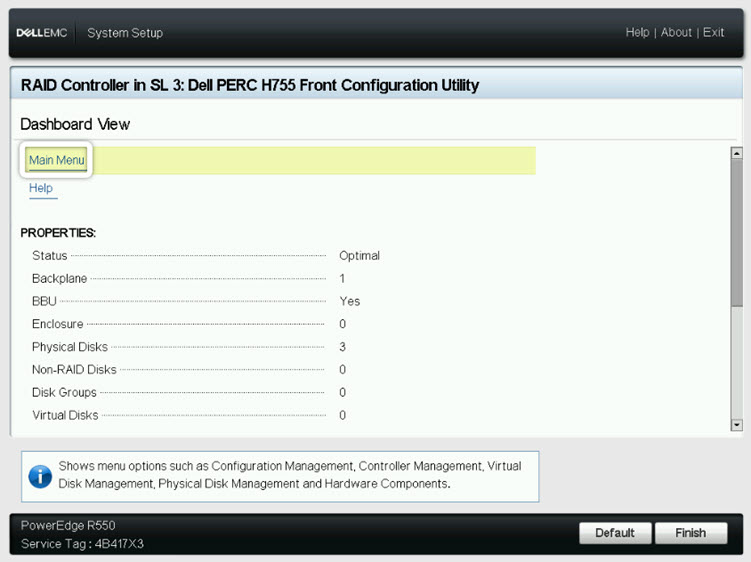
Image 3: RAID Controller Dashboard
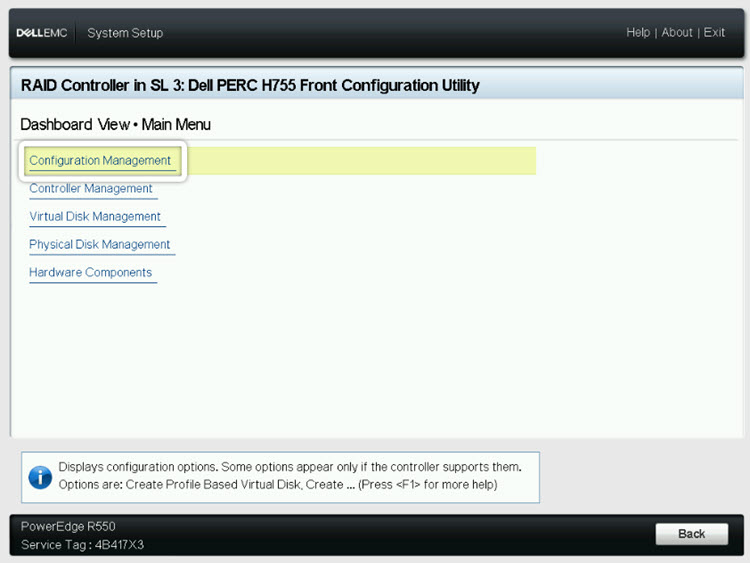
Image 4: RAID Controller Main Menu Screen
- Step 4: Click on ‘Clear Configuration.’ The confirmation warning message will pop up. Select ‘Confirm,’ and click ‘Yes.’ (Refer to Images 5 & 6)
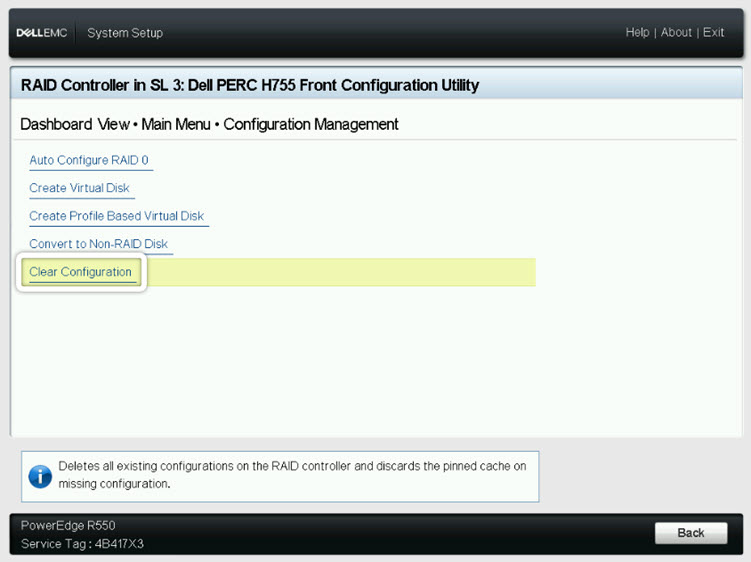
Image 5: Configuration Management Screen
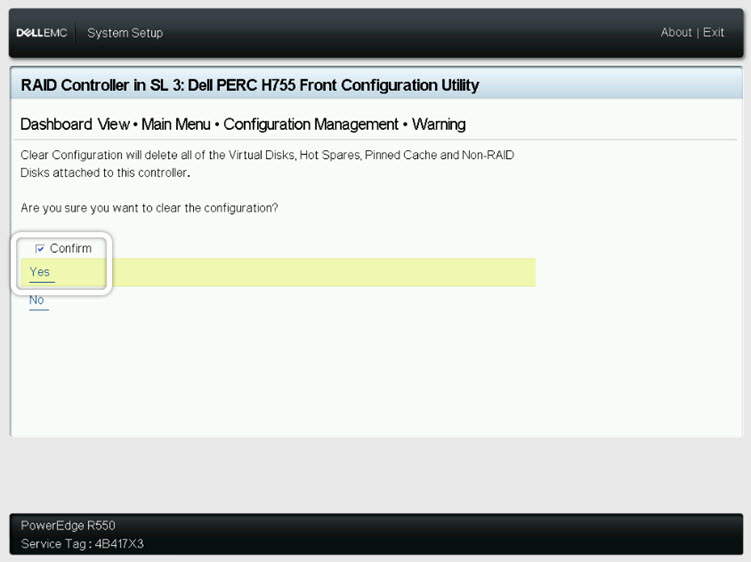
Image 6: Clear Configuration Confirmation Warning Screen
You have successfully performed RAID Dismantling on a Dell Server. (Refer to Image 7)
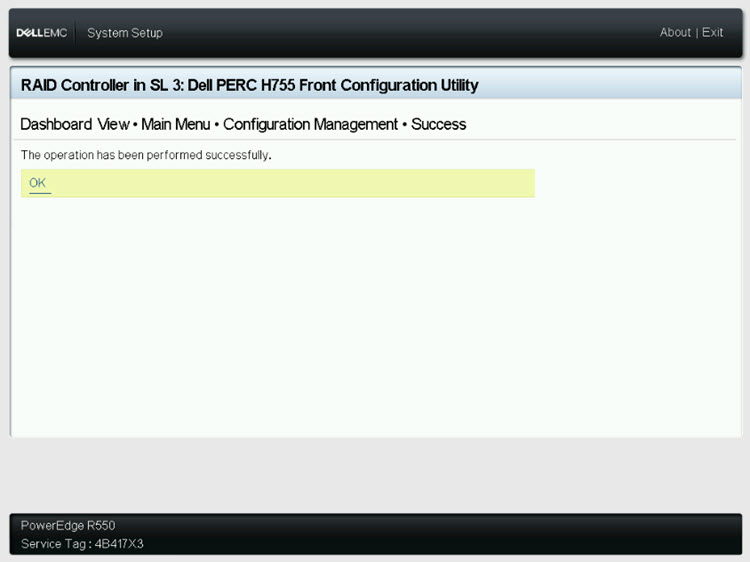
Image 7: RAID Dismantling Success Screen
Post RAID dismantling of Dell Server, you can reboot the machine using BitRaser Drive Eraser, incase you are erasing the server.
How to Access Dell Server Using iDRAC?
- Step 1: Enter the server IP address in a browser, then enter your iDRAC credentials, and click ‘Log In.’ This process requires the iDRAC server address to be accessible remotely. (Refer to Image 8)
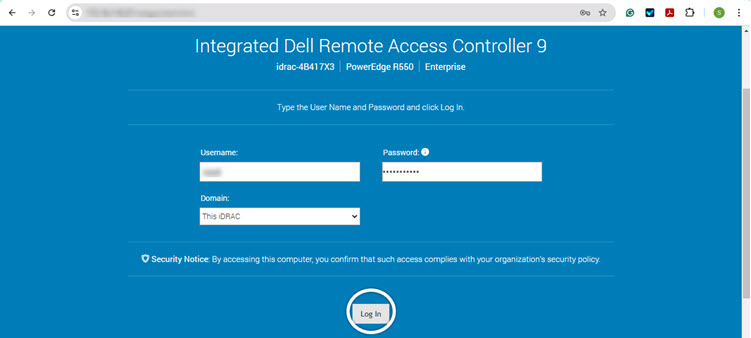
Image 8: Enter iDRAC Credentials, then Click Log In
- Step 2: You will be able to see your iDRAC dashboard. You now have access to the iDRAC platform. (Refer to Image 9)
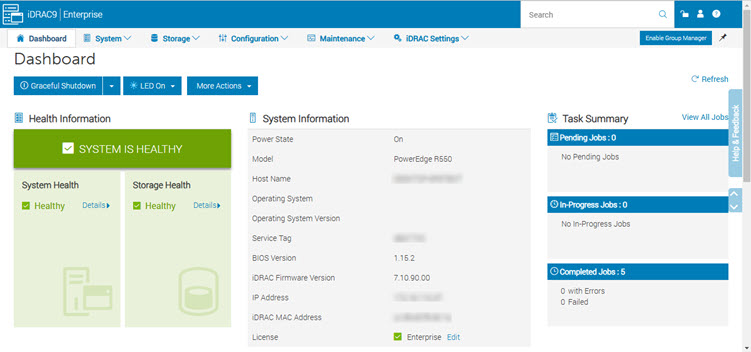
Image 9: iDRAC Dashboard
- Step 3: To access the system setup, the Dell PowerEdge R550 server must be restarted in BIOS. Scroll down and click on ‘Start the Virtual Console.’ This will display the server screen on your connected laptop or desktop, allowing you to proceed. (Refer to Image 10)
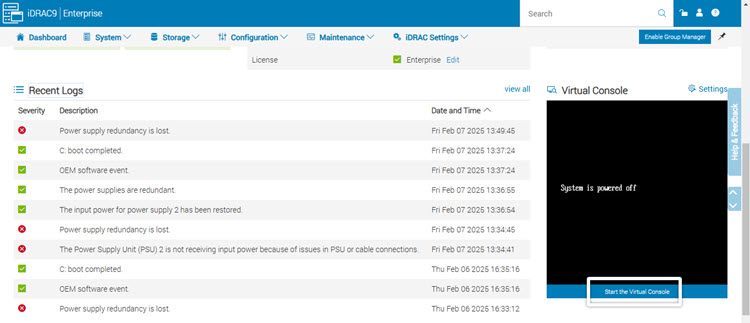
Image 10: Scroll Down the Click Start the Virtual Console
A confirmation screen will appear, click ‘Yes.’ This ensures the server automatically boots into the BIOS Setup on the next restart. (Refer to Images 11 & 12)
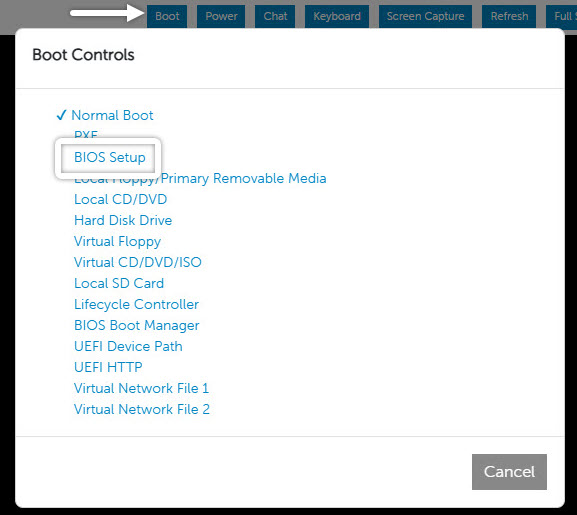
Image 11: Select BIOS Setup
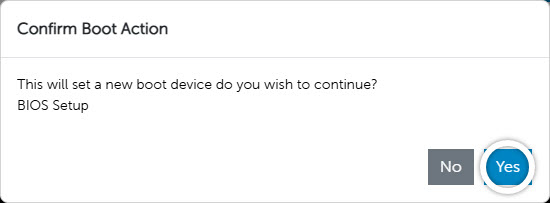
Image 12: Click Yes to Confirm Boot Action
- Step 5: Go to ‘Power’ then click on ‘Power On System.’ Click ‘Yes’ in the ‘Confirm Power Action’ screen. (Refer to Images 13 & 14)
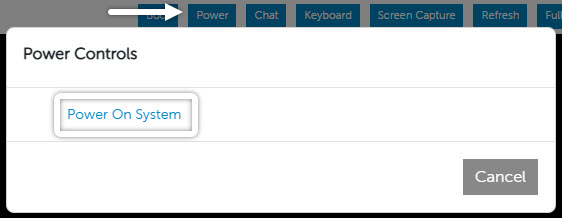
Image 13: Power On System

Image 14: Click Yes in the Confirmation Screen
Now, follow the above RAID Dismantling via BIOS steps to complete the RAID dismantling process.