This Knowledge Base article provides instructions on how to customize the BitRaser Hardware Diagnostics application. ISO customization enables the automation of repetitive tasks and streamlines the diagnostic process across locations and devices. Using this feature, you can select or exclude any auto or manual test and save login credentials for the BitRaser server and your network details to avoid manual entry.
Follow the steps below to customize the cloud variant of the BitRaser Hardware Diagnostics ISO file.
Note: Customization of BitRaser Hardware Diagnostics ISO is possible for all variants - Cloud, Offline and Network Cloud.
Step 1: Log in to the BitRaser Cloud console with the credentials received post-purchase. (Refer to Image 1)
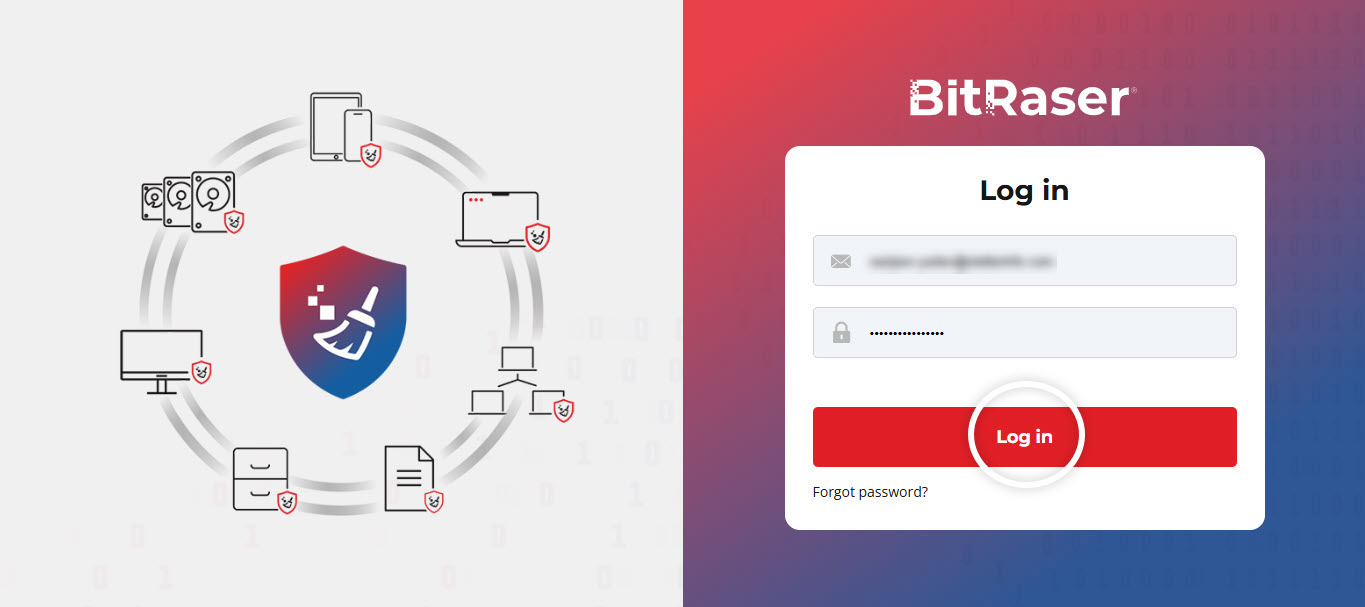
Image 1: Log in to BitRaser Cloud
Step 2: In the left panel, navigate down to ‘Customize ISO’ and click on ‘Create Custom ISO.’ (Refer to Image 2)
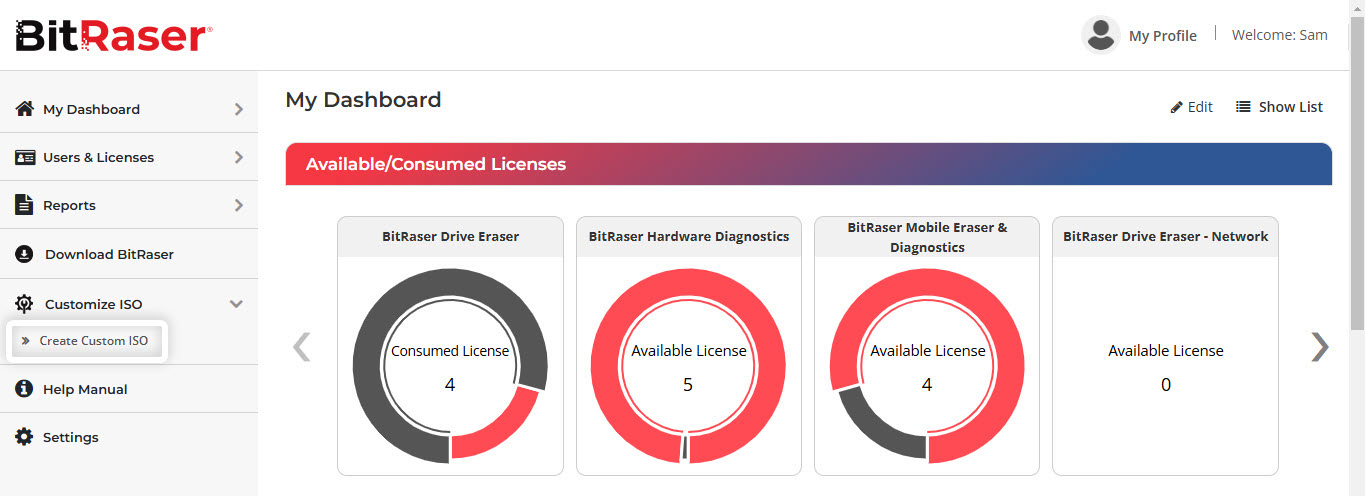
Image 2: Click on Create Custom ISO
Step 3: You will be redirected to the secure ‘ISO Customization’ portal. Re-enter your login credentials to access it. (Refer to Image 3)
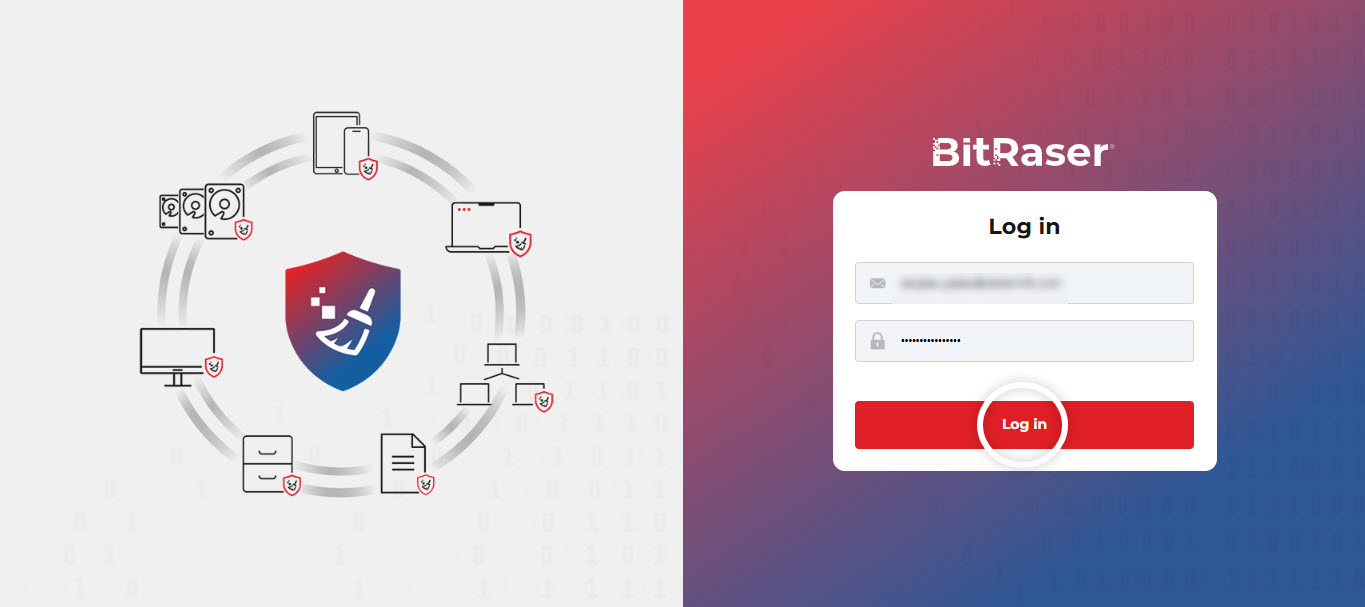
Image 3: Re-enter Log in Credentials
Step 4: Select the BitRaser Hardware Diagnostics ISO file and click ‘Customize.’ (Refer to Image 4)
Note:
- The portal allows you to create & store a maximum of 3 customized ISOs. In case you wish to add another ISO, delete an existing ISO first, in order to create a new one.
- To delete a previous ISO, click on the Customized ISO
 button at the top left corner of the page. You will see the list of customized ISO files stored on the portal.
- Select and delete the ones you don’t require by clicking the delete button next to the ISO file. (Refer to Image 5)
- After deletion, click on the Home button
 to go back.
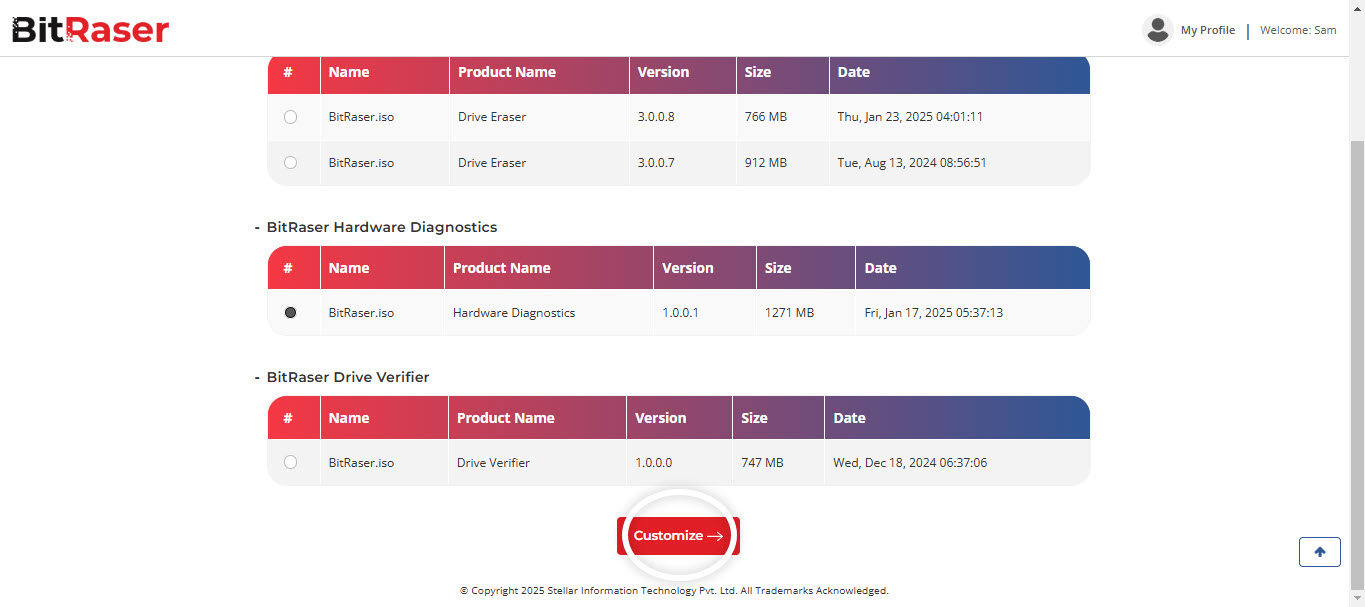
Image 4: Select BitRaser Hardware Diagnostics ISO, then Click Customize
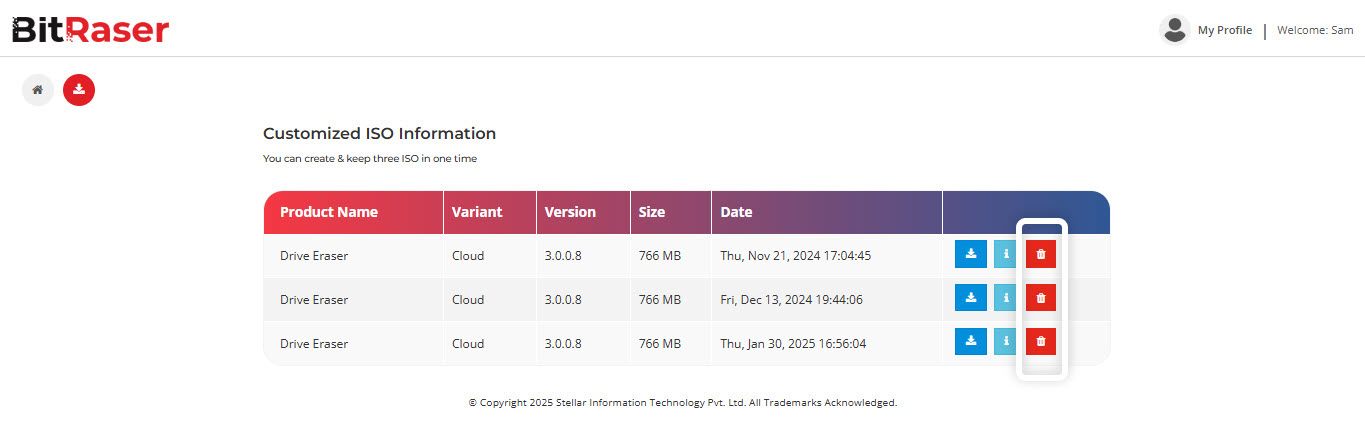
Image 5: Delete Customized ISO Files
Step 5: You will see three options to choose from – Cloud, Network & Offline variants of BitRaser Hardware Diagnostics software. We are customizing the Cloud variant of Hardware Diagnostics for the purpose of this KB. Select the variant and click ‘Next.’ (Refer to Image 6)
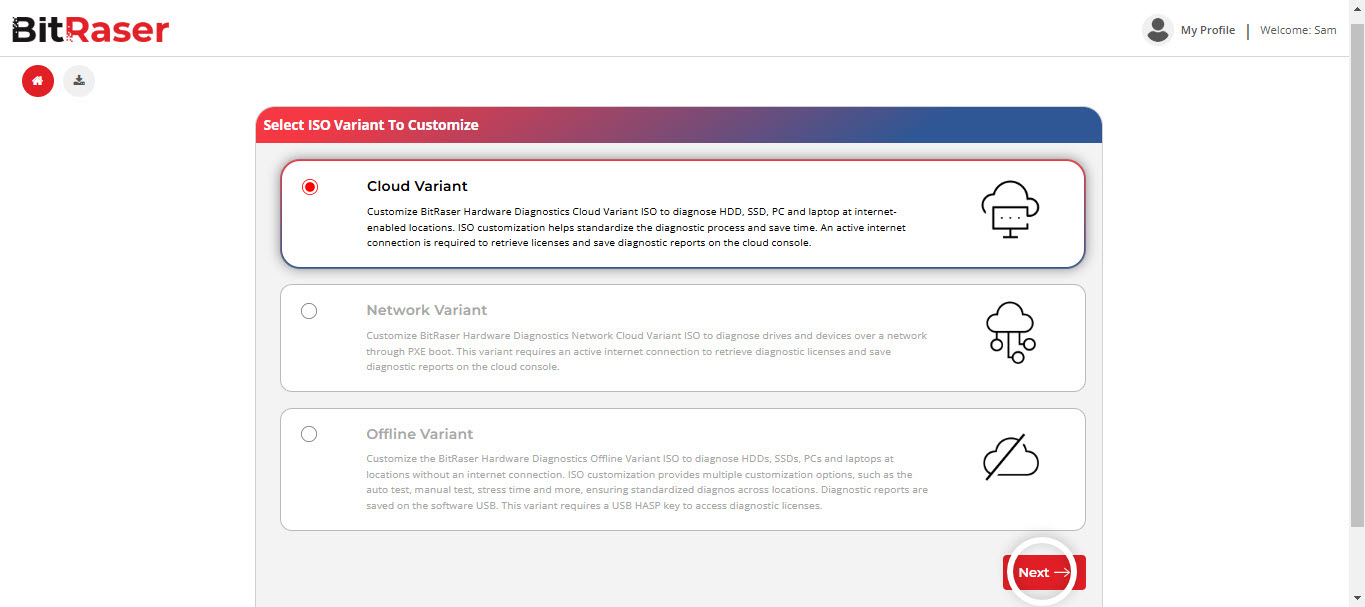
Image 6: Select the Cloud Variant of BitRaser Hardware Diagnostics, then Click Next
Step 6: Start customizing the required fields, beginning with General, Server, Network, Proxy, Custom Fields, and Notes. The portal provides you with multiple Customization choices that are optional. You can ‘Next’ in case you want to skip any customization. Let’s explore each one and understand its features.
-
General: This is the first tab, and it provides you with the following options to choose from: (Refer to Image 7a)
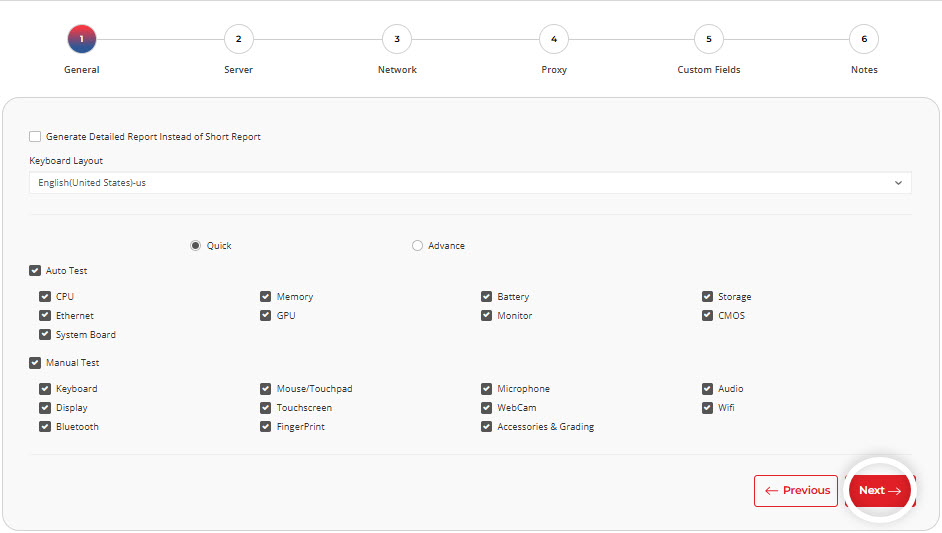
Image 7a: General Tab
-
Generate Detailed Report: Selecting this ensures that the detailed diagnostic report is generated by default.
- Keyboard Layout: You have the option to choose the keyboard layout according to language, such as English (United States), French (France), German (Germany), and so on.
- Quick & Advance: Under ‘Quick,’ multiple auto & manual tests are selected by default. You can choose the test to be performed on all machines and customize it accordingly.
The ‘Advance’ option, on the other hand, provides multiple advanced diagnostic setting options to choose from, including CPU, memory, and battery stress test duration, the percentage of storage media to be diagnosed, recording, display color, and fingerprint scan time. (Refer to Image 7b)
Once you have selected the preferred settings, click ‘Next.’
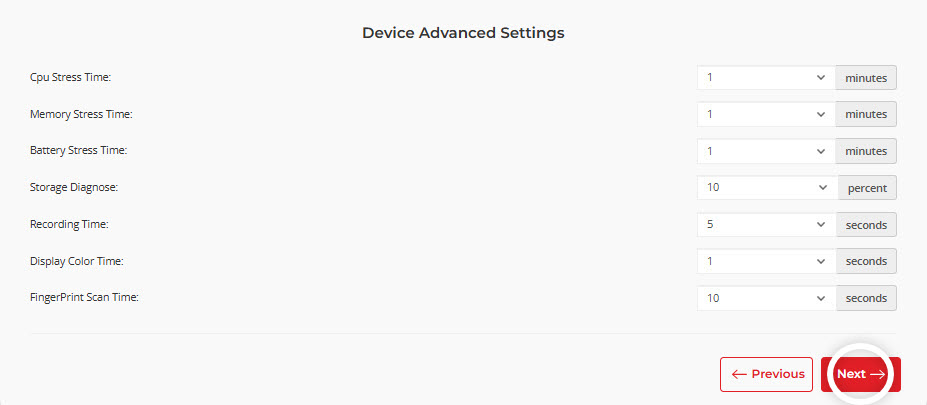
Image 7b: Device Advanced Settings
- Server: The next tab is ‘Server,’ which lets you store BitRaser Cloud credentials in the ISO, eliminating the need to manually enter details each time you perform Hardware Diagnostics. Enabling the ‘Auto Connect to Cloud’ helps the application to instantly connect to BitRaser Cloud when an internet connection is established. The ‘Enable HTTPS Support’ option ensures secure HTTPS communication with the BitRaser Cloud Console. Click ‘Next.’ (Refer to Image 8)
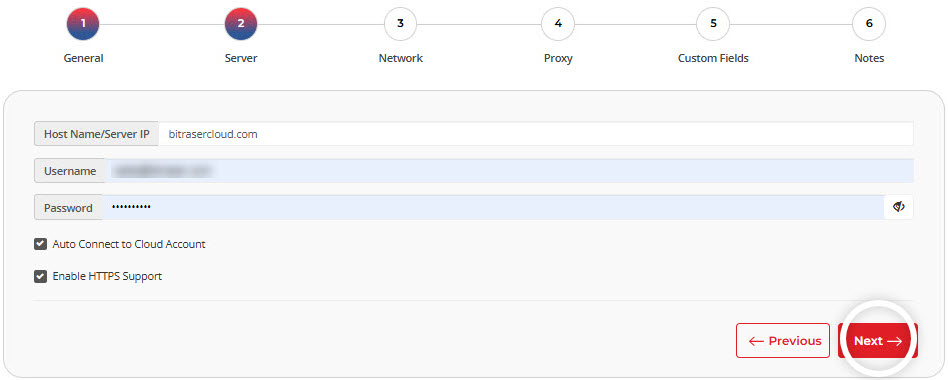
Image 8: Server Tab
- Network: You have now reached the ‘Network’ tab. This allows you to save your ‘DHCP’ or ‘Wireless’ details to eliminate the need to enter it manually for each diagnosis. The DHCP option is selected by default. You may either manually enter the DHCP details or let the software retrieve it automatically.
Additionally, you have the option to save your Wi-Fi details, including SSID Name & Password, by selecting the Wireless option.
After entering the details, click ‘Next.’ (Refer to Image 9)
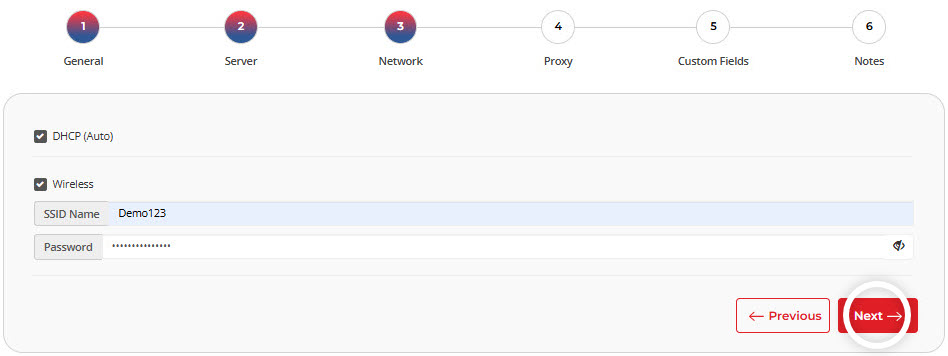
Image 9: Network Tab
- Proxy: The next tab is ‘Proxy,’ which lets you enter Proxy server details, if any. Enter the Proxy details and then click ‘Next.’ (Refer to Image 10)
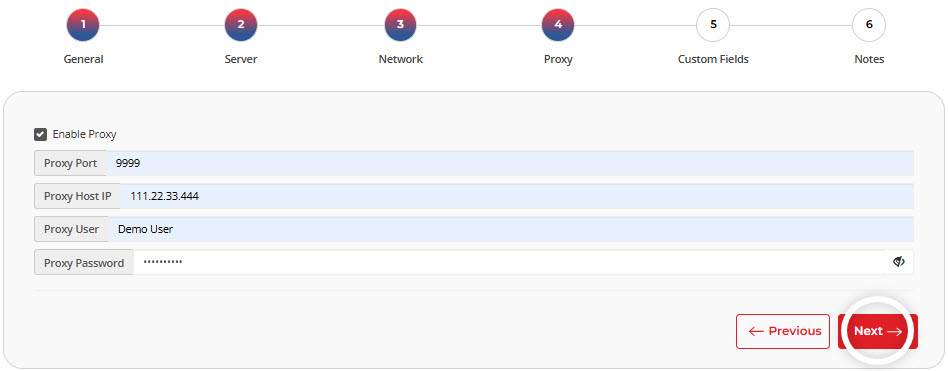
Image 10: Proxy Tab
- Custom Fields: This tab has 2 options:
- Enter Details: It allows you to save your customer, diagnostics technician, validator details, and the media source & destination information that is required to be a part of the diagnostic report. (Refer to Image 11)
- Enter Custom Fields: It allows you to enter custom field names and their values, which are reflected in the diagnostic report.
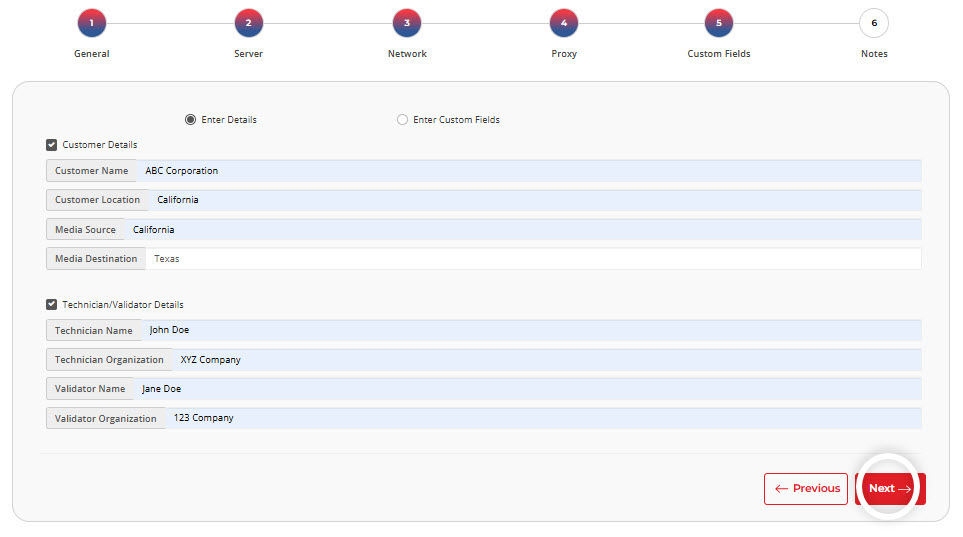
Image 11: Custom Fields Tab
- Notes: You have now reached the last option, ‘Notes,’ which allows you to enter your comments about the ISO file. Once entered, click on ‘Submit.’ (Refer to Image 12)
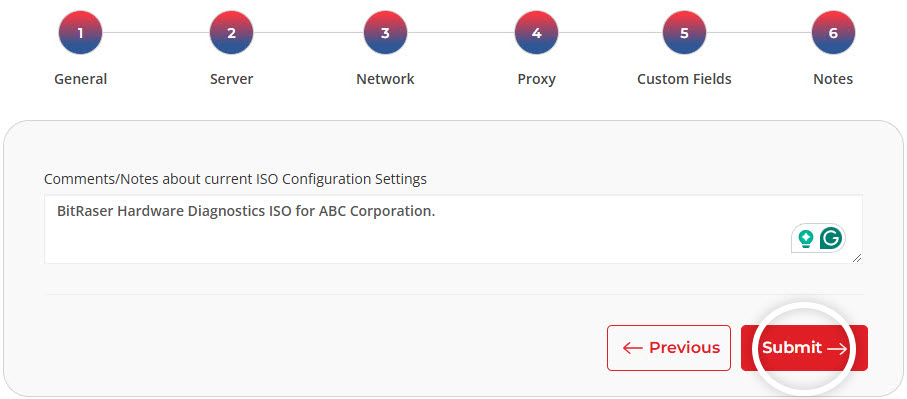
Image 12: Notes Tab
The BitRaser Hardware Diagnostics ISO customization process has started and you will see the below screen. (Refer to Image 13)
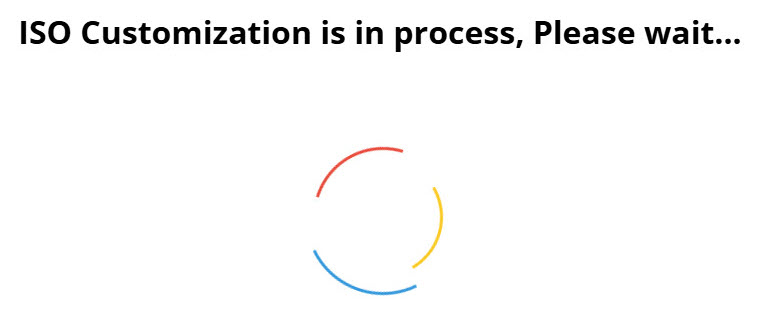
Image 13: ISO Customization in Process
Once the process is complete, you can download BitRaser Hardware Diagnostics ISO. (Refer to Image 14)
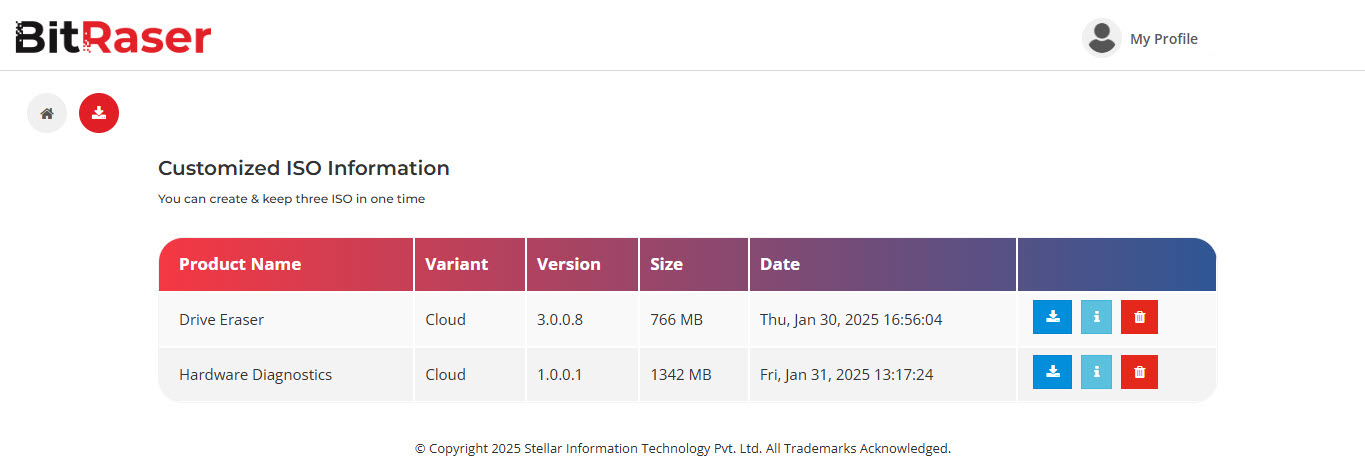
Image 14: BitRaser Hardware Diagnostics ISO Customization Completed
FAQs
How can I customize the BitRaser Hardware Diagnostics ISO? 
You can customize the ISO through the BitRaser Cloud portal by selecting the ISO file and using various customization options, including network settings, server details, and advanced diagnostics.
What are the customization options available?
Customization options include General settings (keyboard layout, report generation), Server settings (auto-connect to cloud), Network (Wi-Fi and DHCP details), and Custom Fields (technician info, custom fields).
Do I need to manually enter credentials every time?
No, you can store your BitRaser Cloud credentials within the ISO to avoid manual entry during each diagnostic process.
How many customized ISOs can I create?
You can create and store up to 3 customized ISOs. If you need more, you must delete one of the existing ISOs.
What advanced diagnostic options can I configure?
You can configure settings for stress tests on CPU, memory, and battery, as well as storage media diagnostics, recording settings, display color, and fingerprint scan time.