BitRaser USB Creator for Mac

BitRaser USB Creator for Mac / 4. How to / 4.3. Customization Settings / 4.3.1. General Settings
4.3.1. General Settings
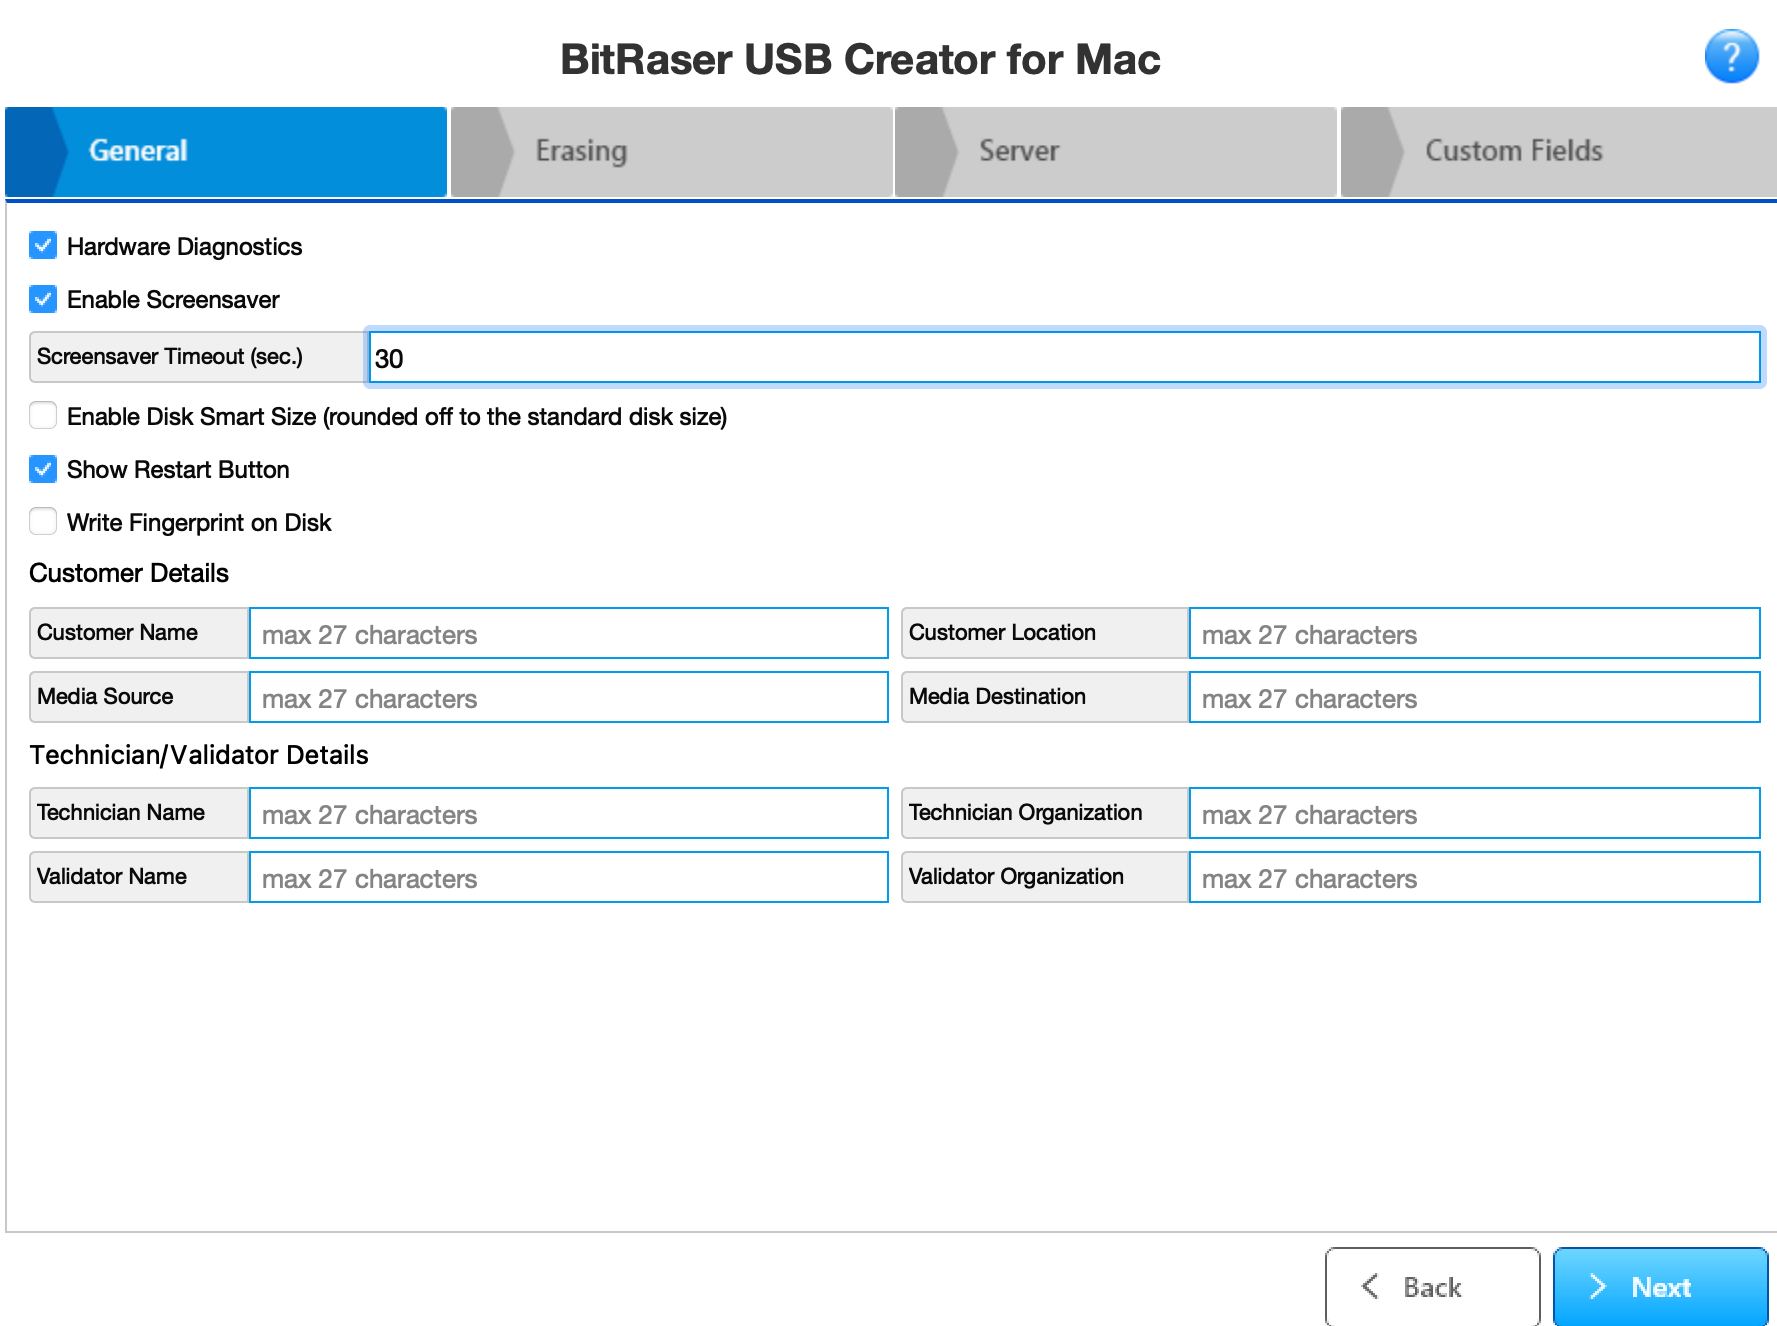
Use the General Settings to add information to various options. Access the list of a variety of options present on the screen below:

-
Hardware Diagnostics- This field is checked by default. This feature provides diagnostic information on various hardware devices in the system, including the motherboard, memory, processor, and other components. Uncheck this option if you don't want to perform hardware diagnostics on your system while using the BitRaser application.
-
Enable Screensaver - Check this field to view a screensaver that displays the status of the erasure process, including whether it is completed, failed, or in progress.
-
Screensaver Timeout (sec.) - Set the period between 10 to 240 seconds, after which you want the screensaver to appear while the BitRaser application runs.
-
Enable Disk Smart Size - Checking this field displays the standard disk size calculated by disk manufacturers
-
Show Restart Button - Check this field if you want to restart the system.
-
Write Fingerprint on Disk - Check this field to write a fingerprint at a drive sector after the erasure process in the Bitraser application. This fingerprint acts as a unique marker, to verify at a later stage that the drive has erased using the application. In the FingerPrint Sector Address field, you can define the sector number on the drive where you want to add the fingerprint.
-
Customer Information - Specify the required Customer/Media information:
-
Customer Details - Enter the details associated with the customer like the Customer Name and Customer Location.
-
Media Details - Enter the details associated with the media/machine like Media Source and Media Destination.
- Technician/Validator Details - Specify the required Technician/Validator information:
-
Technician Details - Enter details associated with the technician like the Technician Name and Technician Organization.
-
Validator Details - Enter the details associated with the validator like the Validator Name and Validator Organization.
Click Next to save the General details and go to the next screen. Clicking on Back will take you to previous screen.
 3. Getting Started