BitRaser USB Creator for Mac

BitRaser USB Creator for Mac / 4. How to / 4.3. Customization Settings / 4.3.2. Erasing Settings
4.3.2. Erasing Settings
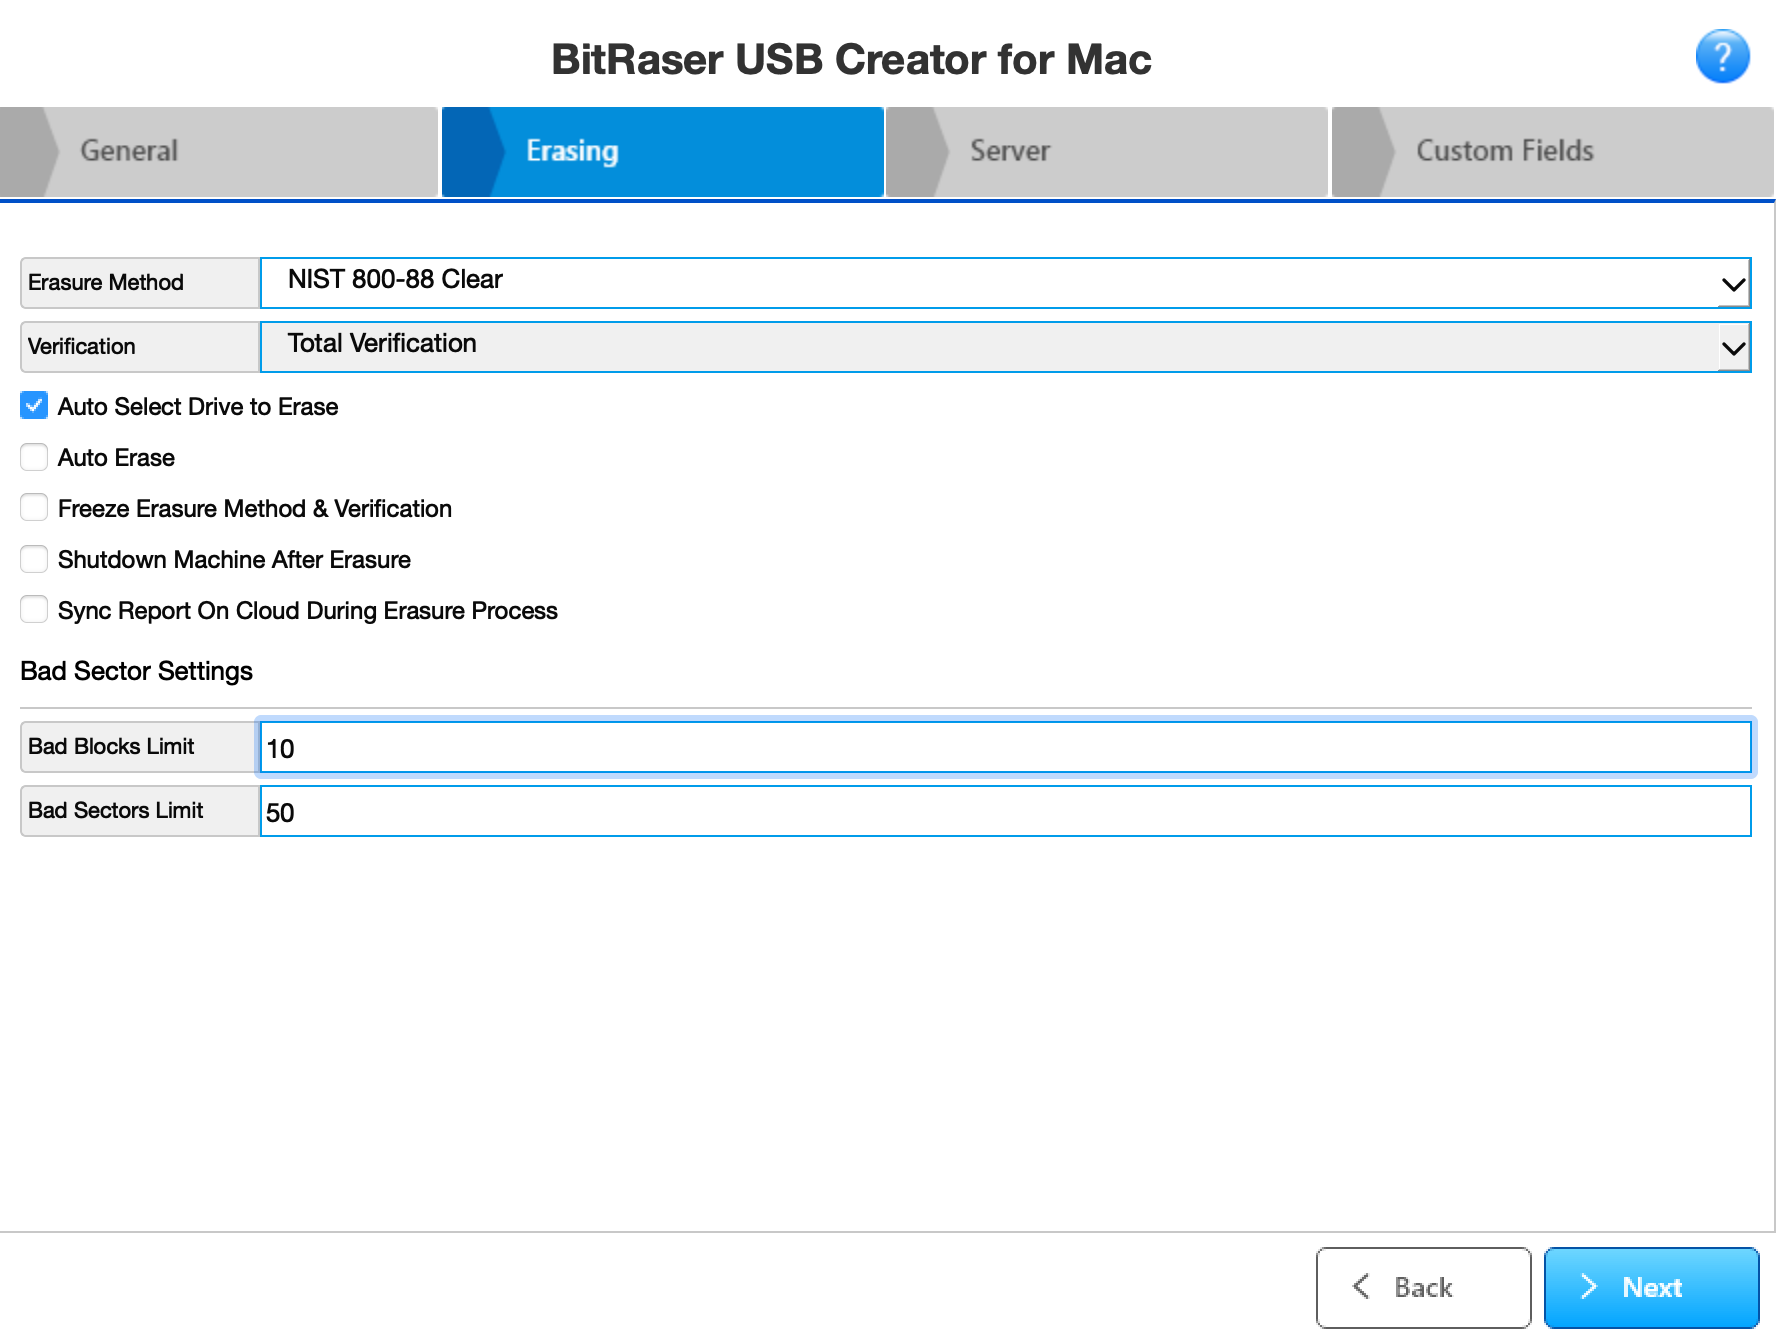
Use the Erasing Settings to add information to various options. Access the list of a variety of options present on the screen below:

-
Erasure Method - Select an erasure algorithm from the drop-down list. The application will use the selected algorithm to erase the drive.
Note: Refer to Erasure Algorithms to know the purpose of each algorithm.
-
Verification - Choose a verification method from the drop-down list.
Note: Refer to Verification Methods to know the purpose of each method.
-
Auto Select Drive to Erase - This field is checked by default. Checking this field automatically selects all the connected drives for the erasure process in the BitRaser application.
-
Auto Erase - Check this field to automatically start erasing the connected drives after the BitRaser application connects to the internet.
-
Freeze Erasure Method & Verification - Check this field if you want to freeze the erasure and verification methods. Freezing will prevent changes to these methods in the application at a later stage.
-
Shutdown Machine After Erasure - Check this field to shut down the machine after the erasure process completes.
-
Sync Report on Cloud During Erasure Process - On checking this field, the report will be updated at each percent of the erasure process.
-
Bad Sector Settings - Set the default limit of bad sectors and blocks so that the erasure process would automatically stop.
-
Bad Blocks Limit: Enter the number of bad blocks where you want to stop the erasure process.
-
Bad Sectors Limit: Enter the number of bad sectors on which you want to stop the erasure process.
Click on Next to go to Server. Clicking on Back will take you to General.
 3. Getting Started