BitRaser Mobile Eraser & Diagnostics
- 1. About BitRaser Mobile Eraser & Diagnostics
- 2. About the Guide
 3. Getting Started
 4. Working with BitRaser Mobile Eraser & Diagnostics
- 5. Frequently Asked Questions (FAQ)
- 6. About Stellar

BitRaser Mobile Eraser & Diagnostics / 3. Getting Started / 3.4. General Overview of User Interface
3.4. General Overview of User Interface
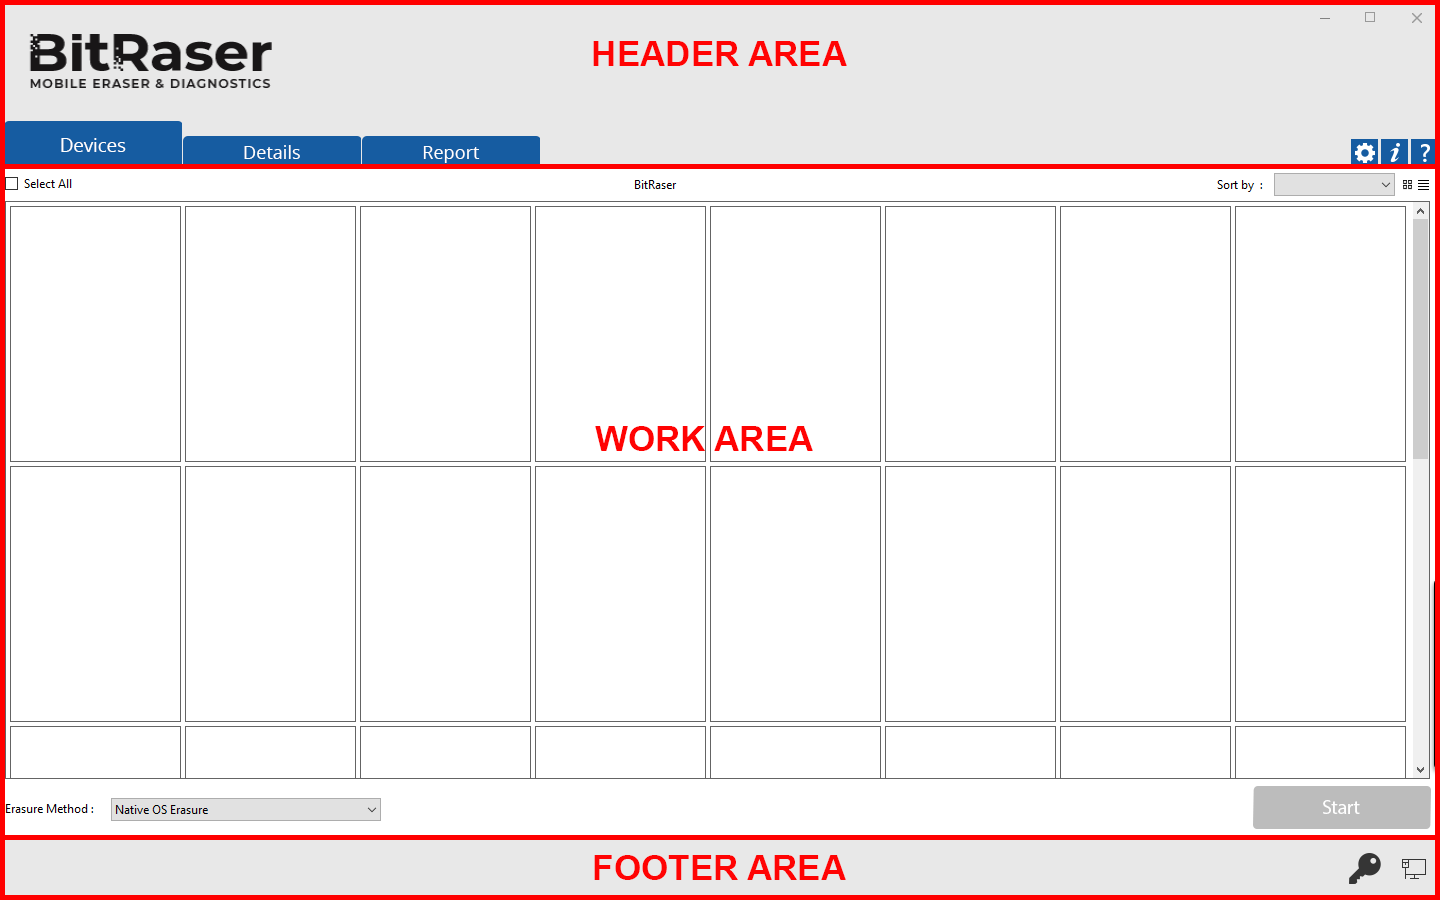
The user interface is divided into three main areas:
-
Header area
-
Work area
-
Footer area

-
Header Area: The header area contains the following tabs and buttons:
-
Devices Tab
 : This tab contains a list the connected devices in grid or list view and is used to perform erasure and diagnostic process.
 -
Details Tab
 : This tab is used to enter various details to be included in reports. To know more, refer to the Details Section.
 -
Report Tab
 : This tab provides a list of BitRaser Mobile Eraser & Diagnostics reports and various options for Working on Reports.
 -
Settings Button
 : Click this button to update various settings available for BitRaser Mobile Eraser & Diagnostics.
 -
About Button
 : Click this button to see information about BitRaser Mobile Eraser & Diagnostics and system information as given below:

-
Help Button
 : Click this button to open this help guide from the application.
-
Work Area: The work area contains all the specific information and functionality of the selected tab or button.
-
Footer Area: The footer area contains the following buttons:
-
License Key Button
 : Click this button to view the BitRaser Mobile Eraser & Diagnostics license information. If you are not connected to BitRaser Cloud, this button opens the User Settings for login authentication.
 -
Network Button
 : Click this button to check the current status of the network. A red cross mark on this button shows that BitRaser Mobile Eraser & Diagnostics is not connected to the internet.