Please Follow the Steps to Start Wiping in Less than 5 Minutes:
Step 1: Connect both USBs to the host machine on which wiping will be performed. (Refer to Image 2)
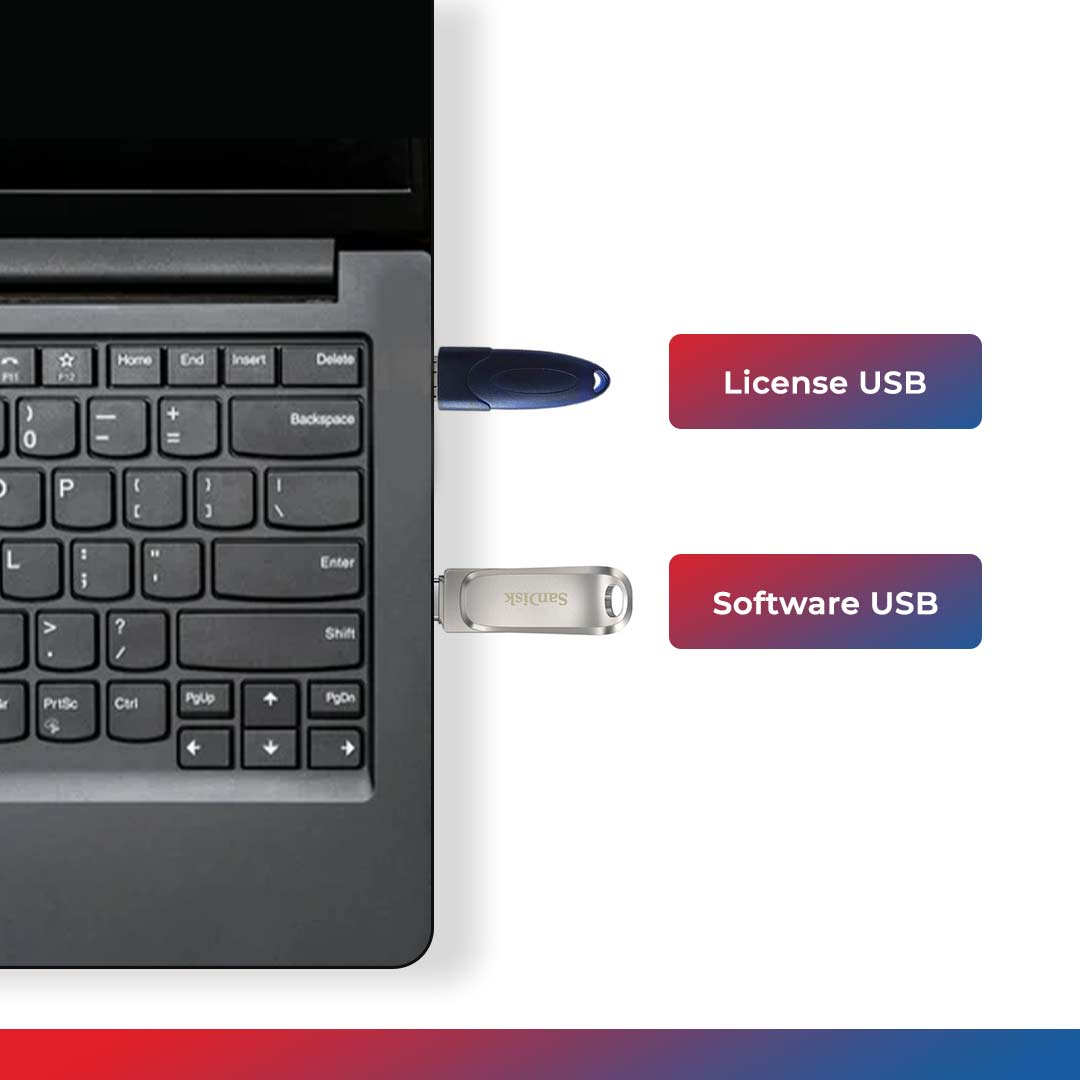
Image 2: BitRaser Software & License USB Connected to Laptop
Step 2: Turn 'ON' the system and press the Function keys (per your laptop/desktop brand) to enter the Boot Menu and boot from BitRaser USB.
Select the BitRaser USB Device and press 'Enter.' (Refer to Image 3)
A screen with 'BitRaser Boot Menu' will appear; select 'BitRaser' and press 'Enter' to boot the machine with the BitRaser Drive Eraser software. (Refer to Image 4)
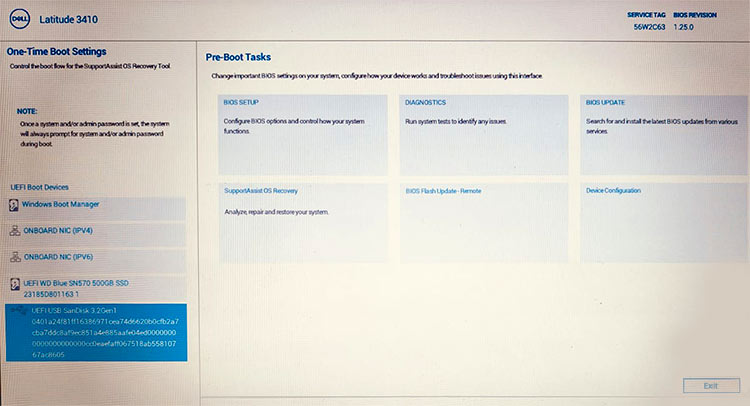
Image 3: Dell Latitude Boot Menu: Select the BitRaser USB and Press Enter
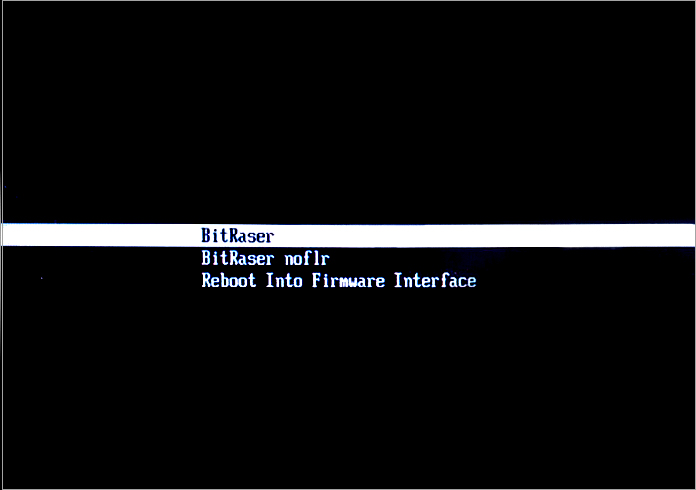
Image 4: BitRaser Drive Eraser UEFI Boot Menu
Once the machine boots, you can see your connected drives on the BitRaser main screen. You can see multiple tabs – Erasure, Erasure Details, Report, Advanced Options, and Settings. The license number appears as 'License Left' in the bottom right corner. (Refer to Image 5)
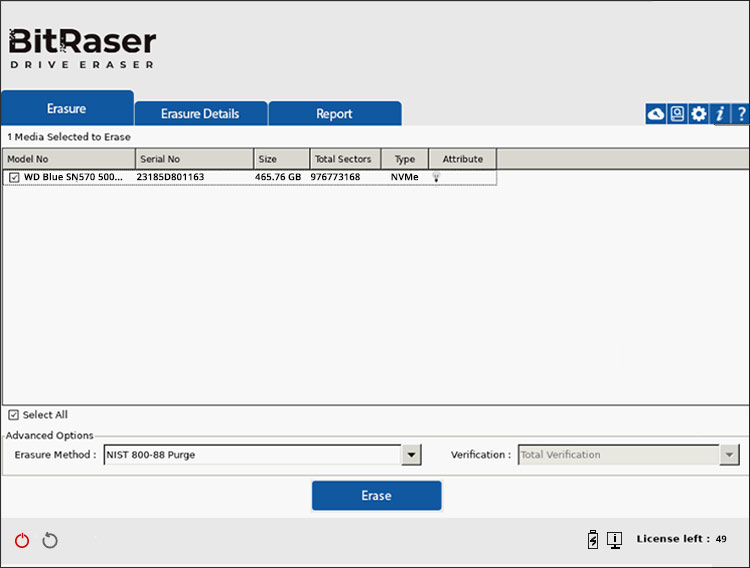
Image 5: BitRaser Drive Eraser Offline Variant Main Screen
Step 3: Select all the drives you want to erase. We have not connected any external drives on this device; hence, only one drive is visible.
Next, select an 'Erasure Method' from the dropdown list at the bottom of the screen and click 'Erase.' A message prompt will appear to confirm the erasure process. Click 'Yes' to confirm. (Refer to Image 6)
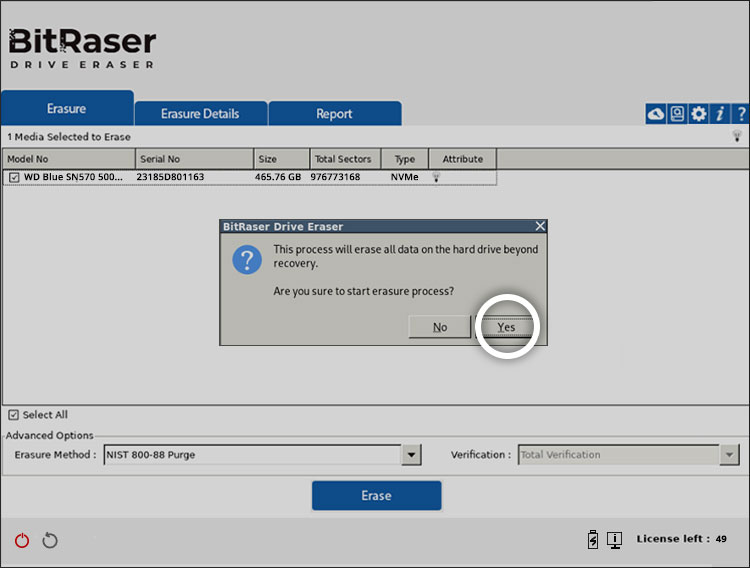
Image 6: Click Erase, then Click Yes to Begin Wiping
The software will start wiping the selected drive. It will display the runtime progress on the main interface. (Refer to Image 7)
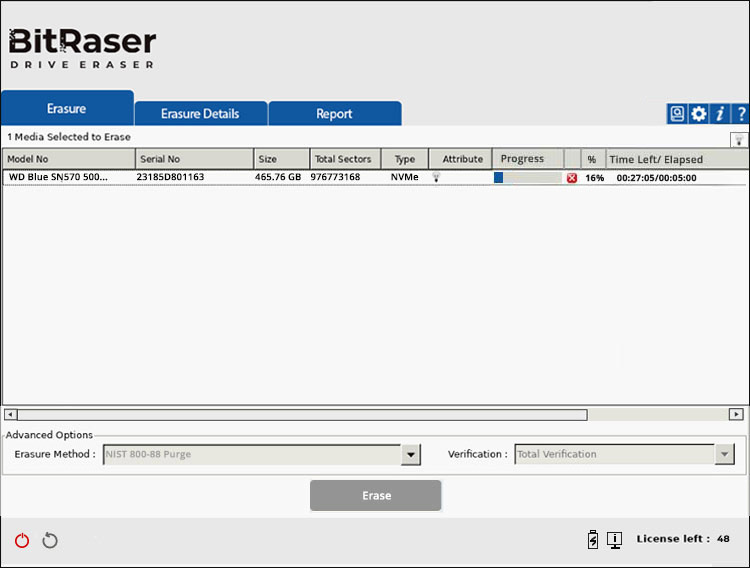
Image 7: BitRaser Drive Eraser Offline Variant Wiping Progress Screen
Once the process finishes, you'll see a green tick on the screen indicating the erasure process is completed. (Refer to Image 8)

Image 8: BitRaser Erasure Process Completed Green Tick Screen
After erasing the drives, the software will generate digitally signed reports & certificates for all the drives.
Step 4: Click the 'Reports Tab' to save the erasure reports and certificates on the software USB drive. Reports act as audit trails for compliance needs. (Refer to Image 9)

Image 9: Go to the Reports Tab and Save Erasure Reports