BitRaser® Drive Eraser MSI Package
In this deployment guide, we will share instructions to perform a remote wipe on a laptop or desktop using the BitRaser Drive Eraser MSI package delivered via the cloud.
BitRaser Drive Eraser remote wiping software is a powerful Windows-based utility that allows you to remotely wipe Windows machines with minimal human intervention. The Drive Eraser MSI package helps you erase multiple remote Windows machines via the MSI package deployed locally, in silent mode, or through endpoint management systems like Microsoft SCCM, Intune, SolarWinds, etc. The software can be deployed as below to perform a remote wipe:
- Download the BitRaser MSI Application via E-Mail or
- Push the MSI package using an endpoint management system
For this deployment, we will explain the local deployment of the MSI package on a laptop in detail and share brief steps on deploying via Microsoft SCCM.
Wipe Windows-Based Device Remotely Using MSI Package:
Step 1: Post-purchase of BitRaser Drive Eraser software, log in to the 'BitRaser Cloud Console.' Navigate to the 'Download BitRaser' panel on the left, then click on 'Remotely Wipe Endpoint Devices using MSI Package' to download the required MSI package. You have the option to download either the 'Standard' or 'Stealth' deployment based on your business needs. The Stealth deployment gets installed silently on the target device that needs to be erased, while the Standard deployment operates like regular software. (Refer to Image 1)
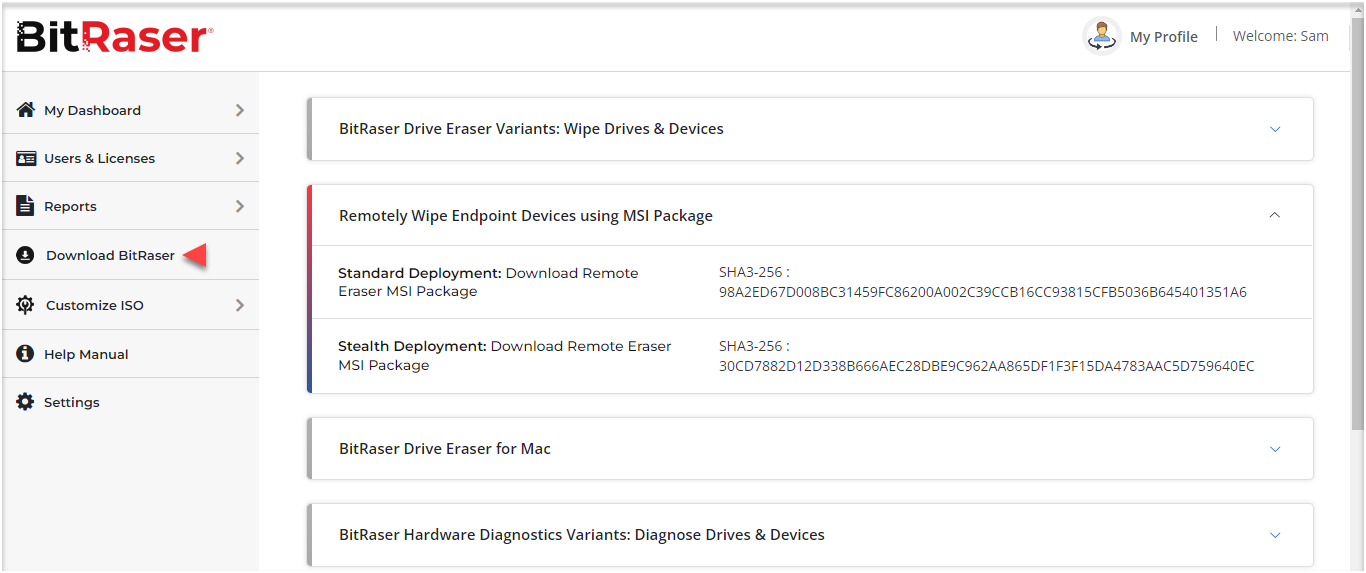
Image 1: Download BitRaser Remote Eraser MSI Package
Step 2: Double-click on the application to install the MSI package on the Windows laptop or desktop you want to wipe. The software will be installed on your device, and you will see the 'Prepare your computer for erasure' screen. Now, click on 'Start' (Refer to Image 2)
Note: The application requires Administrator-level permission for installation.
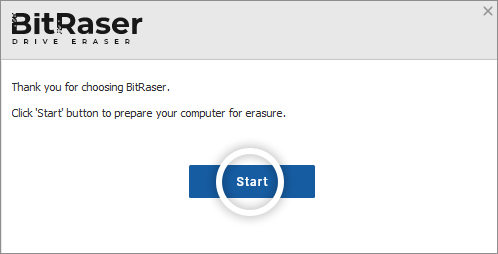
Image 2: Prepare your Computer for Erasure - Click on 'Start' Button.
Step 3: Next, you will see the 'Computer is ready for erasure' screen. Click on 'Restart' to boot your machine with BitRaser Drive Eraser. (Refer to Image 3)
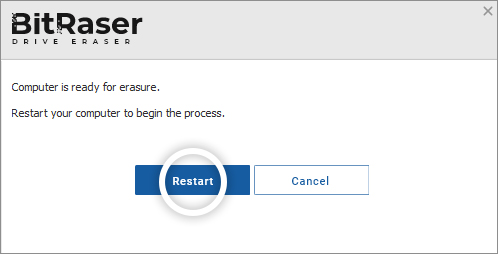
Image 3: Computer is Ready For Erasure : Click on 'Restart' Button.
Step 4: The system will reboot with BitRaser Drive Eraser automatically, or you can press 'Enter' on 'BitRaser' in the 'Windows Boot Manager' screen. The BitRaser option is selected by default. (Refer to Image 4)
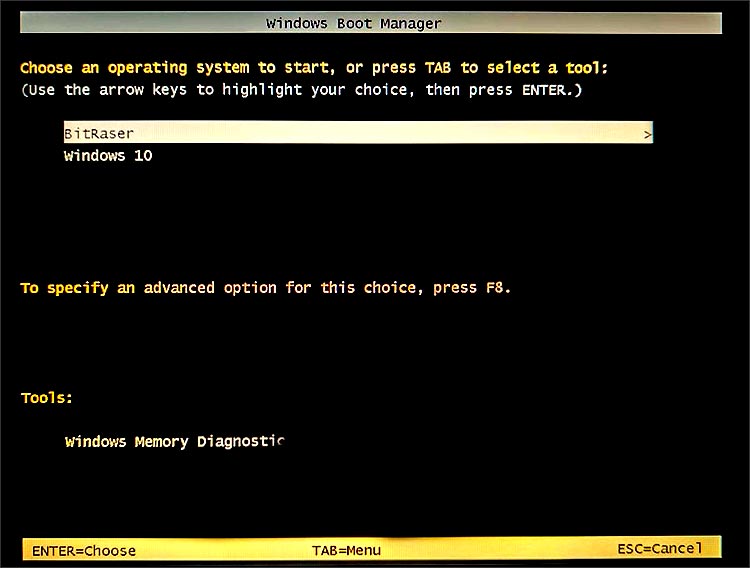
Image 4: Windows Boot Manager Press Enter on BitRaser
Once the laptop boots, all your connected drives are listed there. (Refer to Image 5)
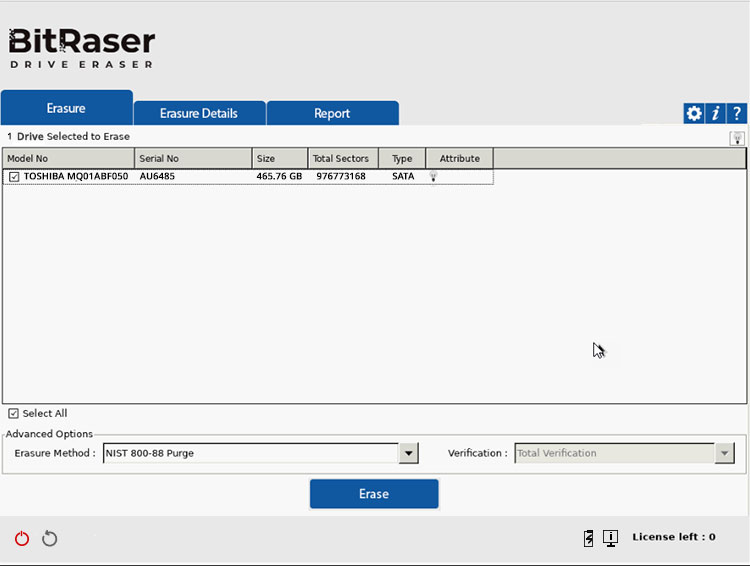
Image 5: BitRaser Main Screen with Connected Drives
Step 5: Connect the BitRaser application to the internet to get 'Erasure Licenses' and sync 'Erasure Reports' to the BitRaser Cloud Console.
To establish an internet connection, go to the top right corner of the screen, click on the settings icon, and select the 'Network' tab. You may connect the device to the Internet via 'Ethernet' or 'Wireless'.
Enter your Wireless or Ethernet credentials to connect the application to the Internet. (Refer to Image 6)
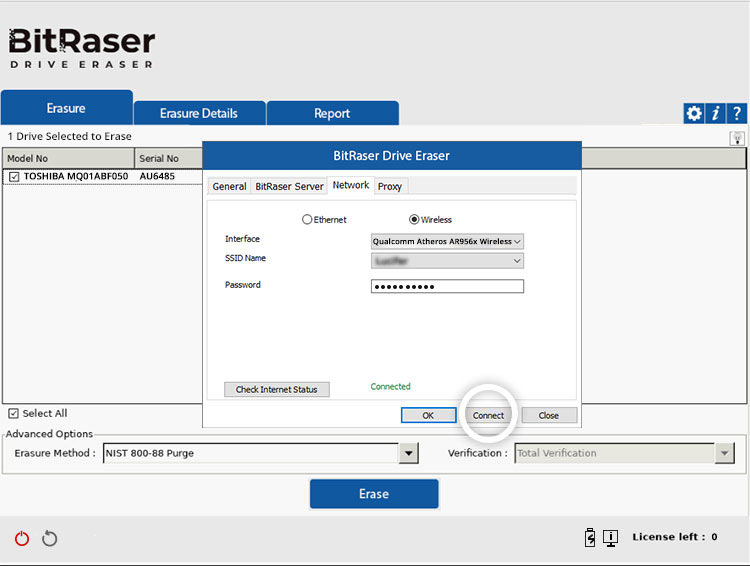
Image 6: Connect the BitRaser Application to the Internet
Note: If your Wi-Fi does not show, you must install the 'Network Driver' INF file on the application. Download the relevant file from the internet and transfer it to a different USB drive. Reboot your system with BitRaser, go to settings under the 'General' tab, and click Install. Select the INF file to install the driver by selecting the relevant file from the USB. (Refer to Image 7)
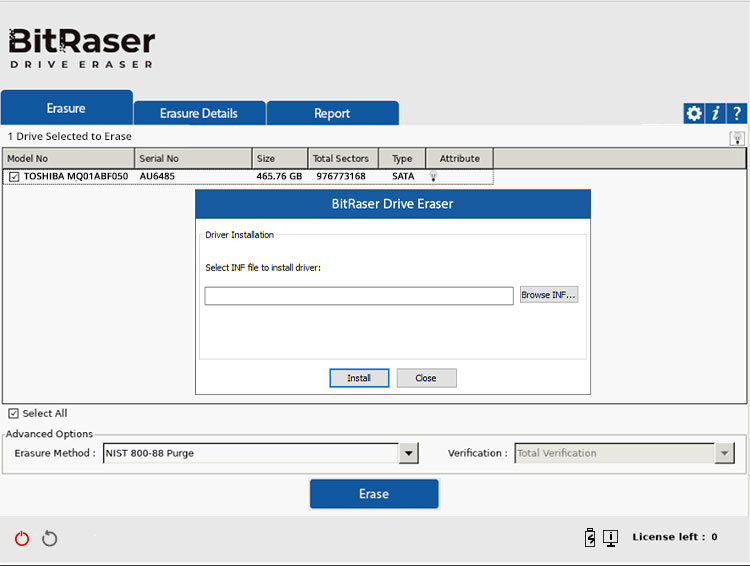
Image 7: Install INF File to Install Network Card Driver
Step 6: Connect the application to the BitRaser Cloud console by going to the 'BitRaser Server' tab and entering your login details. These details were shared over mail when you purchased the 'BitRaser Drive Eraser'. (Refer to Image 8)

Image 8: Connect the Software to BitRaser Cloud Console
Step 7: Select the drive you want to wipe, the erasure method, and the verification type, and then click 'Erase'. You will see an alert window informing you that the data will be wiped permanently; click 'Yes'. The erasure process has started; this process is time-consuming and can take a long time to finish. (Refer to Image 9).
Once the erasure process is completed, you will see the BitRaser erasure report and certificate. The same will be sent to the cloud automatically.
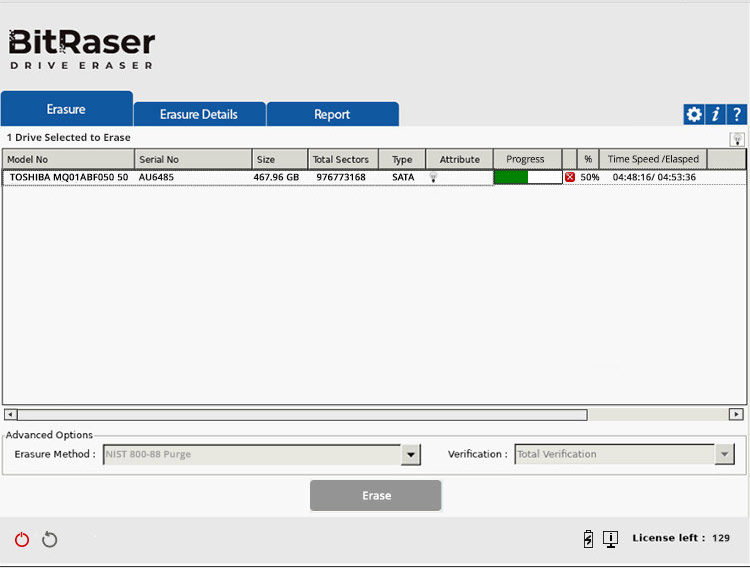
Image 9: Erasure Progress Screen
Remotely Erase Data via MSI Package Deployed through SCCM
Step 1: Download MSI Package.
Step 2: Import MSI Package in SCCM through the 'Create Application Wizard'.
Step 3: Deploy the MSI Package on the required machines/users.
Step 4: Run the Remote Wiping (BitRaser Drive Eraser) application from the System Center on the client end.
Refer to our deployment guide, How to Remotely Erase Devices Using Microsoft SCCM, for detailed instructions.