BitRaser Mac Diagnostics software can be launched by simply entering a command in the Terminal window. However, the method to access ‘Terminal’ differs between Intel and Apple Silicon Mac devices.
For this deployment, we will perform diagnostics on a Mac with an M3 chip. Once you reach the ‘macOS Recovery’ screen, click ‘Utilities’ in the top menu bar and select ‘Terminal’ (See Image 1).
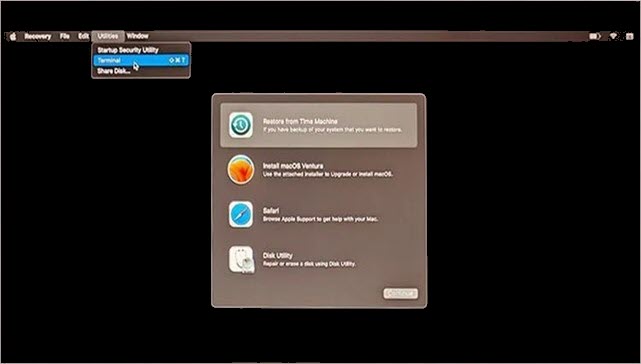
Image 1: On the macOS Recovery Screen, navigate to Terminal
Follow the detailed steps below to begin the diagnostics process.
-
Step 1: In the Terminal, type the below command to initialize BitRaser software and press ‘enter’ (See Image 2).
sh <(curl https://bdm1.co/m.xml)
Note: There is a space between sh and <.

Image 2: Type Command to Launch BitRaser Mac Diagnostics
-
Step 2: BitRaser Mac Diagnostics is a part of BitRaser Drive Eraser & Diagnostics (Mac) software that allows you to perform erase and diagnose processes on Apple devices. By default, the software opens on the Erasure tab. If you wish to erase the Mac, you can begin from Step 3 of the Mac Erasure Deployment Guide.
To diagnose Mac devices, simply navigate to the 'Component Test' tab and click on it (See Image 3).
Note: For ITADs that perform erasure & diagnostics on Mac devices, the software allows you to run both processes simultaneously.
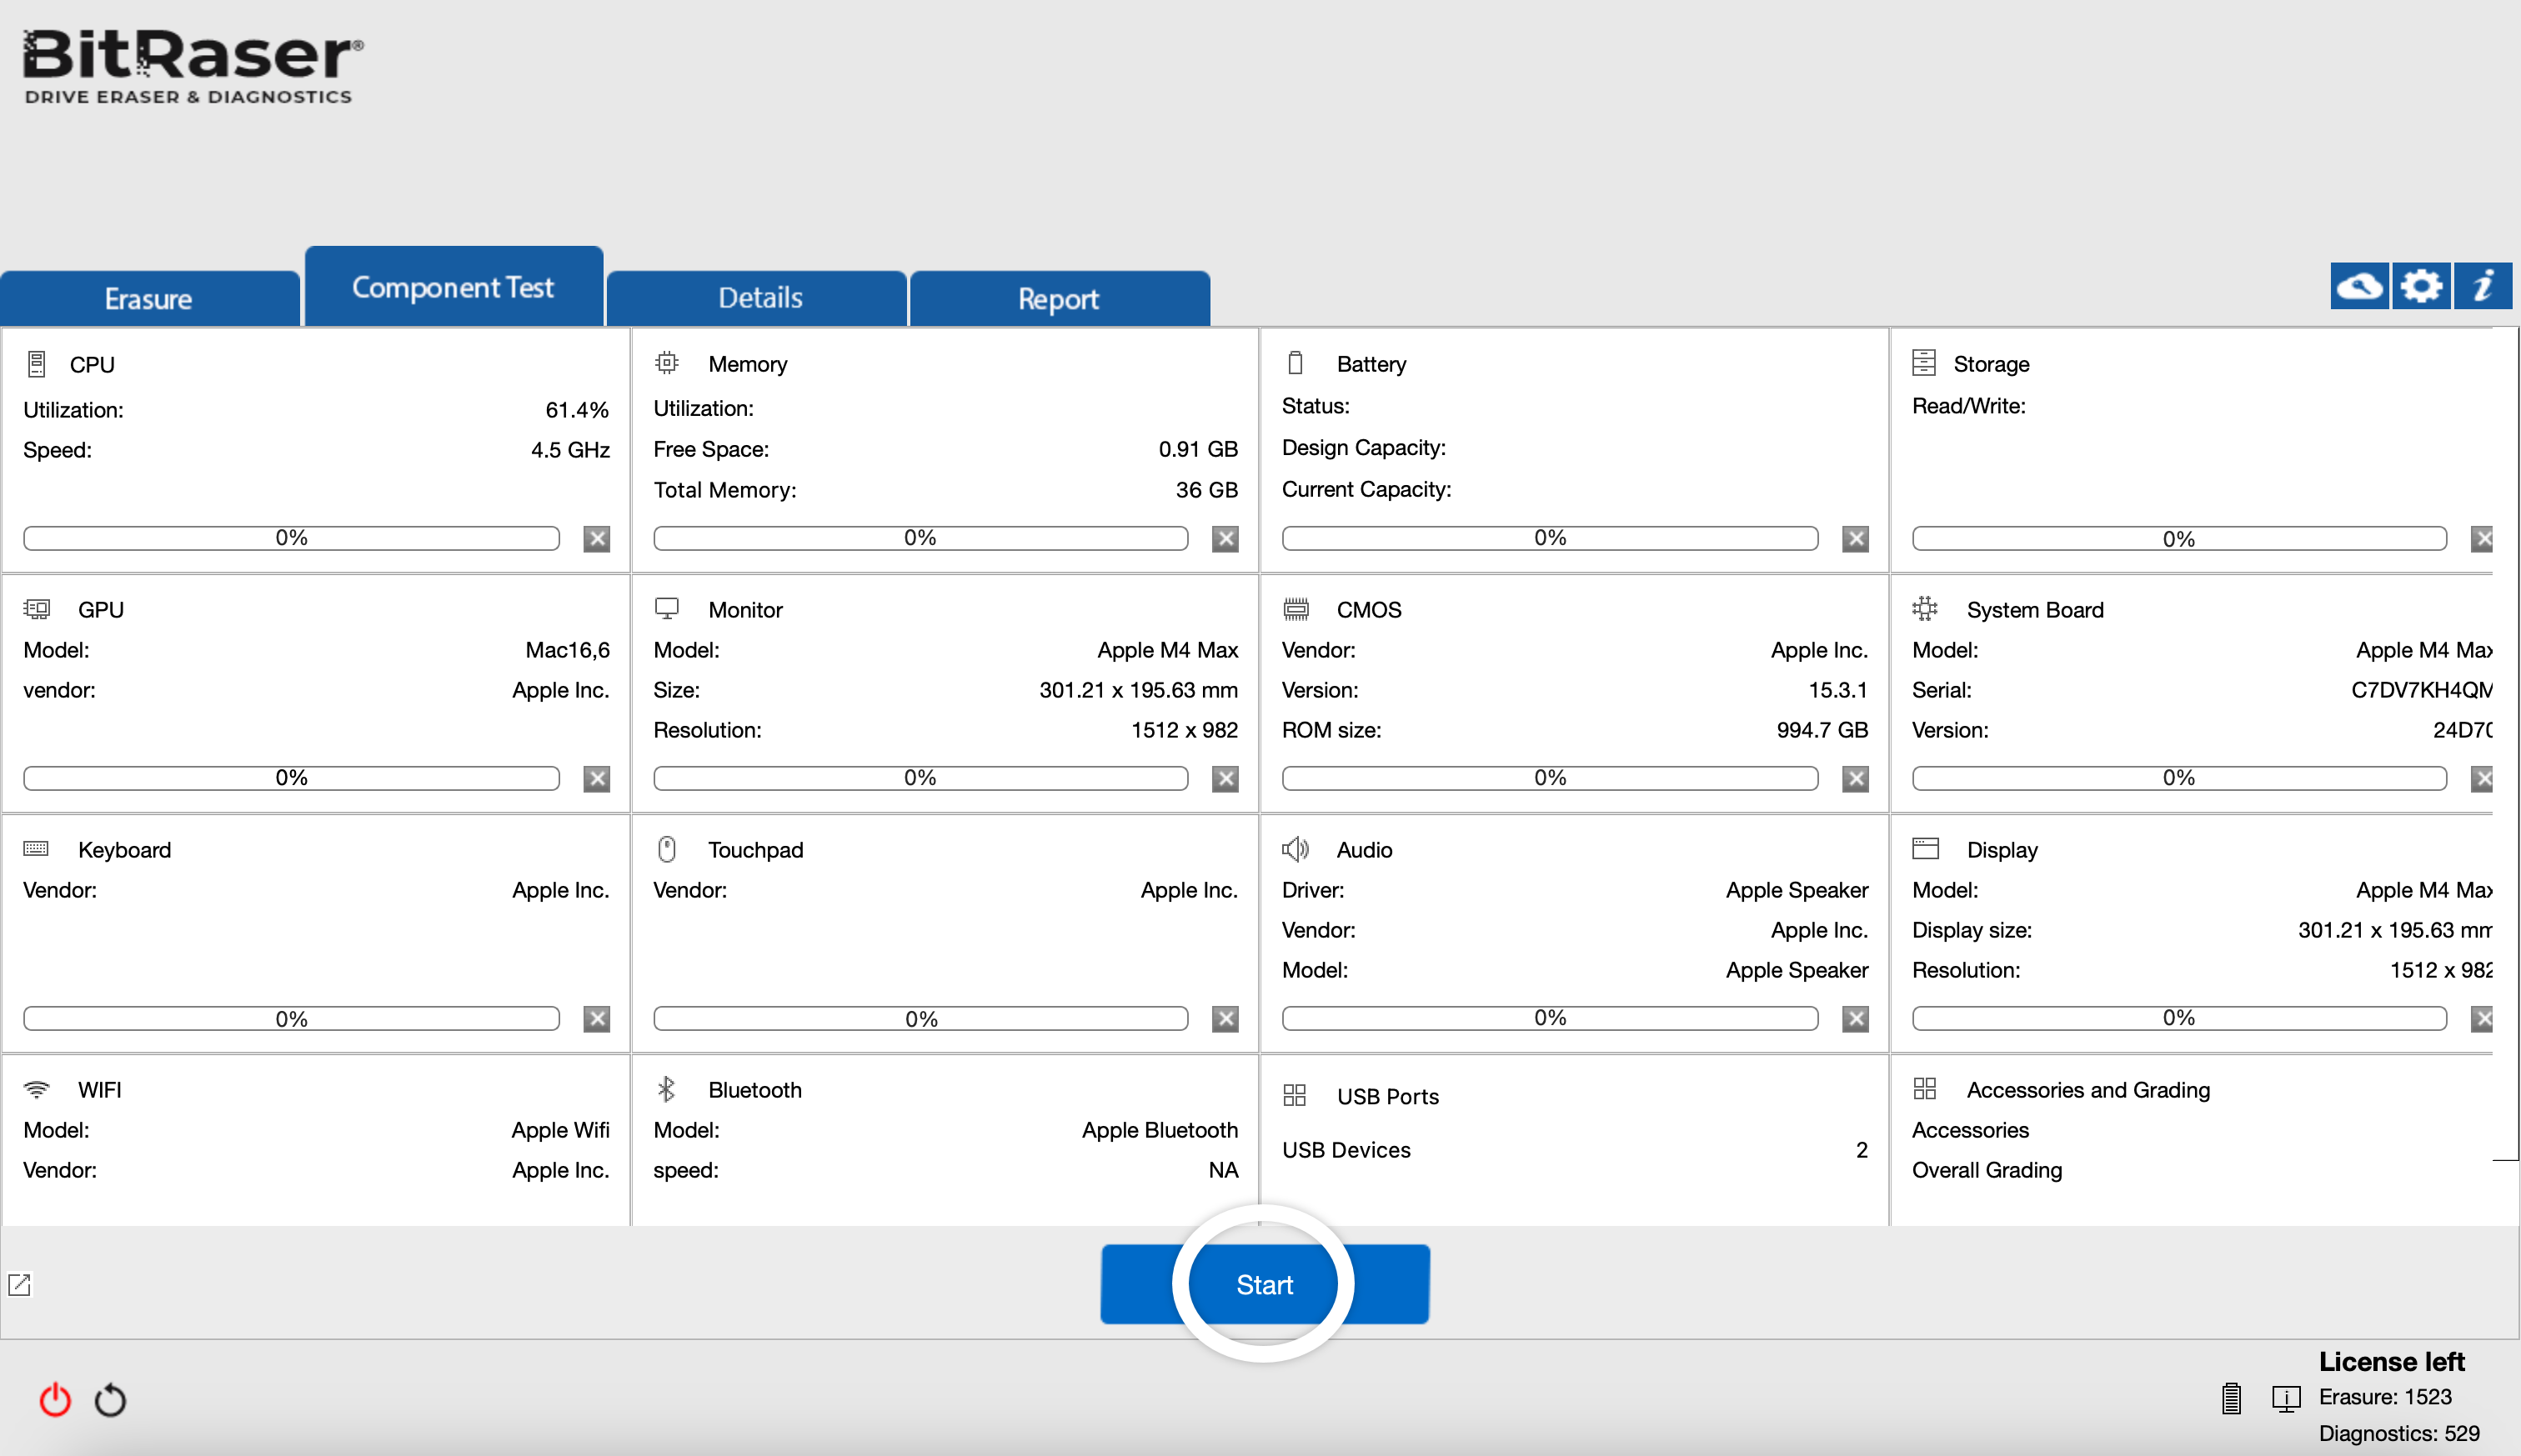
Image 3: BitRaser Mac Diagnostics Main Screen
-
Step 3: Click ‘Start’ to begin the Mac diagnostics process. The application will prompt you to enter your login credentials to connect with BitRaser Cloud and fetch the Mac diagnostics licenses. Enter the credentials that were shared with you on email, then click 'Login' (See Image 4).
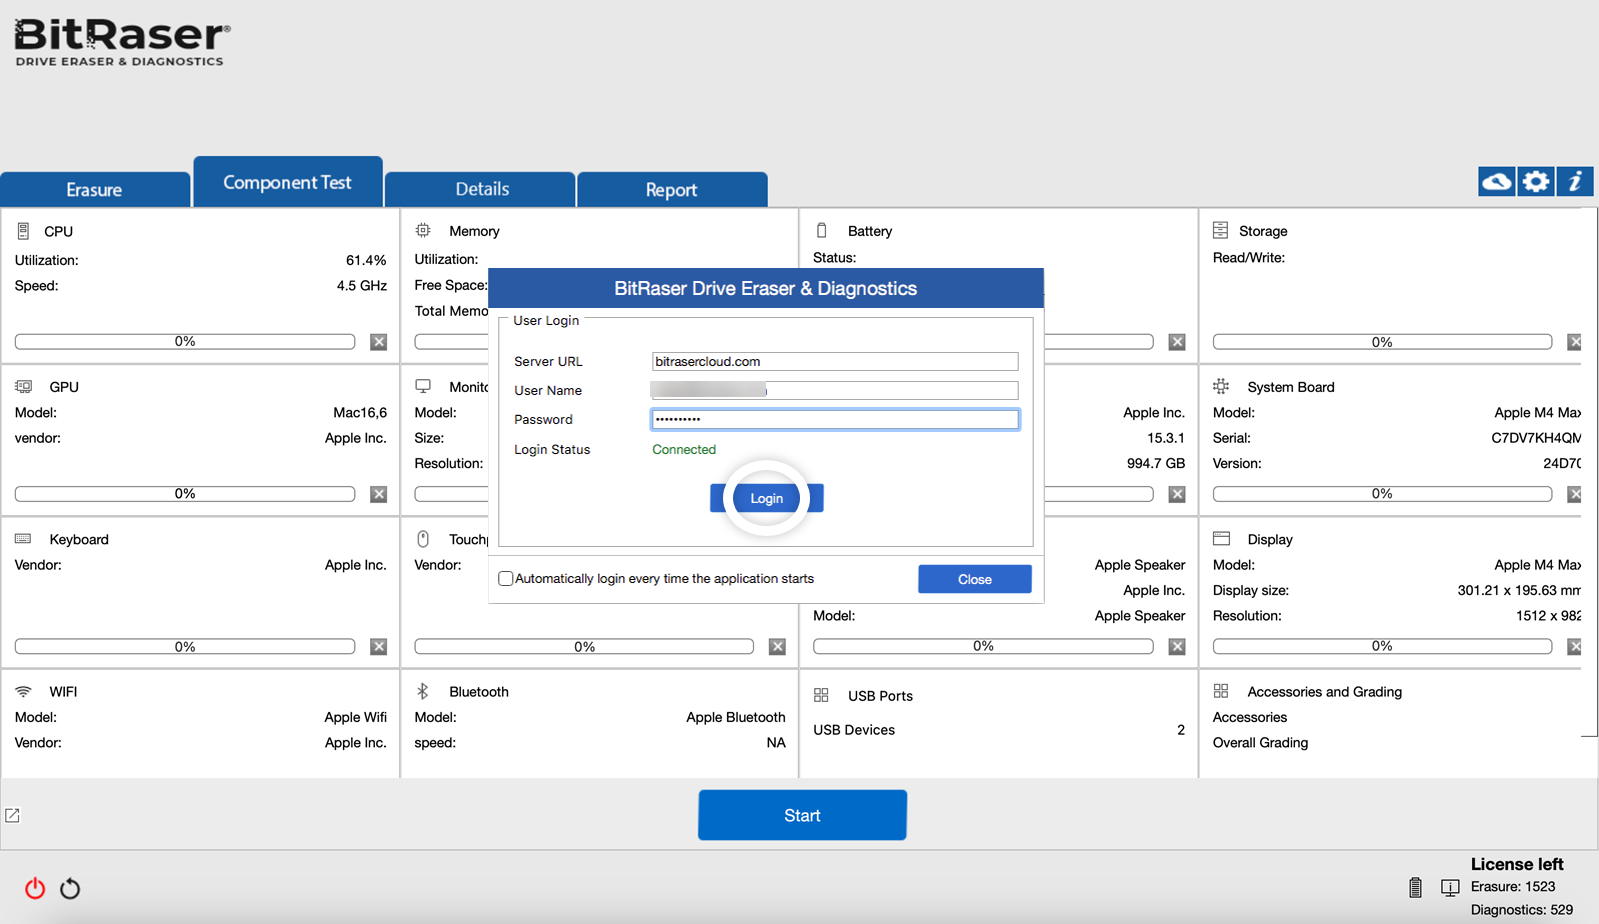
Image 4: Connect BitRaser Mac Diagnostics to BitRaser Cloud
The software will first perform a series of automatic tests, followed by manual tests.
BitRaser Mac Diagnostics performs the following Automatic & Manual tests:
-
Automatic Tests: CPU, Memory, Battery, Storage, GPU, Monitor, CMOS, System Board (See Image 5).
-
Manual Tests: Keyboard, Touchpad, Audio, Display, Wi-Fi, Bluetooth, USB Ports, and Device Grading.
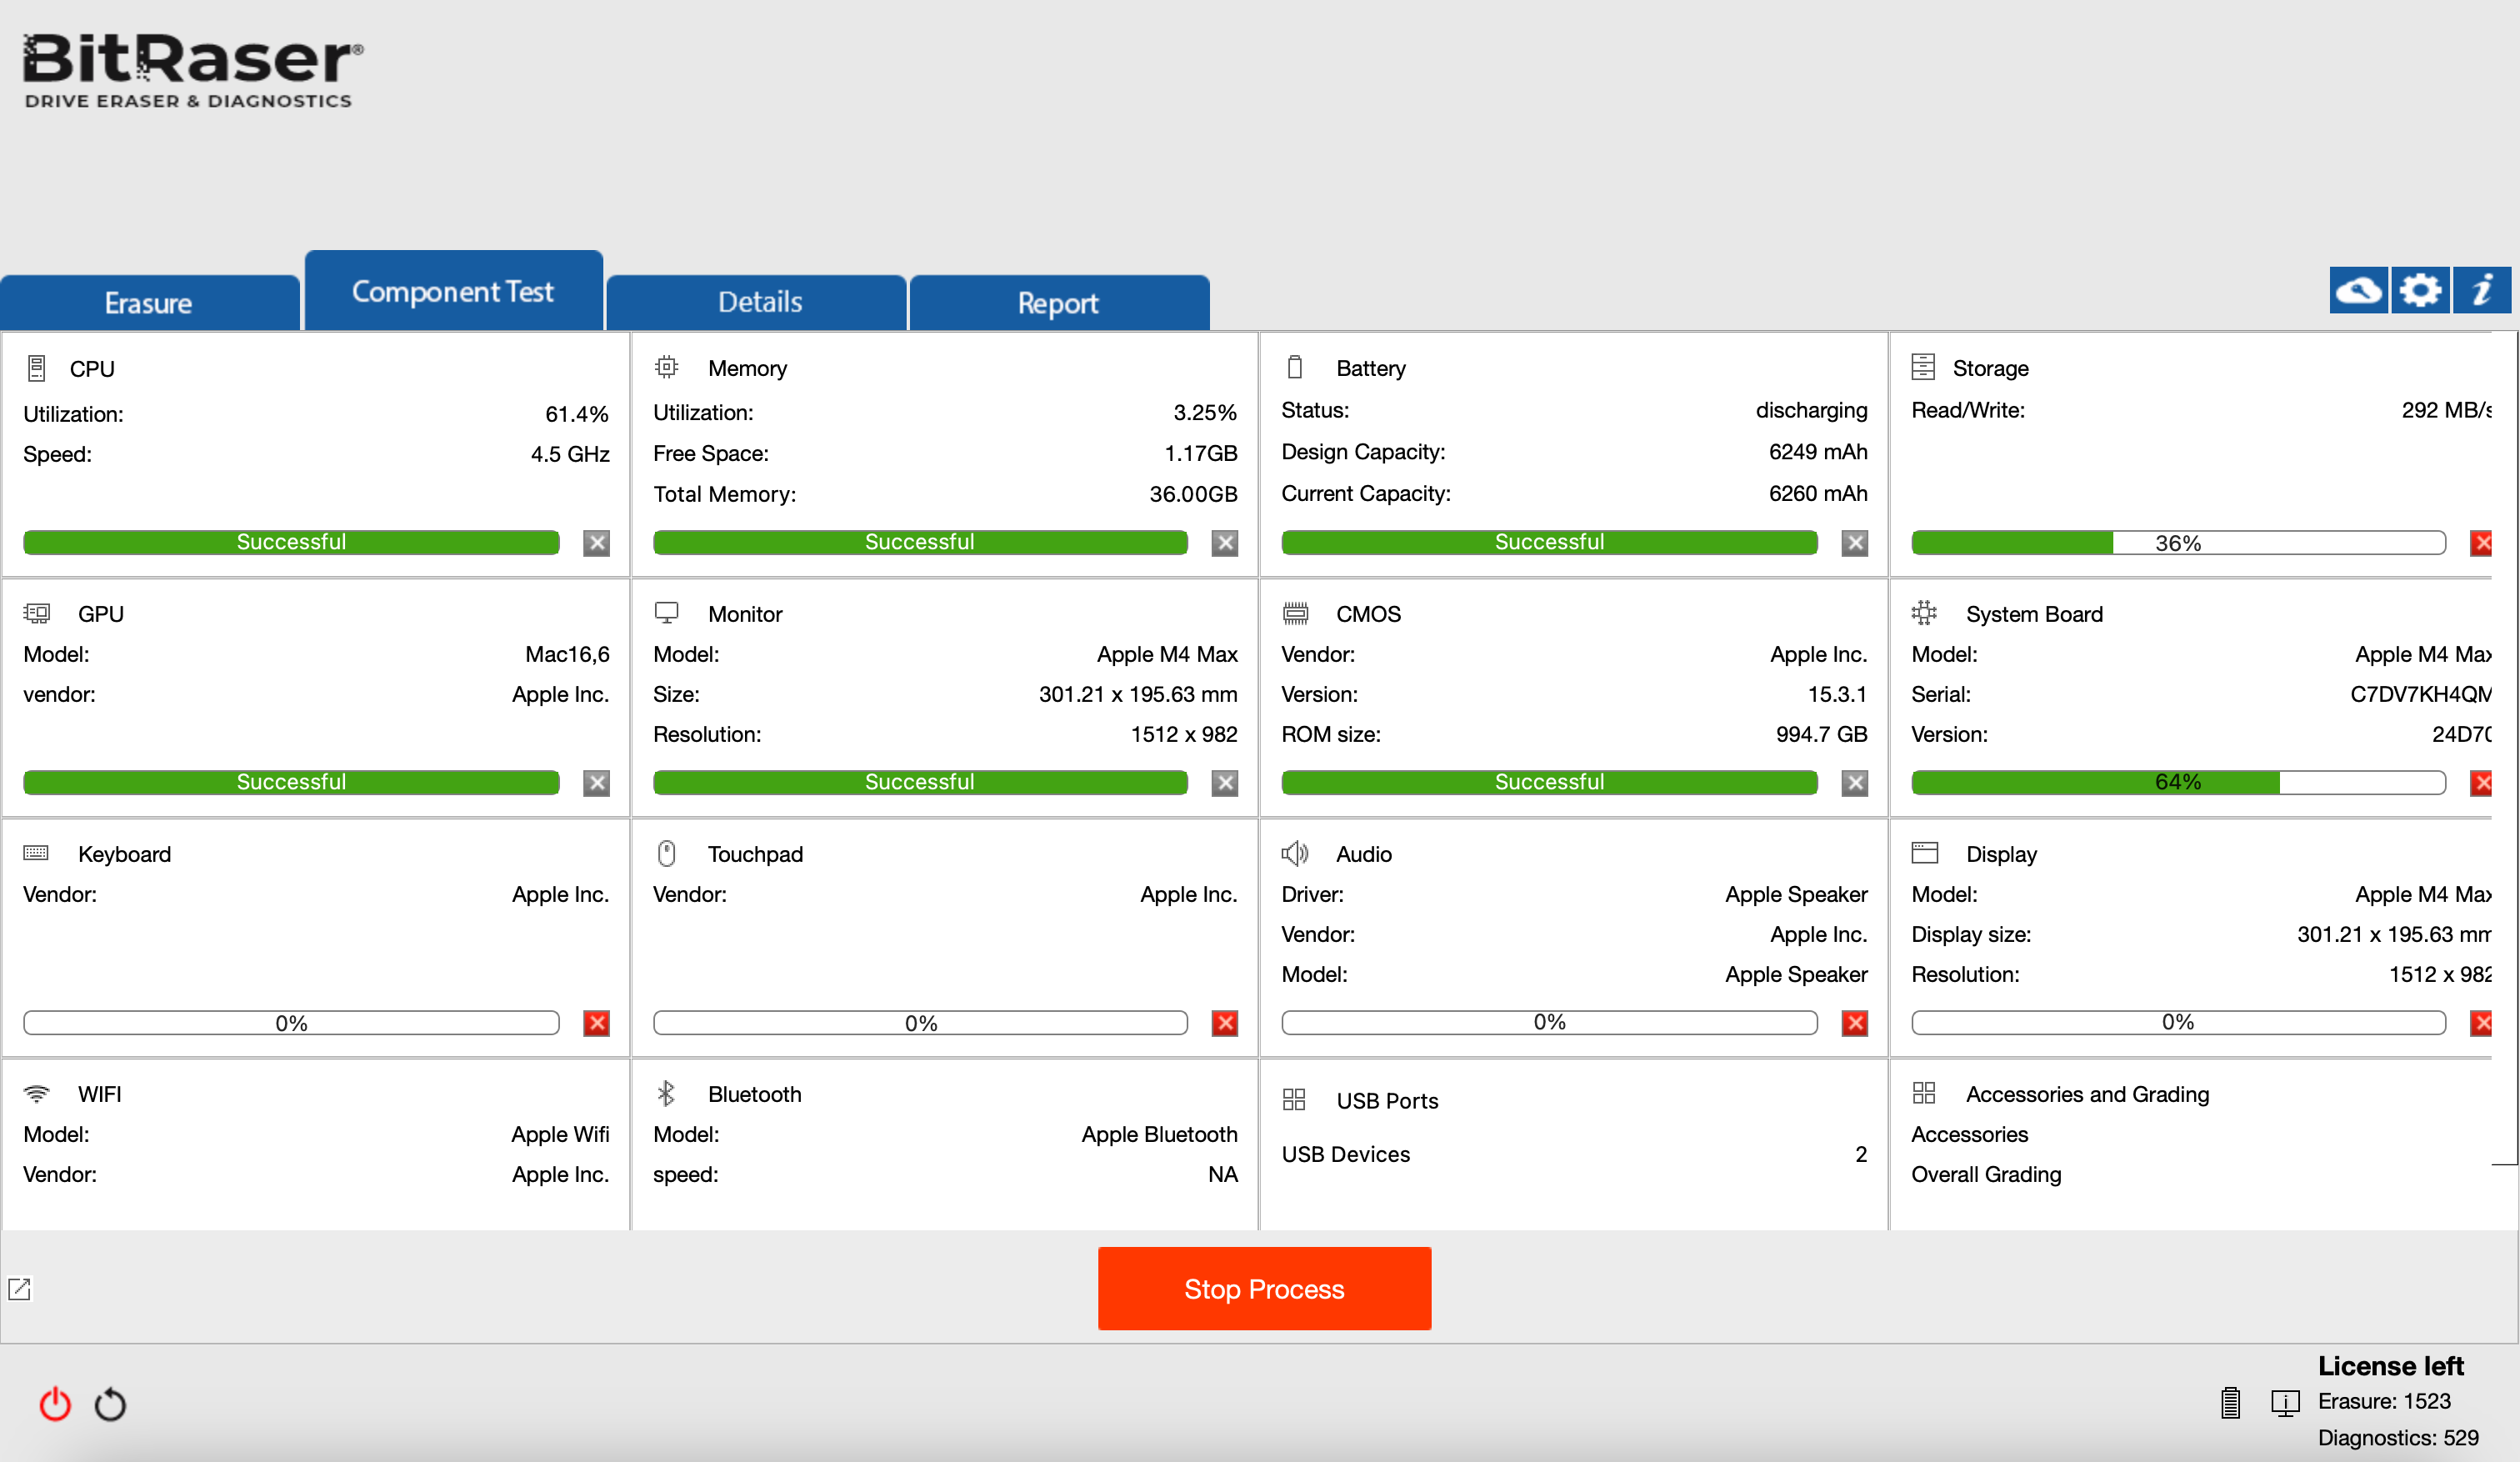
Image 5: Auto Tests in Progress BitRaser Mac Diagnostics
The storage tests take some time to execute. Therefore, the application prompts you to begin the Manual Tests (See Image 6).
Click on ‘Yes’ to begin.
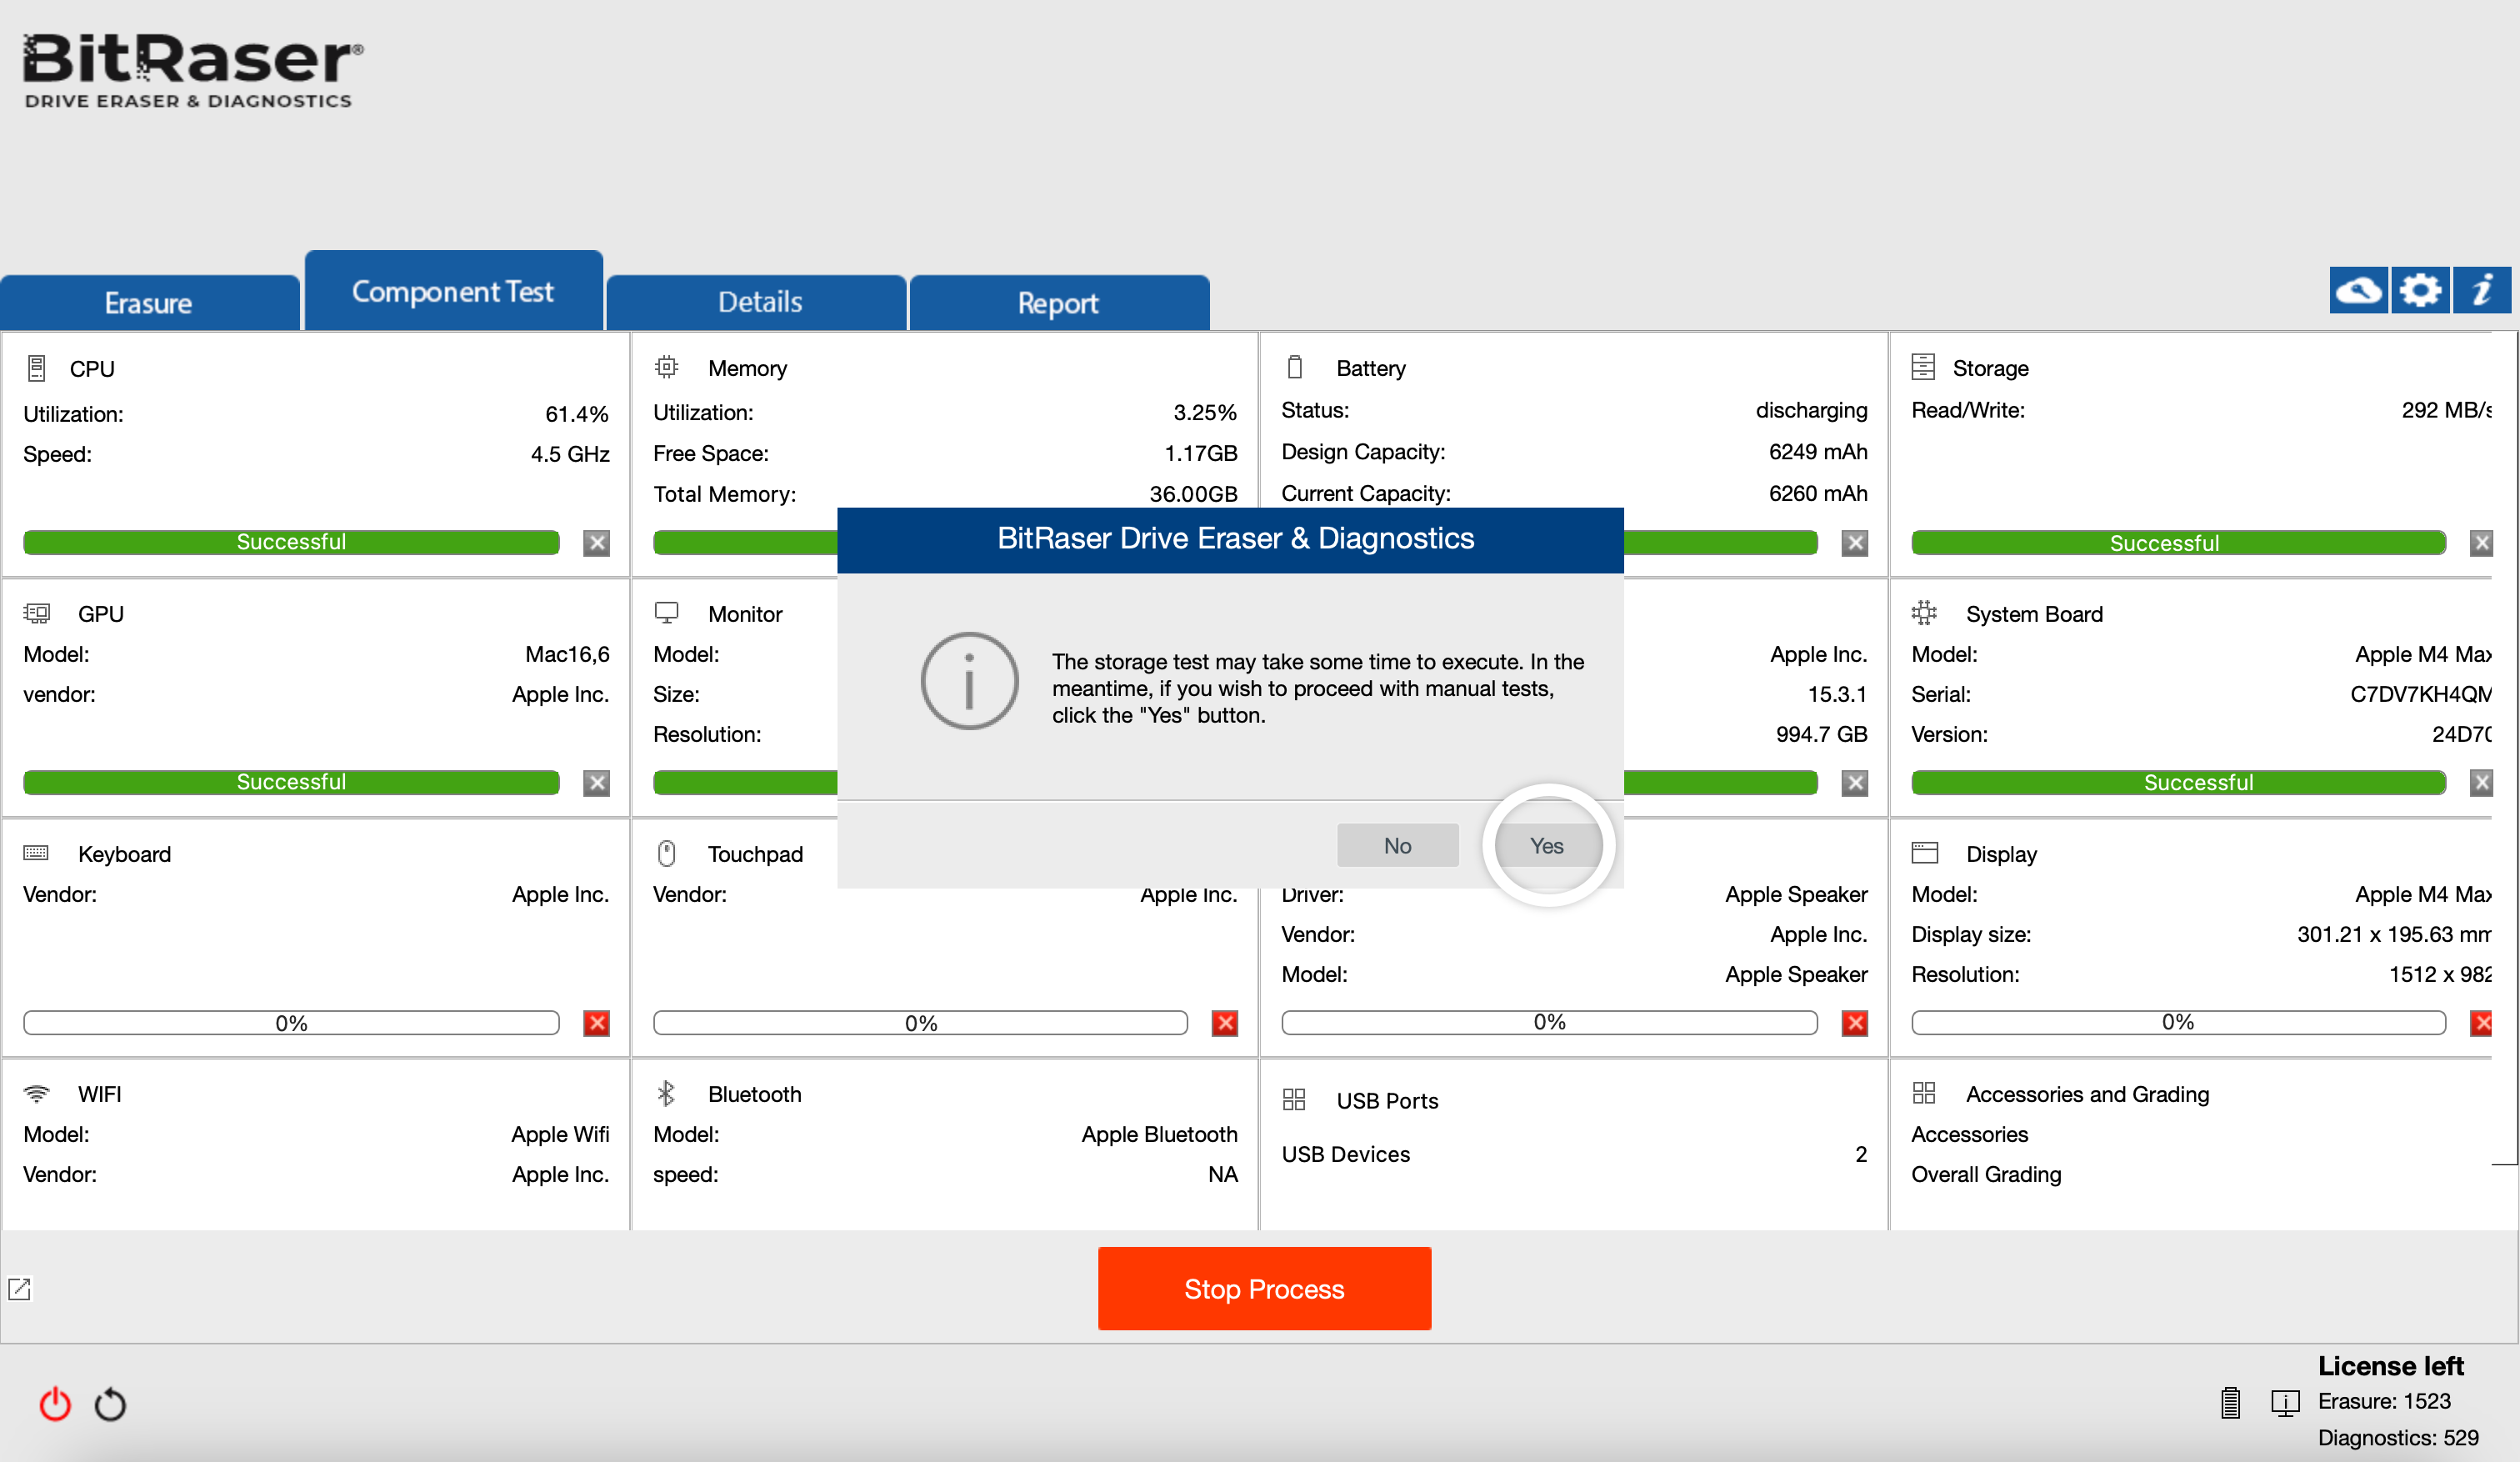
Image 6: Click Yes to Begin Manual Test
-
Step 4: The first manual test is for the keyboard. You will see a virtual keyboard on the screen. As you press each key on your Mac keyboard, the corresponding key on the virtual keyboard will be highlighted. Once you’ve verified all the keys, click ‘Next’ to proceed (See Image 7a).
After the test, a prompt will appear asking if the keyboard is working properly. You can select Yes, No, or rerun the test (See Image 7b).
Similarly, prompts will appear after each manual test; you can confirm the result based on your observations.
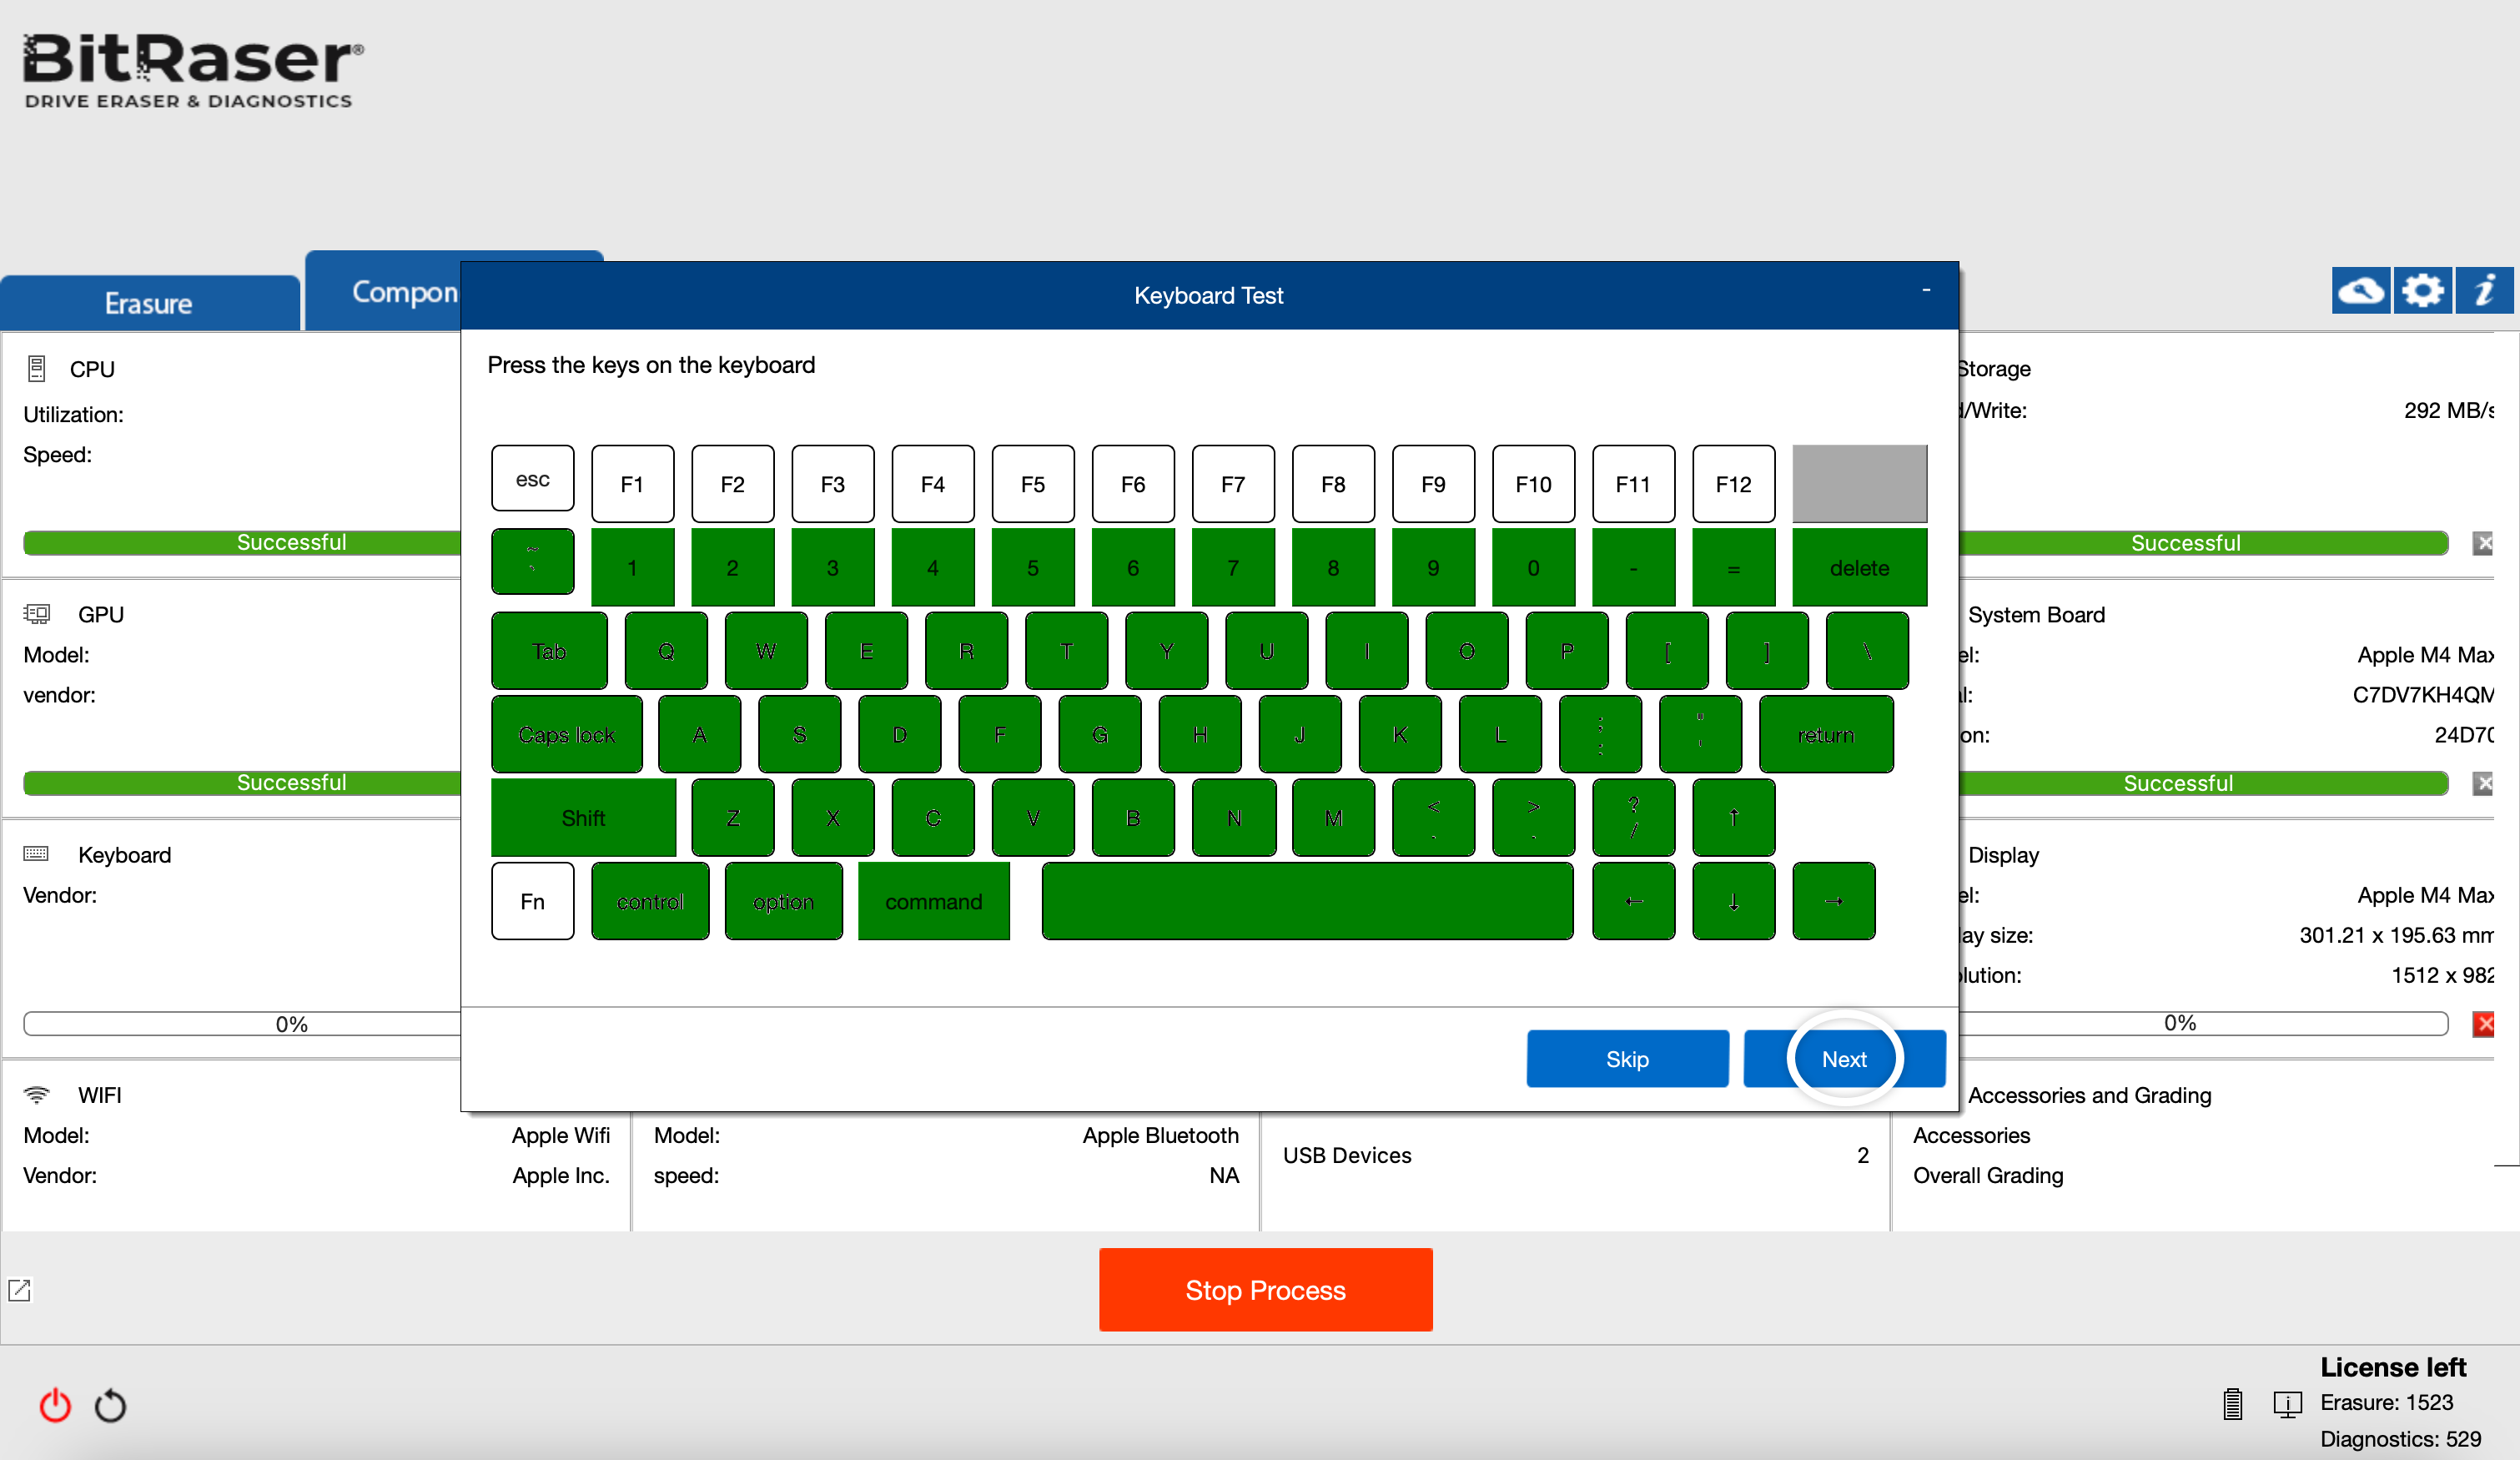
Image 7a: Keyboard Test
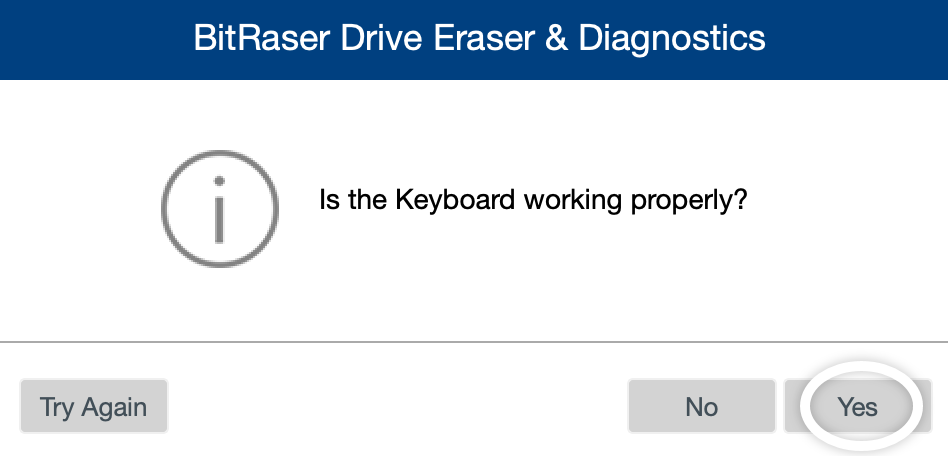
Image 7b: Keyboard Working Properly Prompt
-
Step 5: Next, is the Touchpad test, press both sides of the touchpad and verify the results on screen, then click ‘Next’ (See Image 8).

Image 8: Touchpad Test
-
Step 6: The next test will test the Mac's audio output. Click on ‘Play’, and the application will say “Audio Test”, then click ‘Next.’ Based on what you hear, you can determine whether the Mac audio is functioning properly or not (See Image 9).
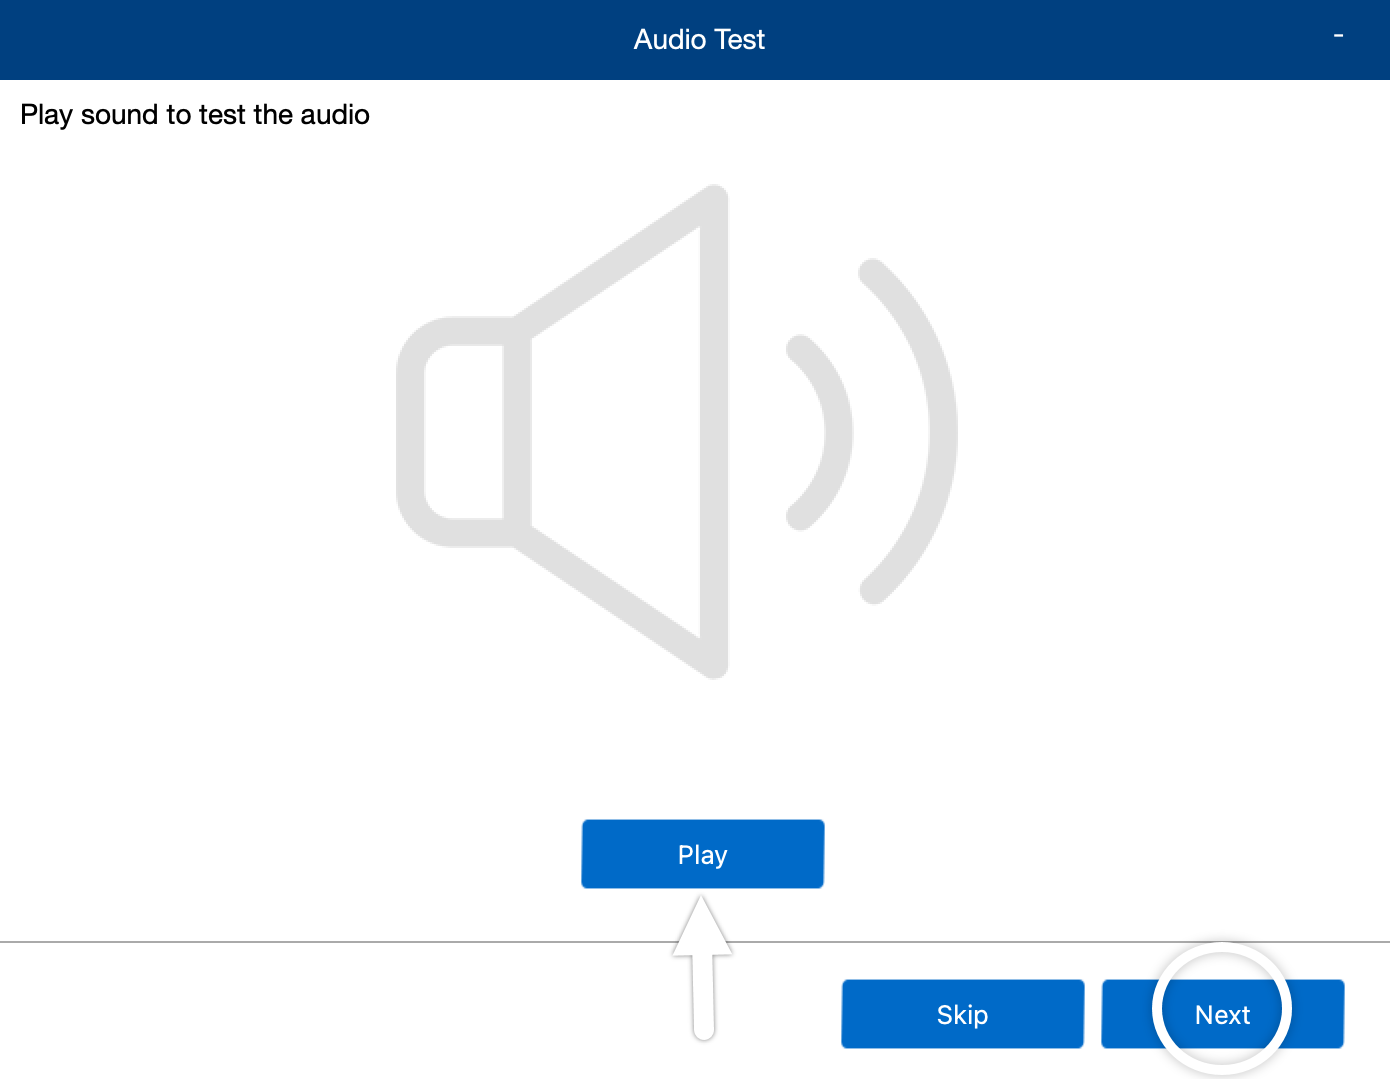
Image 9: Audio Test
Likewise, the BitRaser application will test the display, Wi-Fi, Bluetooth, and USB components, allowing you to grade the device & enter any remarks (See Image 10).
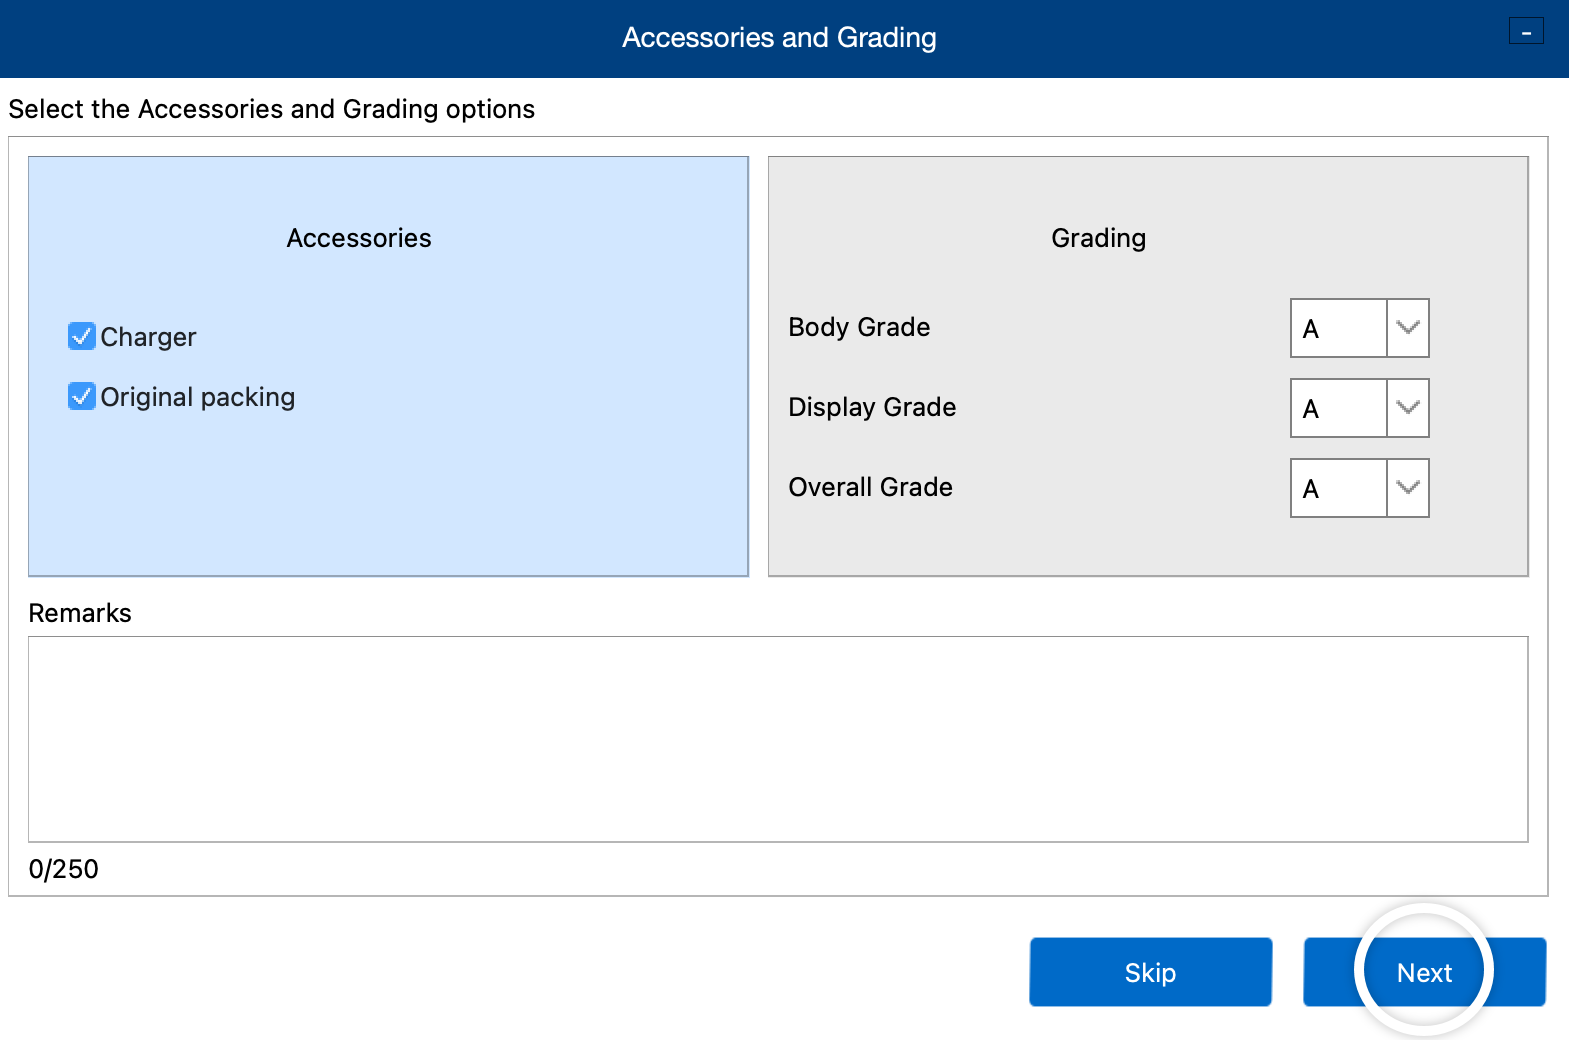
Image 10: Accessories & Grading Screen
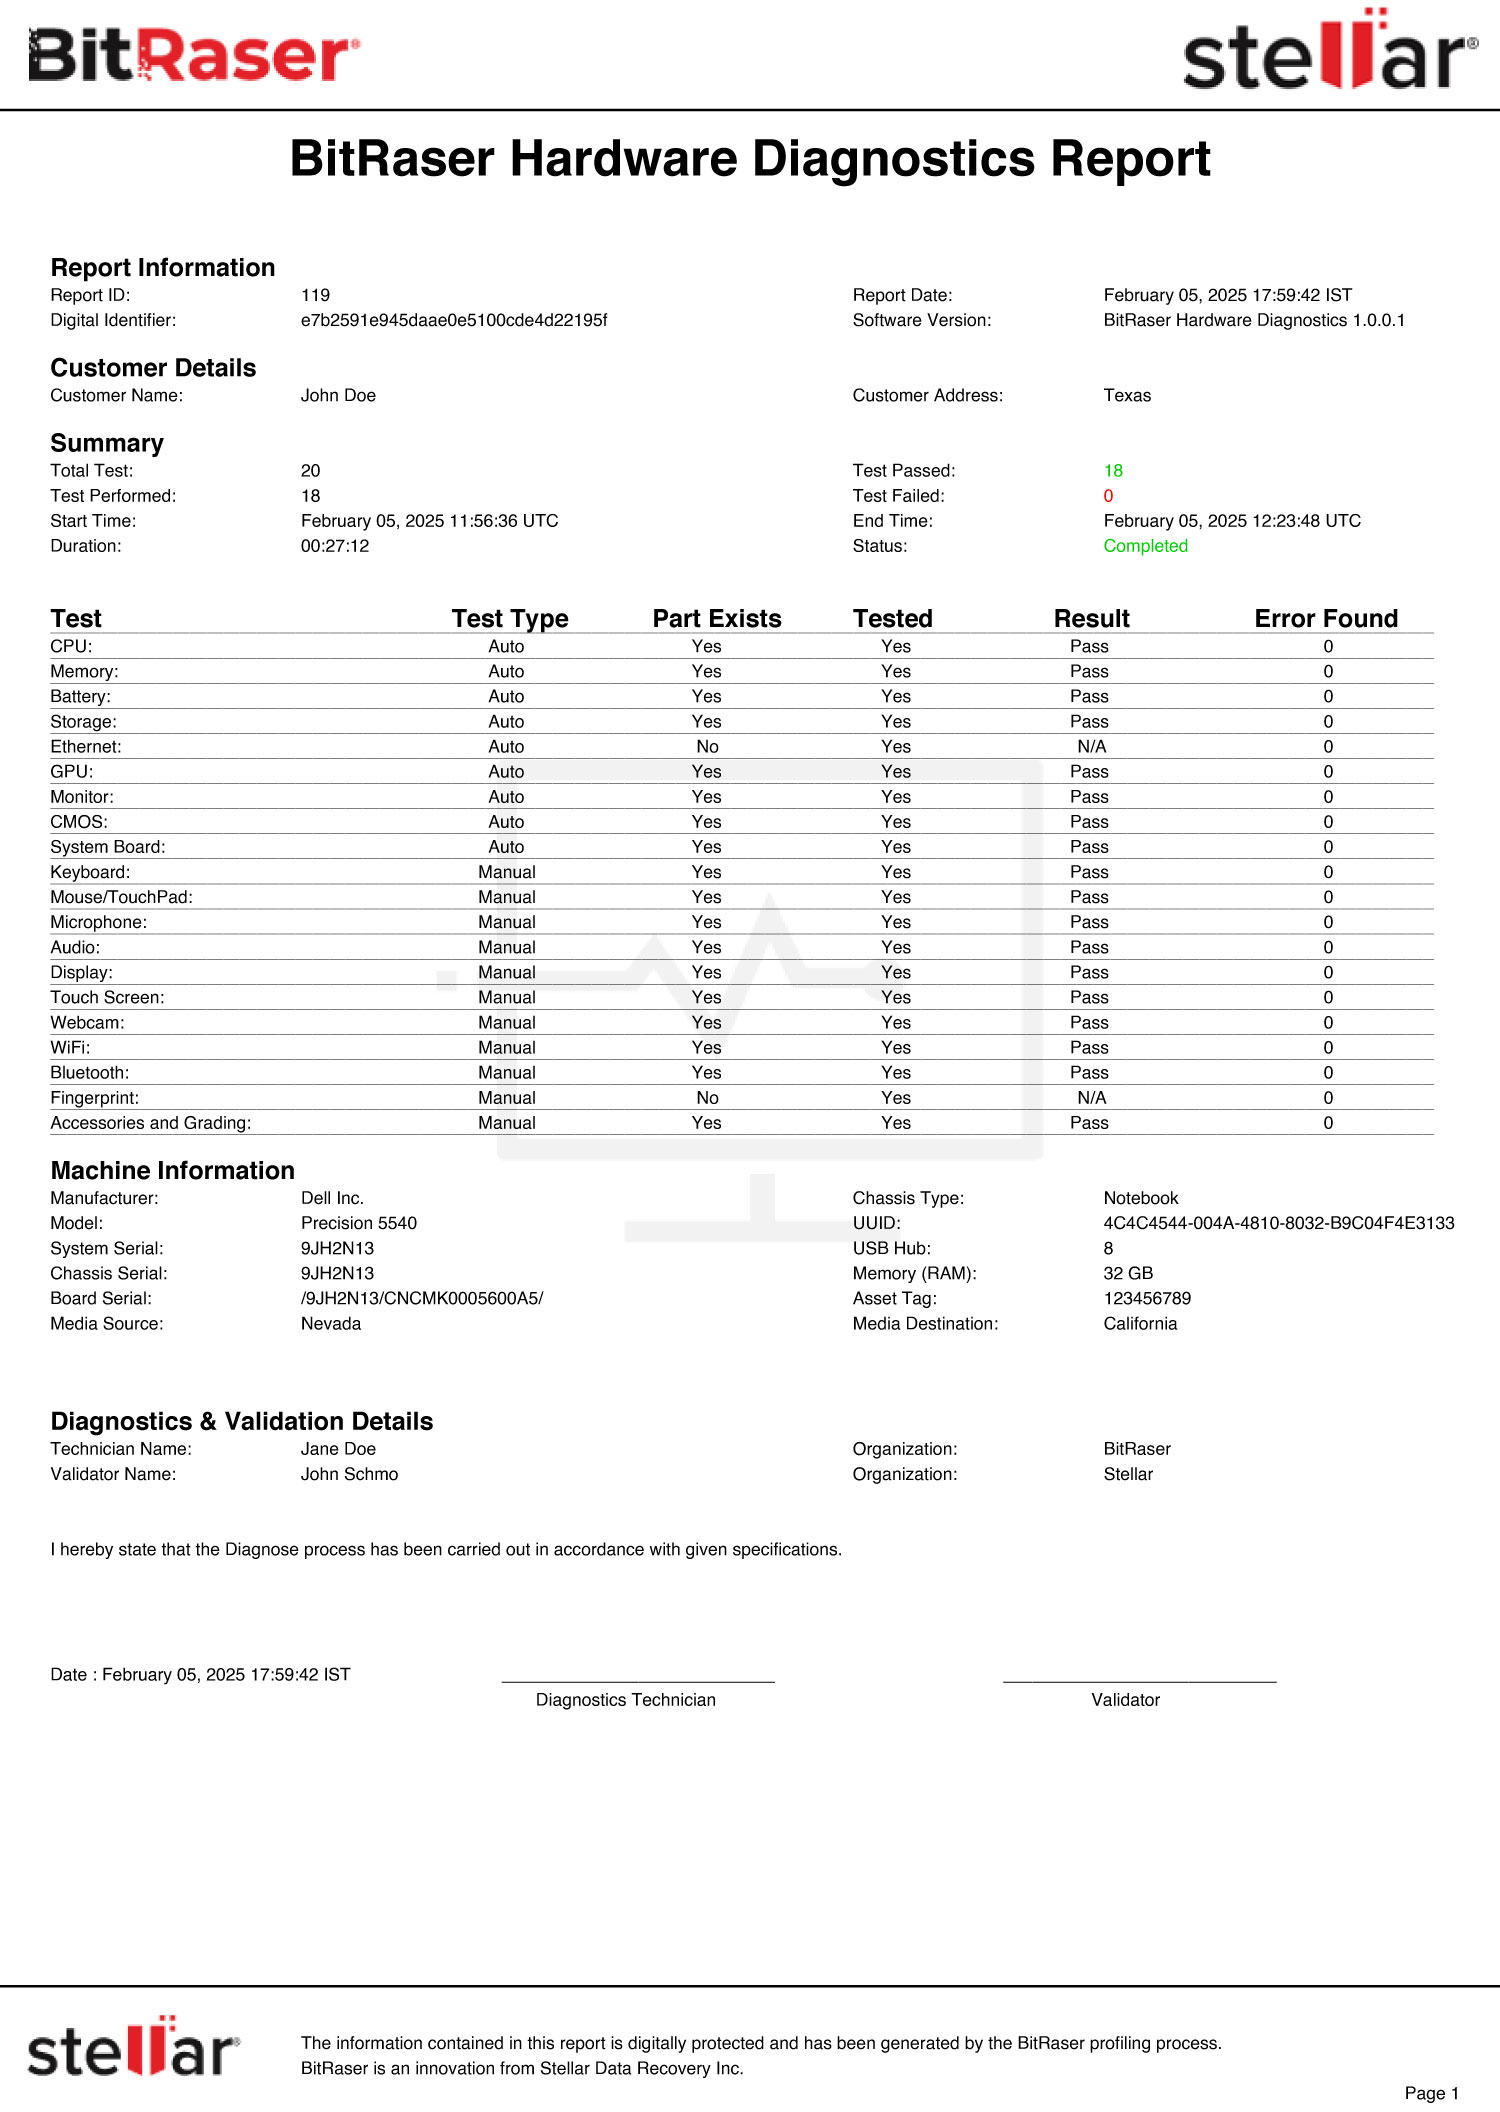
Congratulations, you have successfully diagnosed the MacBook. The diagnostic report has been uploaded to your cloud account.