This deployment guide will provide instructions to deploy BitRaser Hardware Diagnostics software. It allows you to accurately diagnose the functionality of various hardware components in PCs, and laptops like CMOS, battery, Wi-Fi, Bluetooth, storage, CPU, and memory.
BitRaser Hardware Diagnostics software can be deployed either via a bootable USB or via PXE boot. With PXE, the ISO file can be deployed directly on up to 255 devices simultaneously and does not require a bootable USB.
In this guide, we will be deploying the software using a bootable USB solution.
-
Step 1: Plug the bootable BitRaser USB into the device you want to diagnose and power it on. Go to the boot menu and select the BitRaser USB to boot the system. On Dell laptops, this is done using the F12 key, though the key may vary depending on the manufacturer. (Refer to Image 2)
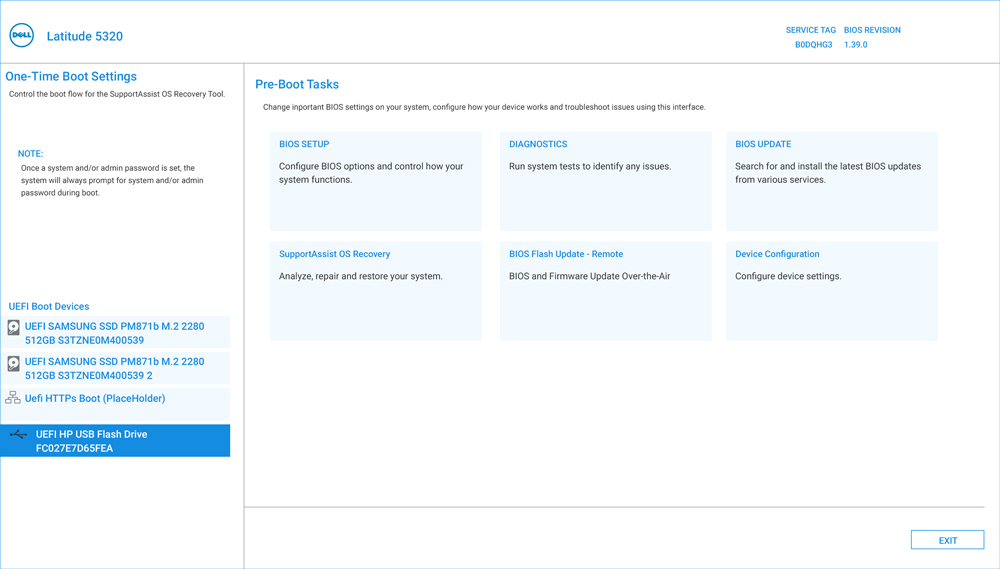
Image 2: Select BitRaser Hardware Diagnostics USB, then Press Enter
-
Step 2: Once the device boots with BitRaser, the software automatically starts checking the following hardware components without any manual intervention. (Refer to Image 3)
- CPU
- Memory
- Battery
- Storage
- Ethernet
- GPU
- Monitor
- CMOS
- System Board
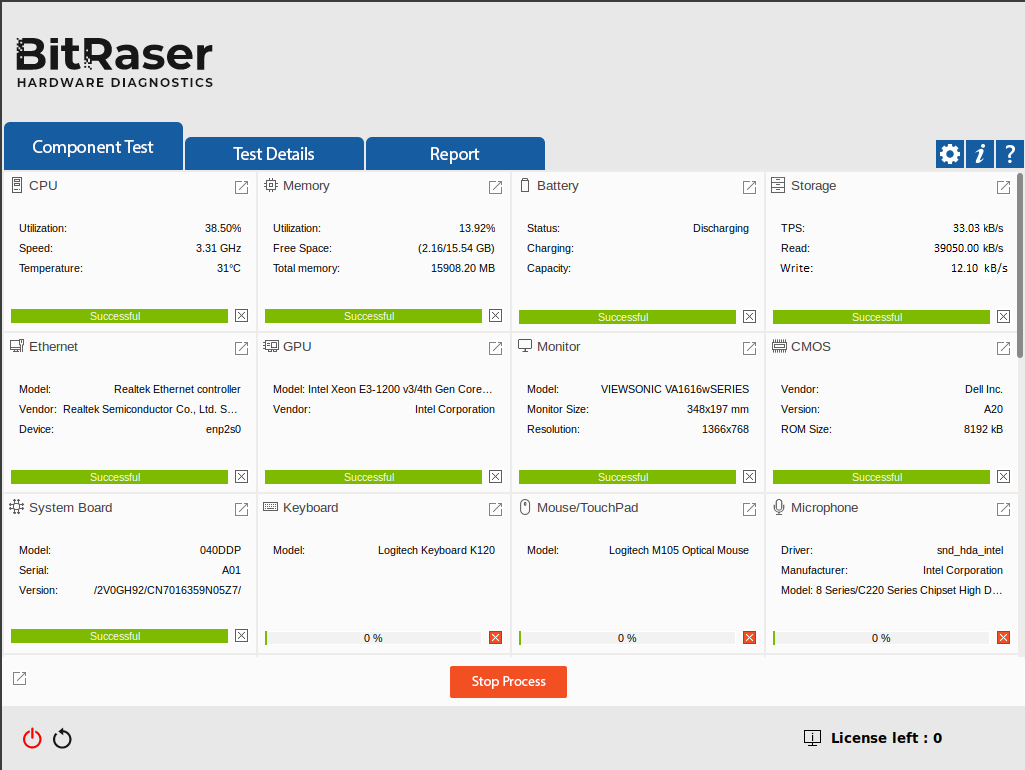
Image 3: Hardware Diagnostics Auto Tests Completed
Note: By clicking the ‘Redirect Icon’  placed on the right side of each test, you can see the details of the tests performed on that specific component. (Refer to Image 4)
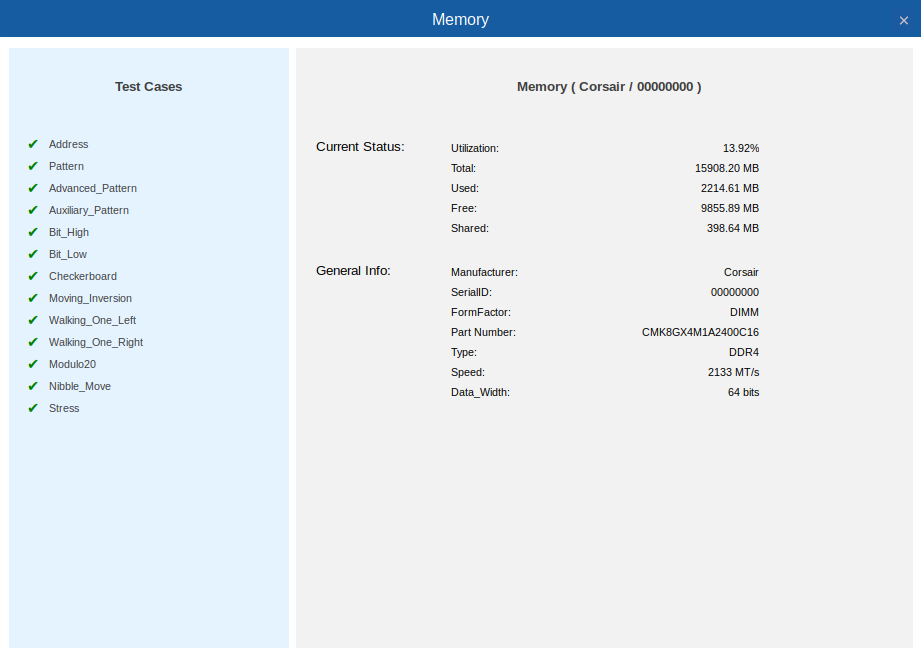
Image 4: Test Cases to Diagnose Memory
Once the Auto tests are complete, the software will begin the ‘Manual Tests.’
Note: You have the option to skip any manual test by pressing the ‘Skip’ button on the test screen, though it is not recommended.
-
Step 3: The first manual test is the ‘Keyboard Test’ which requires the user to press different keys on the keyboard and verify the result on the screen. After completing the test, click ‘Next’. (Refer to Images 5 & 6)
A pop-up window will prompt you with the message “Is the Keyboard working properly?” as per the result you may click on ‘Yes’ or ‘No’.
Note: After completing each manual test, there will be a confirmation window asking you to select ‘Yes’ or ‘No’ to verify whether the hardware component is working properly or not. You also have the option to redo the test by clicking on ‘Try Again’.
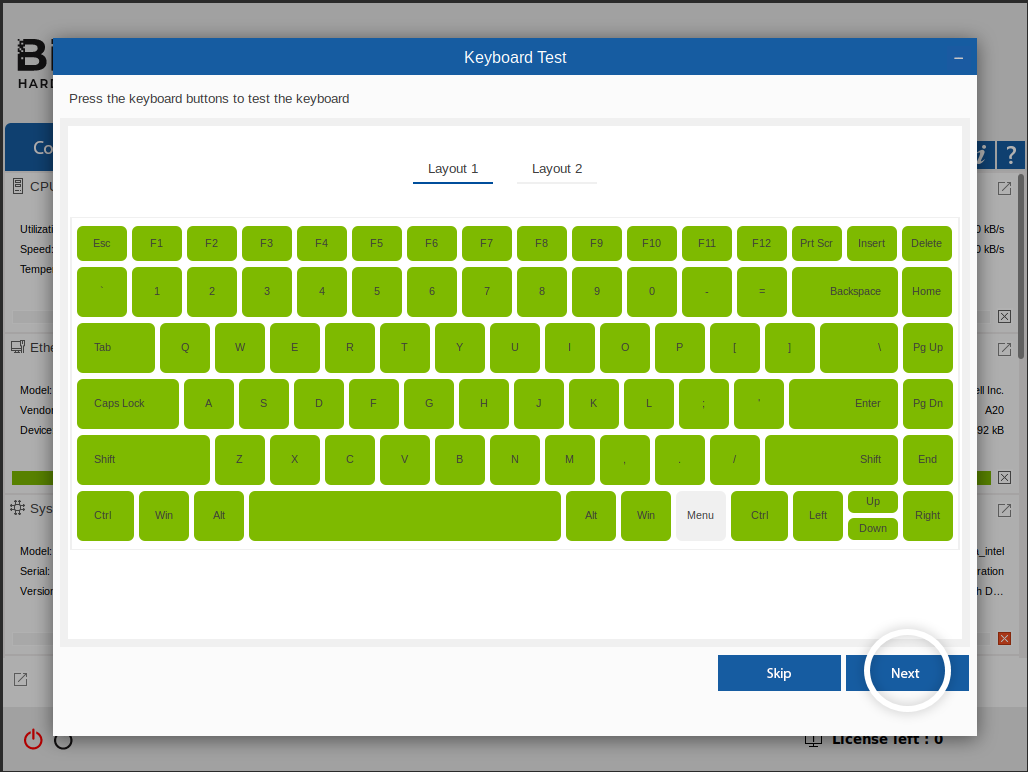
Image 5: Keyboard Test
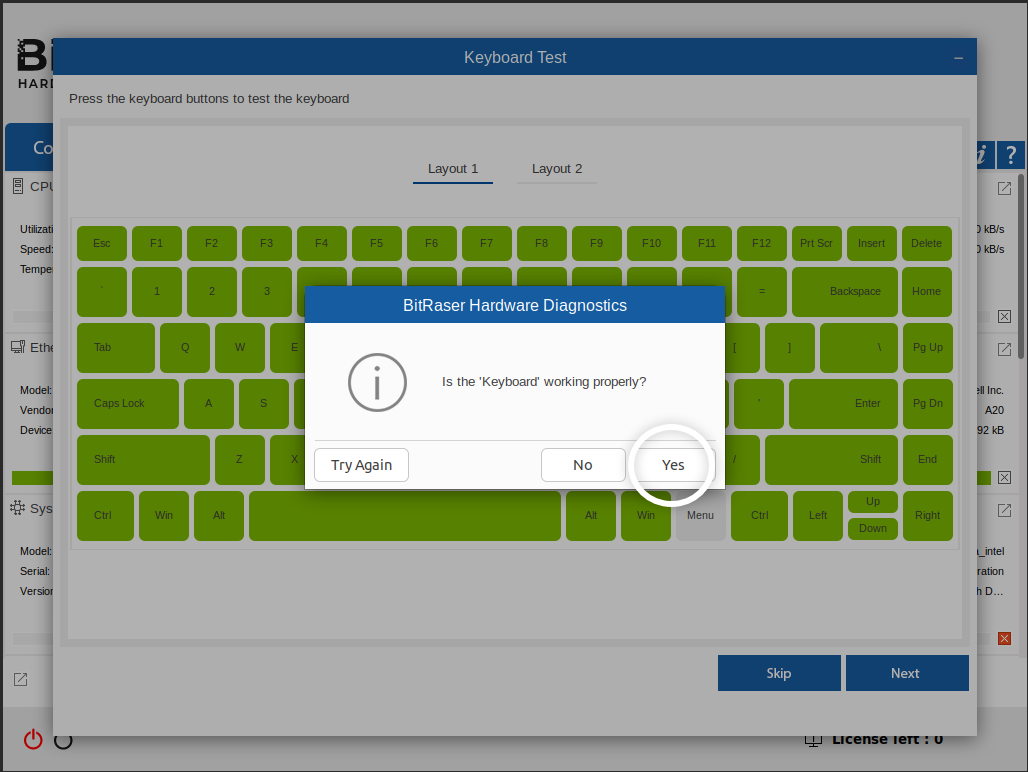
Image 6: Keyboard Test Confirmation
-
Step 4: The next manual test is for the Mouse/Touch Pad. Press the Right, and Left buttons and scroll wheel on the mouse and verify the result on screen, then click ‘Next.’ (Refer to Image 7)
In the next window, click ‘Yes’.
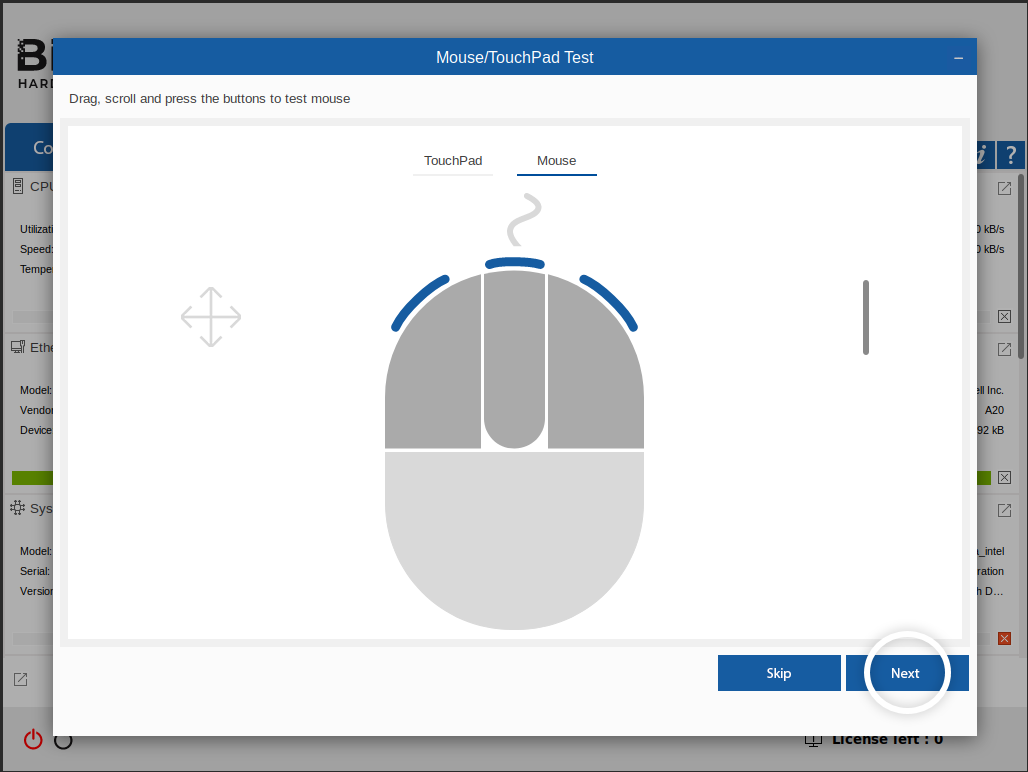
Image 7: Mouse/ Touch Pad Test
-
Step 5: The next test is to check the ‘Microphone’; click on ‘Record’ to start recording audio. (Refer to Image 8)
Press ‘Play’ to hear the recorded audio, then click ‘Next’. (Refer to Image 9)
In the confirmation windows, press ‘Yes.’
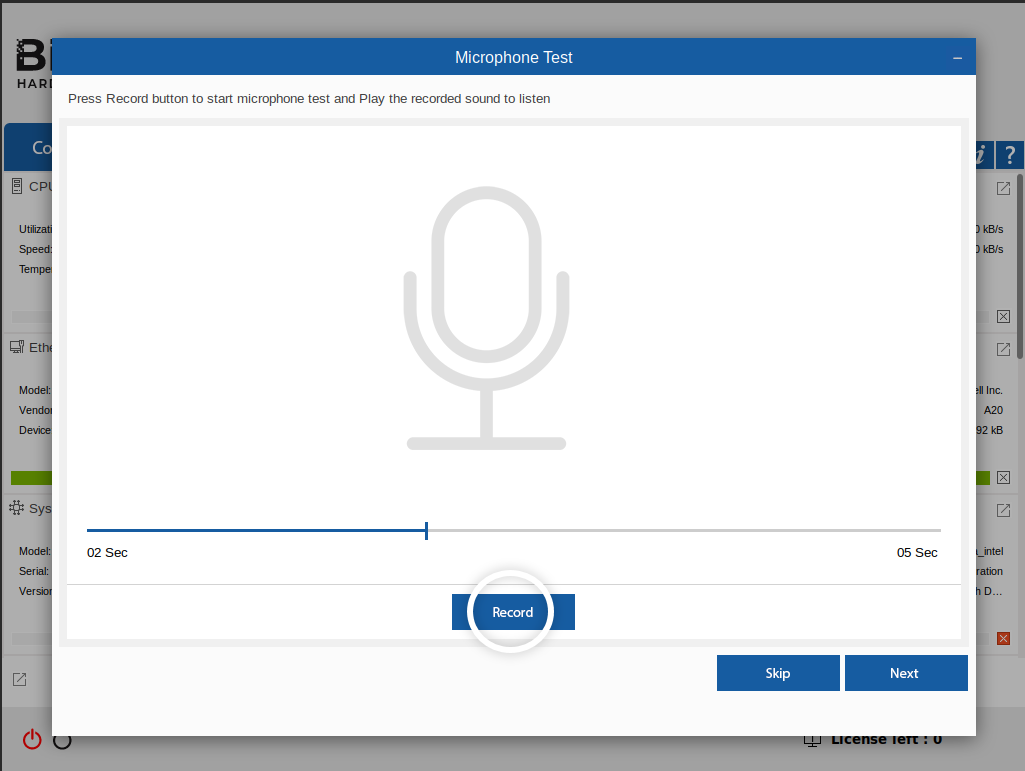
Image 8: Microphone Test
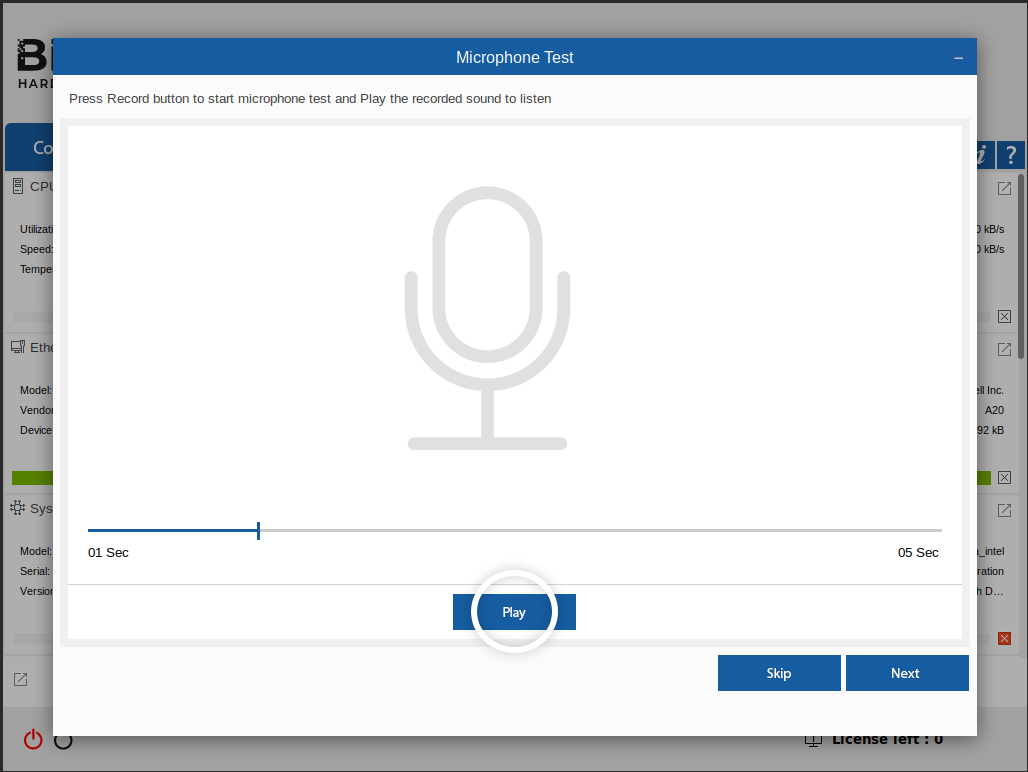
Image 9: Microphone Test Audio Playback
-
Step 6: Next, the software will run an ‘Audio Test’ to check the device’s audio output. You can test both the MIDI and Surround Sound output by clicking on each button individually.
Click on ‘Next‘ to continue. (Refer to Image 10)
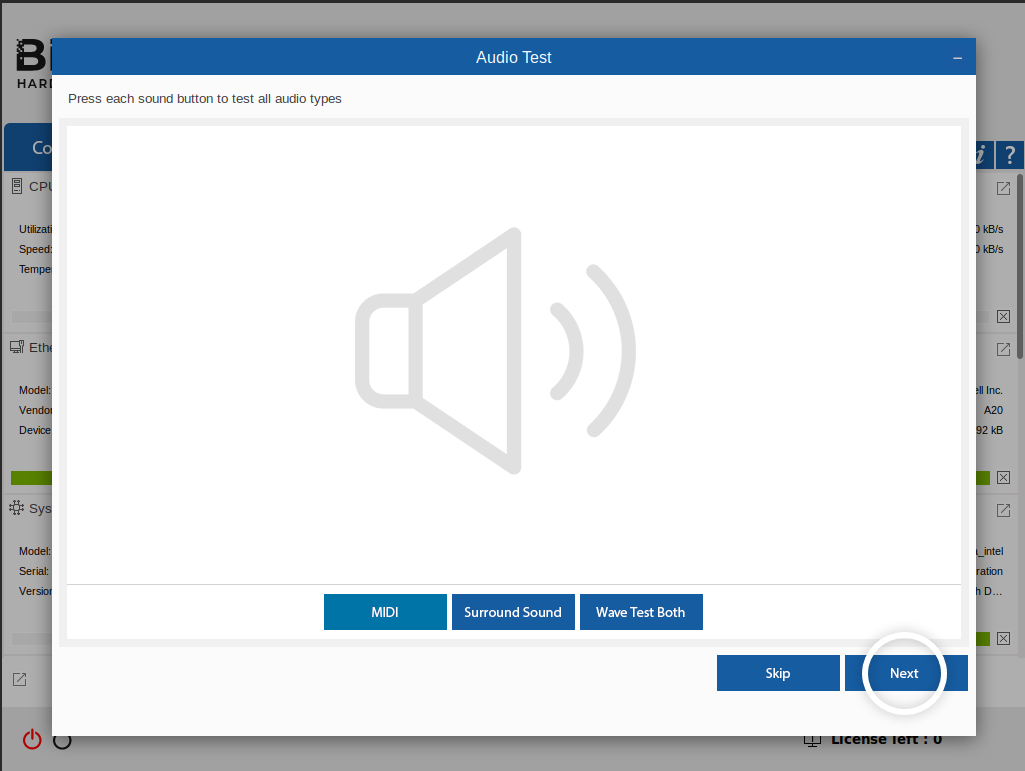
Image 10: Audio Test
-
Step 7: Next is the ‘Display’ test, which checks how the monitor displays different colors such as red, blue, green, etc. (Refer to Image 11)
Once you click on ‘Start,’ the screen will display a series of different colors one by one. Click ‘Yes’ if the display is working properly.
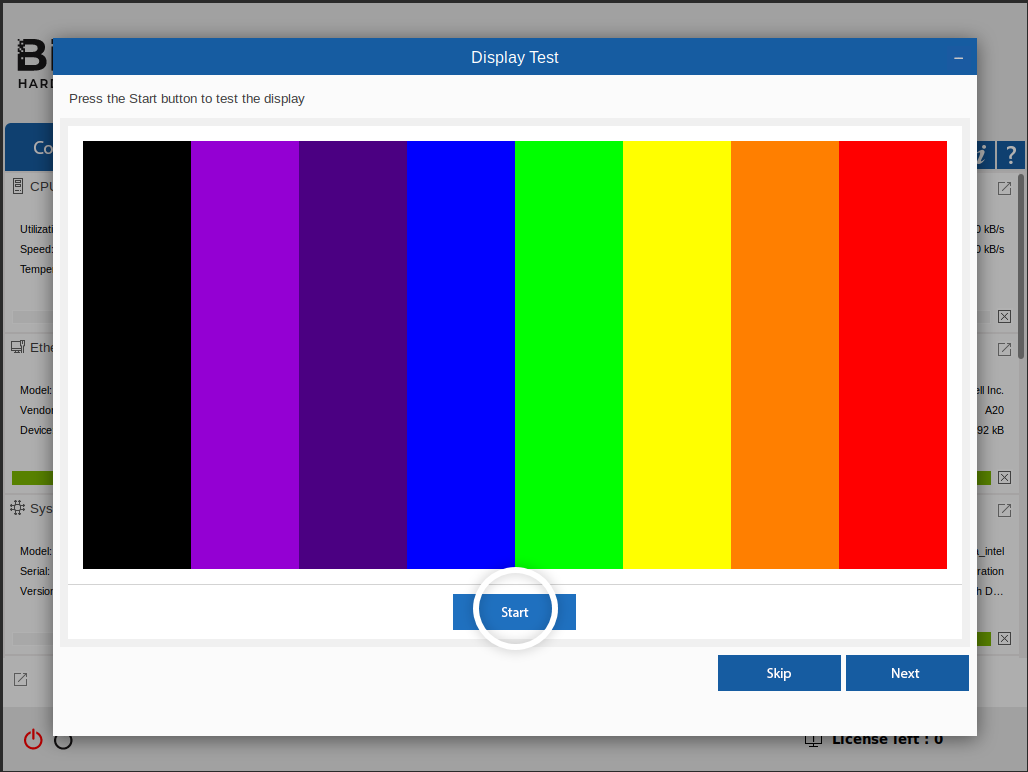
Image 11: Display Test
-
Step 8: BitRaser will now test the device’s webcam (if supported). Click on ‘Start’ to record a short video, and then play it back to check the recording quality. (Refer to Image 12)

Image 12: Webcam Test
-
Step 9: In the next test, the software checks the ‘Wi-Fi’ signal. It will display all available Wi-Fi connections on the screen. You can verify the result, and then click ‘Next.’ (Refer to Image 13)
In the test result prompt window, click ‘Yes’ to continue with the manual tests.
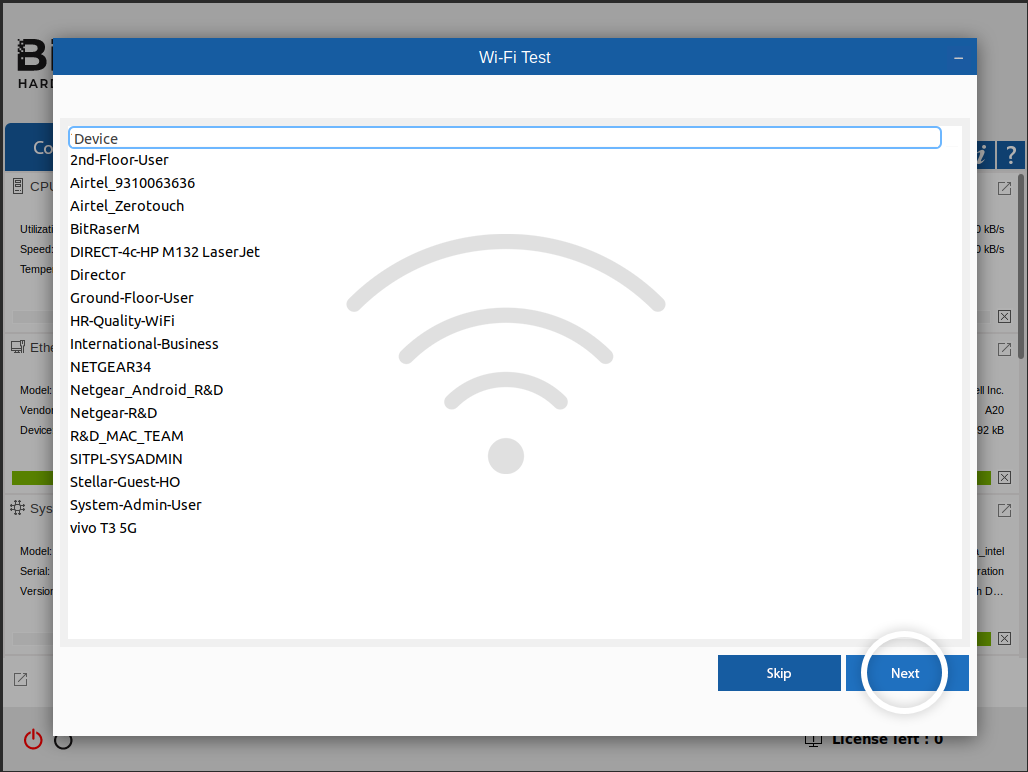
Image 13: Wi-Fi Test
-
Step 10: The next manual test is for the ‘Bluetooth.‘ Click on ‘Scan,’ and the software will list all nearby active Bluetooth connections, verify the result, and then click on ‘Next.’ (Refer to Image 14)
In the confirmation window, click on ‘Yes.’
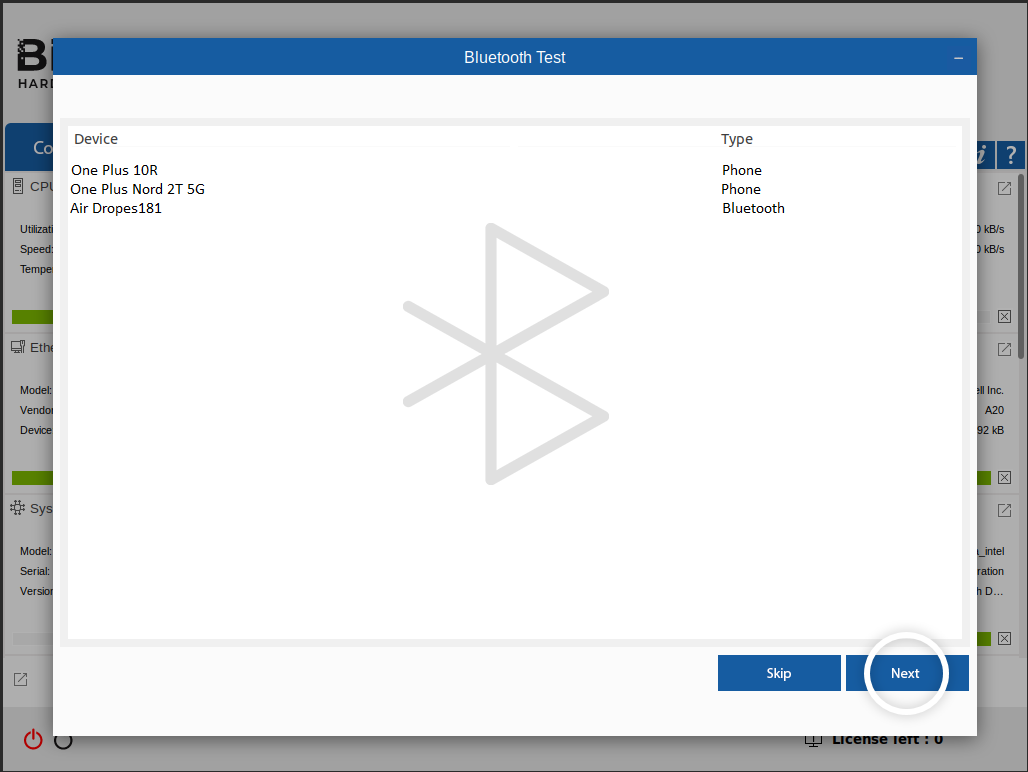
Image 14: Bluetooth Test
-
Step 11: The next screen will prompt you to verify the accessories that came with the device, like the ‘Charger’ and ‘Original Packaging.’ You also have the option to grade the device based on its display and body condition and assign an overall rating. (Refer to Image 15)
After clicking ‘Next,’ a pop-up will come, informing you that the diagnostic tests have been completed. Click ‘OK.’ (Refer to Image 16)
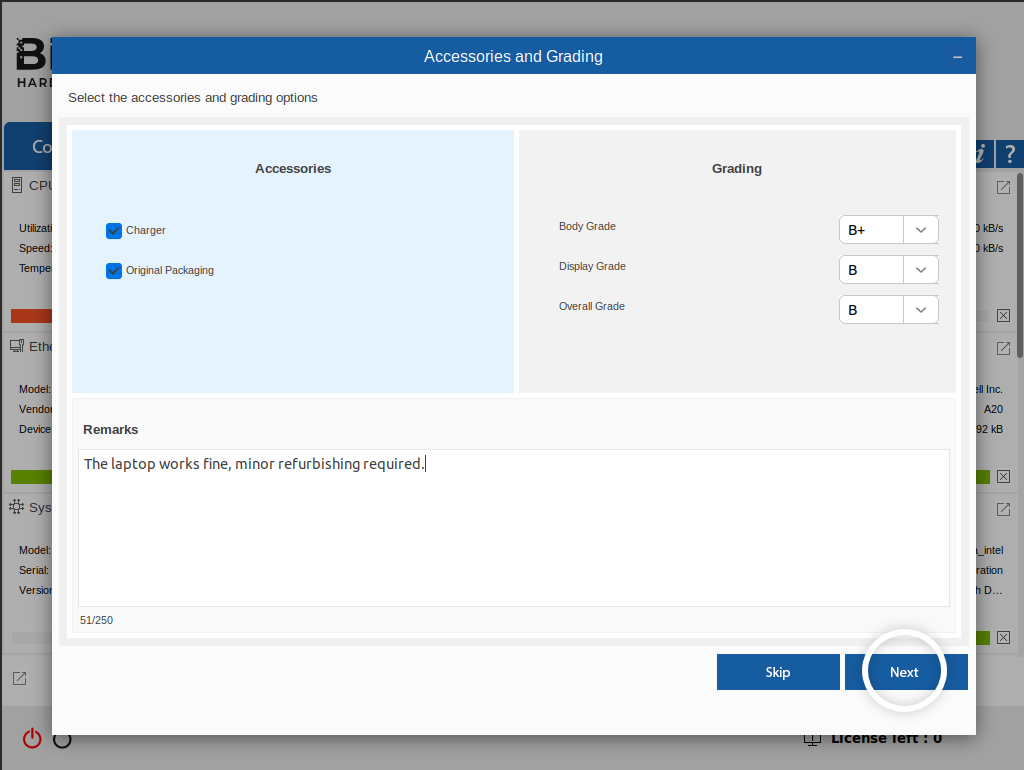
Image 15: Accessories & Grading Screen
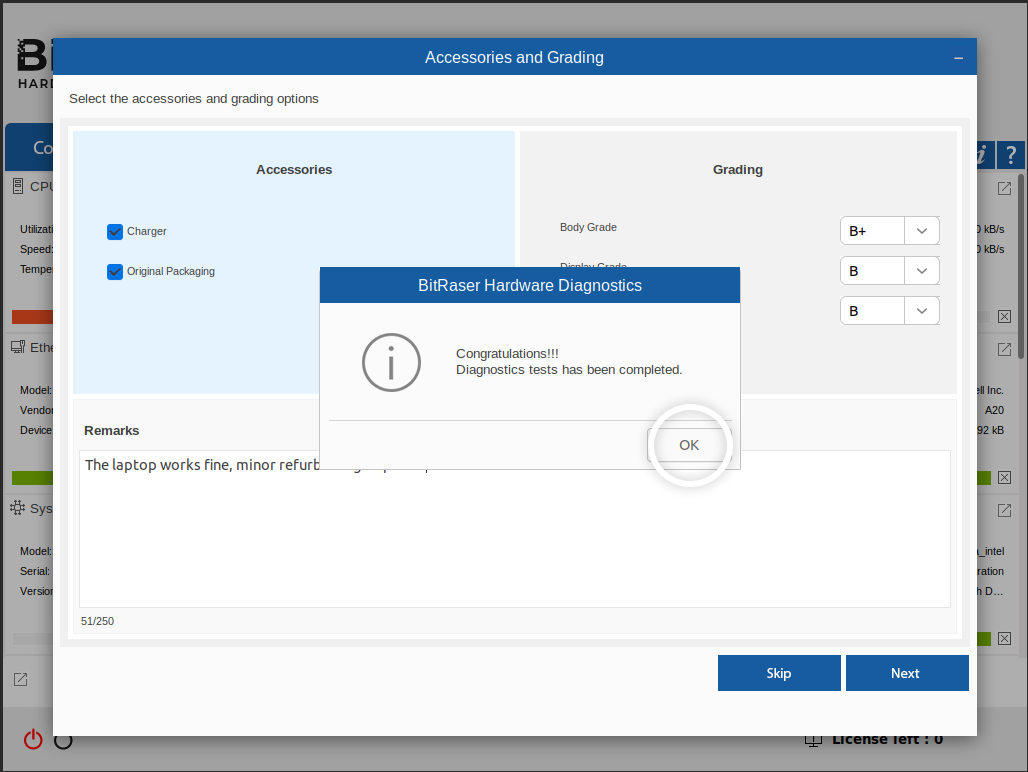
Image 16: Hardware Diagnostics Completed
-
Step 12: BitRaser Hardware Diagnostics settings will open up automatically, prompting you to connect the device to the internet. Enter your ‘Ethernet’ or ‘Wireless’ details and click on connect. (Refer to Image 17)
Internet connectivity is required to connect the application with BitRaser Cloud Console. This allows automatic uploading of diagnostic reports on the centralized BitRaser server.
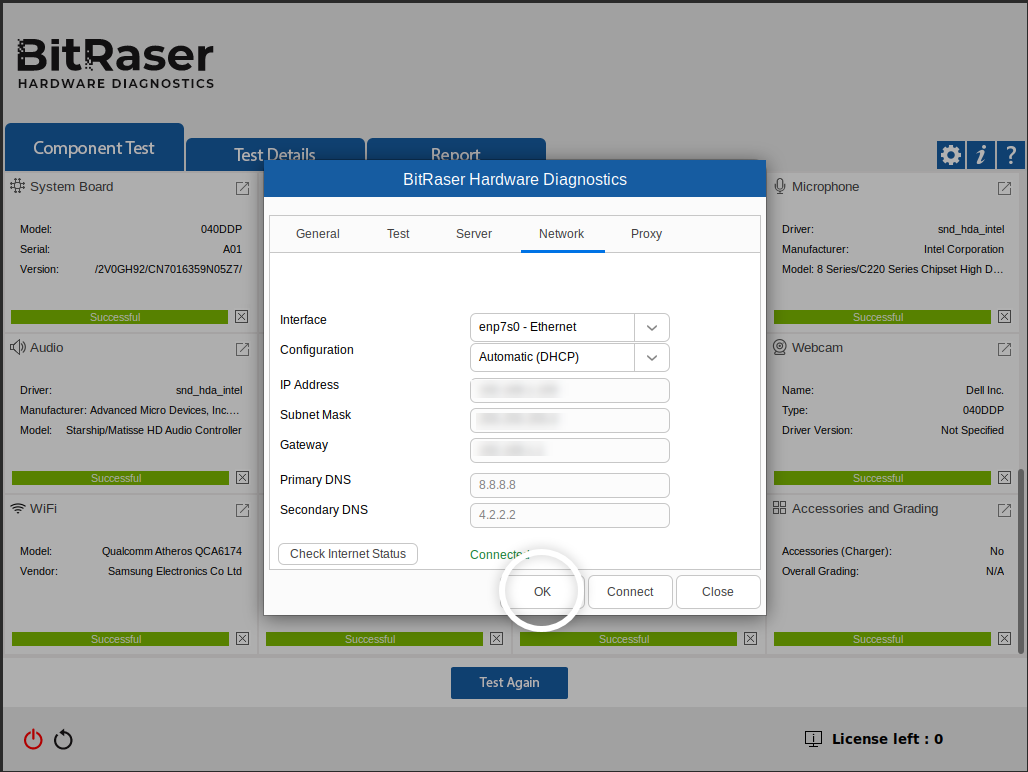
Image 17: Connect to the Internet
-
Step 13: Now, connect the application with your secure BitRaser Cloud account by entering the login credentials received via E-mail post-purchase. (Refer to Image 18)
The diagnostics report will be uploaded to the BitRaser server, which can be accessed 24/7 from any internet-connected location.
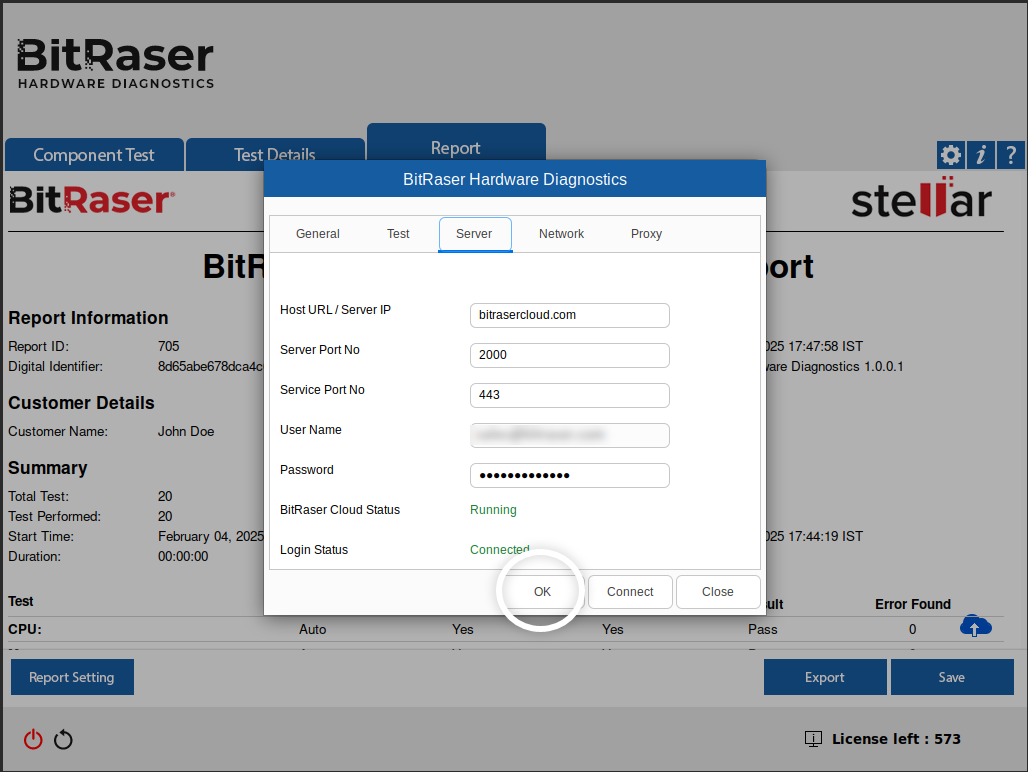
Image 18: Connect Application to BitRaser Server
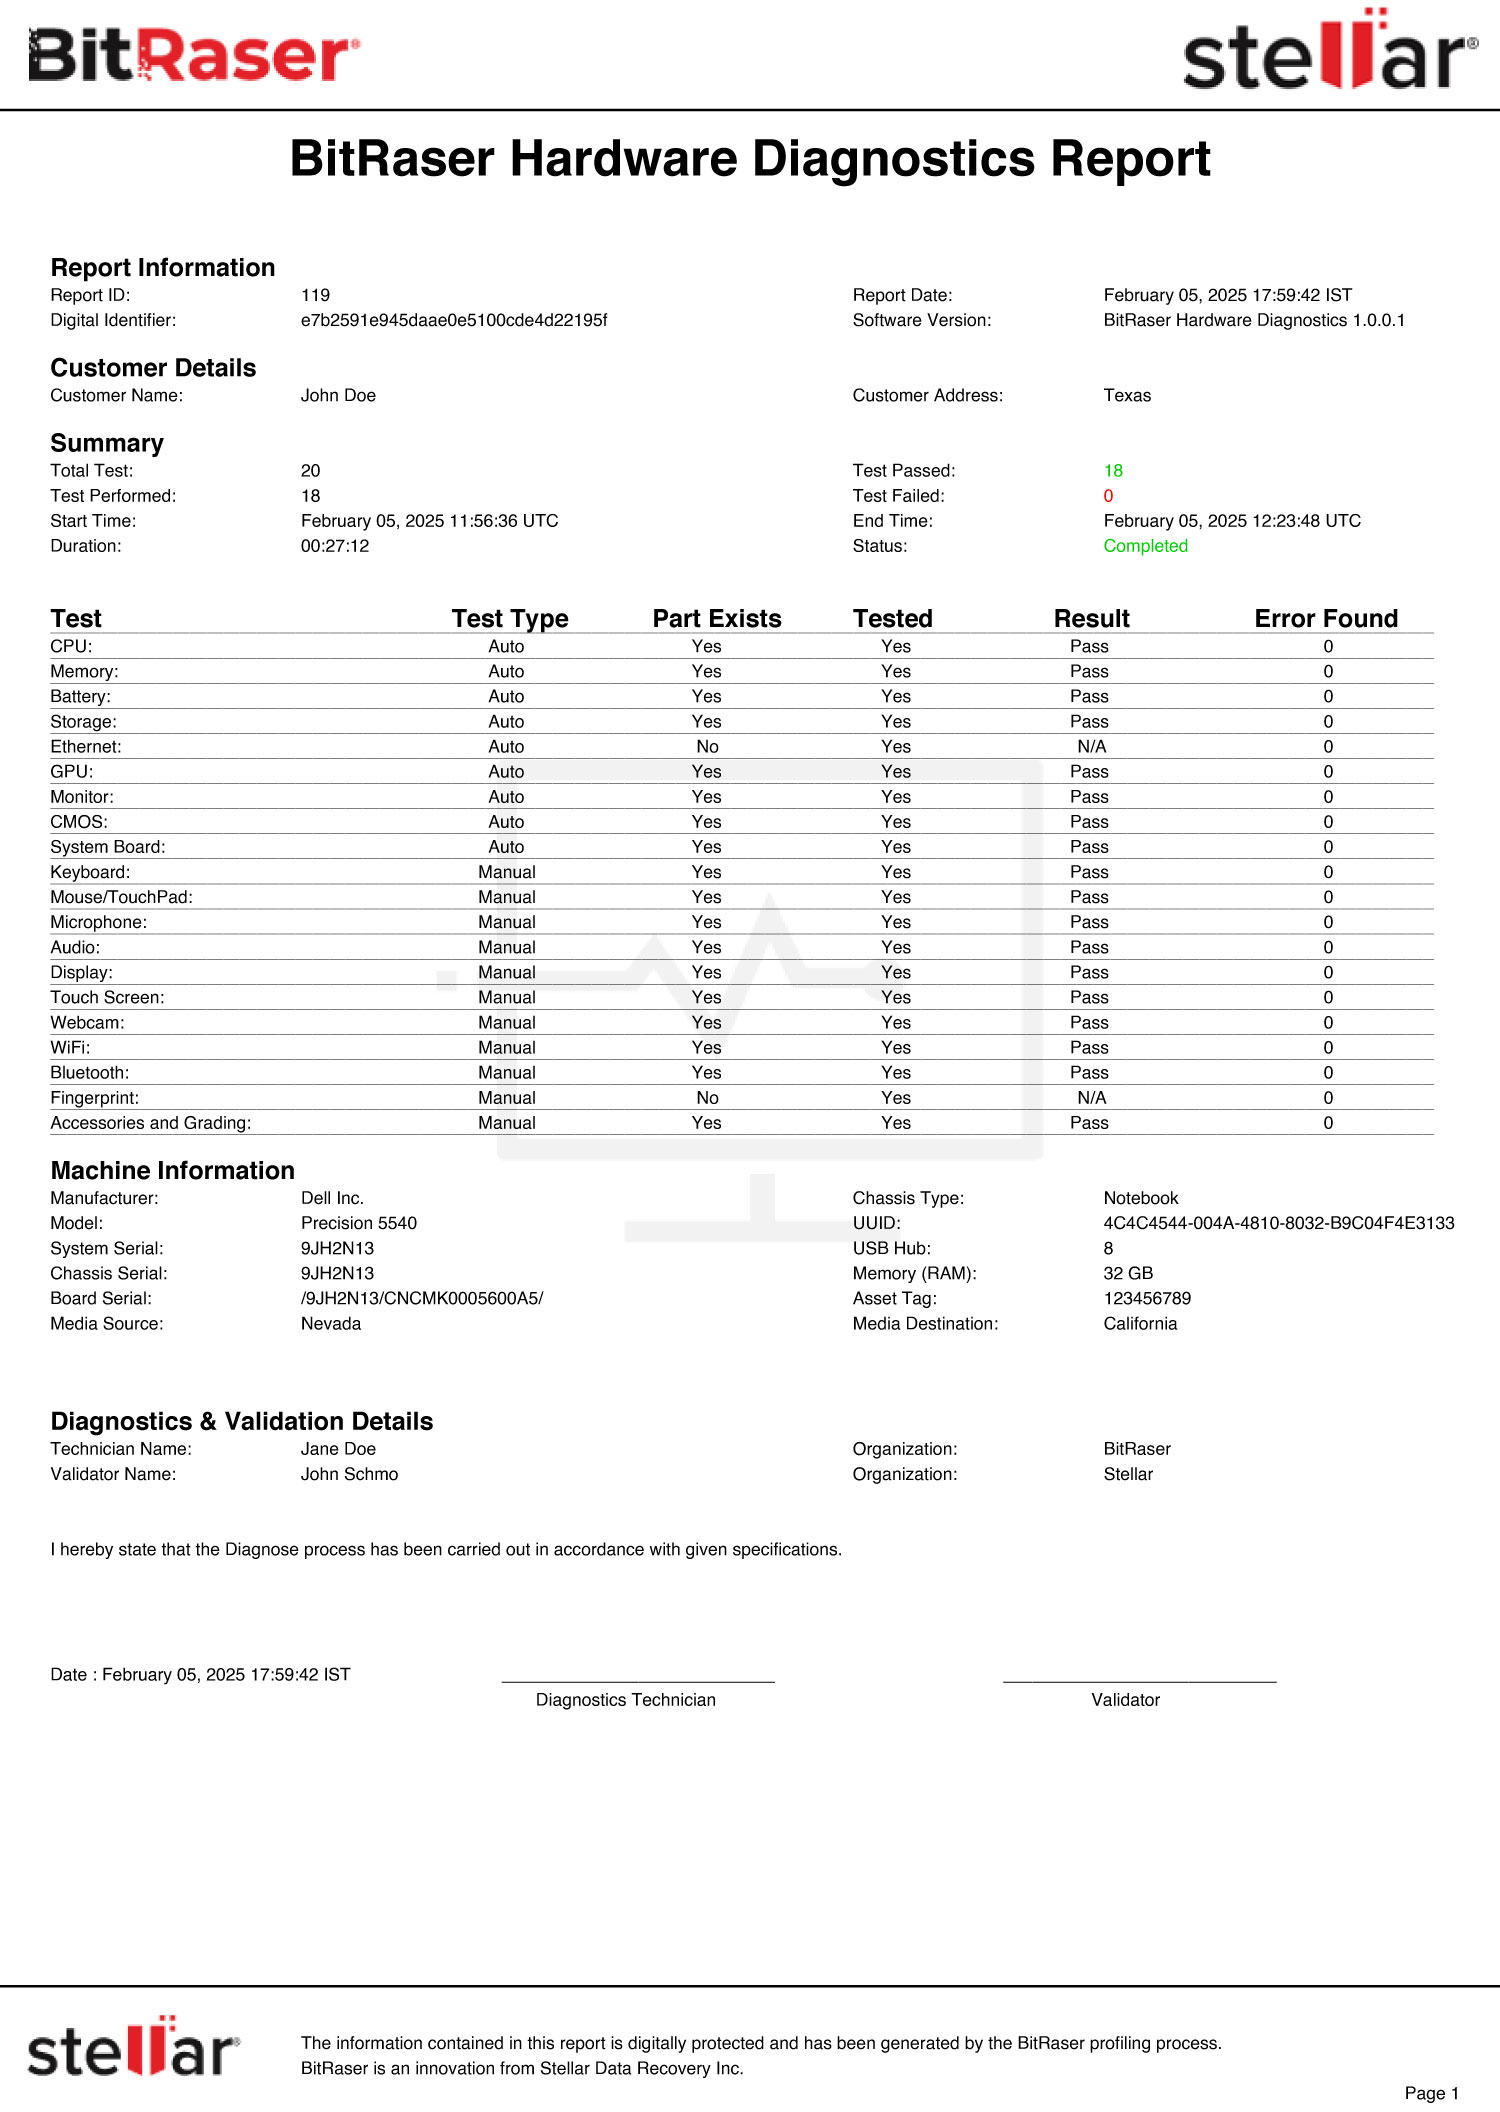
You have successfully tested all components of a laptop. The detailed diagnostic report has been saved in your BitRaser Cloud Console account. You can also see the detailed diagnostics report below. (Refer to Diagnostic Report)